Tamiya 1 35 Sd.Kfz.173 Jagdpanther Late

Post Reply
User avatar
WirbelwindModelling
Corporal
Corporal
Posts: 91
Joined: Sun Mar 30, 2014 5:16 pm
Location: Suffolk, UK

Tamiya 1 35 Sd.Kfz.173 Jagdpanther Late

Post by WirbelwindModelling »

Hey all

Sorry i'm late but Exams, :wall: all 21 of them :violin: , kind of got in the way of building. However now this build has my undivided attention so i thought i'd get the thread started...

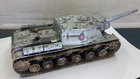
Well i'm building Tamiyas 1 35 Late Jagdpanther, which i think a few others are building including Lee :bow::the main focus of my build will be making a kit work out of the box, this does not necessarily mean lots of scratch-building more just working with what you have. I plan to build a dio to go with it but we will see how it develops...

Anyway it's history time, i promise i'll keep it brief ;)

The Germans had a reliable and capable chassis in the Panther and they had a big old Pak 43 88mm L/71 this gun wouldn't fit on the Panthers turret so as they had done with the Stug and The Pz38 (t) they plonked a superstructure on it and turned it TD to fit the gun they wanted. The new tank the Jagdpanther had the impressive King Tigers gun and the nippy Panther chassis and was and still is in many peoples eyes (including my own) the best Tank Destroyer design of the war.
The tank as mentioned was a good mover capable of speeds of 46 kph or 28.6 mph for all us Brits this was due to the powerful Maybach HL230 P30 engine which gave at a very good power to wieght ratio.
The gun had very impressive stats to the APCBC-HE had 202mm of pen close up and up to 132mm at 2000 metres very capable of blasting through T 34s and Shermans at most ranges. The APCR rounds which had a slightly faster muzzle velocity (1130 versus 1000 m/s) good pen 238mm of armour at 100 metres and 153 at 2000 metres. These values made the gun capable of slicing through the armour at standard combat ranges of even the toughest of targets such as the IS series, only the mantlet of the ISU 152 gave it any trouble at close range. It also had a ball mounted MG 34 at the front for infantry protection.
The armour was not what the tank was famous for as it usually, like most TDs, relied on not being spotted. 80mm at the front and 50 at the sides and 40 at the rear, the mantlet was 100mm thick. However the sloping on the front glacis gave the armour a good chance of bouncing some shots.
The tank weighed in at a bulky 45.5 tonnes which makes it's maneuverability even more impressive.
It had a crew of 5 men: Driver, Radio operator (Who operated the machine gun too), Loader, Gunner and Commander.
There were to versions the G1 (1944) and the G2 (1945) (That's the one i'm building). The G1 had a small internally bolted mantlet and the G2 had a bigger externally bolted mantlet (this is the easiest way to tell the difference betwwen the two). The later G2s had the crew cooling fan seen on the late Panthers and a two piece gun barrel which allowed for easier barrel replacement. Some early G1s were given square "Waffle" zimmerit.
415 Jagdpanthers were produced until the end of the war by MIAG, MNH and MBA companies.
All in all the Jagdpanther was a very successful machine it just was to little to late and i believe that if this and the Panther had been the main effort of the german workforce and factories rather than Hitlers fantasy projects the war could have gone on a lot longer and this tank would have the potential to compete with post war designs like the IS 3 and T 54s of the USSR and the Pershings, Pattons and Comets of the Western Allies.

Phew... and i wrote that myself :ooops: and it's not really that brief... oh well :whistle:

Now the Kit:

Image

It's a fairly new kit for Tamiya first released in 1993 and i think it holds it's own in terms of detail, there are a few very nice bits and a few that could be better.

The contents:
Image

Upper Hull:
Image

Lower Hull Tub:
Image

A Spure: Wheels, Wheels and guess what more wheels you get 2 of these nice detail though shame about sink marks on the torsion bars and the mould lines on the tires, nothing a file and some filer can't fix.
Image

B Sprue: Spare Track links, rather good actually i wonder why they can't give these for the track runs rather than the dreaded Tamiya Vinyls, but we'll get to that later...
Image

C Sprue: I think it's a generic Late Panther sprue as it has a Late Panther Mantlet on it some nice details which i'll talk about later
Image

D Sprue: The Jagdpanther specific sprue some good detail and nice moulding (Like on all the sprues but that's just Tamiya for you)
Image

Tracks: nuuuuuu not vinyl :violin: :violin: i'll get to them soon...
Image

Poly-Caps: Not really much to say about them... :scratch::
Image

Copper Wire: Nice thin gauge, fairly flexible and very safely packed. Not that i really need it I've got plenty of used Guitar strings i usually use for such jobs.
Image

Decals: Are we going to get Terrific Tamiya Transfers or Terrible Tamiya Transfers, lets wait and see...
Image

All right that's an overview lets get into the nitty-gritty of the model:

Some nice upper hull detail with some good weld marks will look very good when picked out with a pin wash:
Image

Fairly nice wheels good bolt detail only other thing i really can say is well... they look...round:
Image

Nice dip in the exhaust which gives somewhere to start on drilling, not sure if i use that on yet though:
Image

Also Cast detail on a Tamiya Kit, and not in an obvious place AND it looks very nice :eeek: :eeek:
Image

More very good cast texture on the gun mantlet i might spice it up a bit with some cement and a tooth brush:
Image

And some more:
Image

The Figure looks pretty sharp well moulded and detailed not a particularly interesting pose though. I'll probably use it. The face is also actually pretty good:
Image

Image

Image

A spare Panther G Mantlet, nice, one for the spare box useful for later builds or dios (Maybe a Panther Factory dio... :scratch:: ) :
Image

More Cast detail yay yay :dance: :dance:
Image

And some more!!!! (I promise I don't have a cast texture fetish :oops: :oops: ) sorry about the quality on this pic:
Image

These spare track links are rather good no moulding blemishes and a nice texture on them i really wonder why Tamiya didn't provide enough sprues of these to be used as link-and-link they are very nice *sigh* :(
Image

Image

Here come the vinyls... Dun Dun Daaaaaaa the detail isn't bad on both sides i suppose but as i said before please Tamiya put your link-and-lengths in your kits. I am worried about the attachments they look quite flimsy:
Image

Image

Some nasty marks to the left on the pictures below:

Image

Image


A few More Problems I noted:
-No Grills for the enigine deck, not even any mossy net stuff :doh:
-Shurzen to thick and one peice, nothing a beer can can't sort out
-No movable suspension, but i suppose that's asking for a bit much
-No PE, well that's Tamiya for you can't really complain :roll:
-The Tow Cable, plastic and the instructions want you to heat it to bend, brass would have been a better option
-Two piece barrel, uurrrgghhh :roll:
-Oh and Staples on the bags, :wall: :wall: :wall: Tamiya glue g - l - u - e (Sound a bit like Coen :nena: )

Now some of the small little "un-sung" good things with the kit:
-No radio control slots, Tamiya you finally learned :clap: :clap: :thumb1: :cheers2:
-The Cast Texture, rivaling some of the stuff i've seen on Dragon kits :o
-The clear instructions, good call outs on which parts are for which version, classic Tamiya something Dragon could really take a leaf out of their book on. By the way i'll show you the instructions as i progress through the build... that is if i remember... :scratch::

***At this point i must mention that on this build i will not be looking at Historical accuracy in the kit as much as i usually do. However i will try to keep the paint job and markings accurate***

In Conclusion a good little kit from Tamiya :clap: :clap: and i look forward to getting started.

Bye for now :hi:

Rufus
On the small desk in the corner of my room:

Zvezda 1/72 IS-2

And i have YouTube now: https://www.youtube.com/channel/UClMVSN ... LouPy4IM_Q
User avatar
NAMBiohazard
Master Sergeant
Master Sergeant
Posts: 474
Joined: Fri Jun 21, 2013 3:21 pm
Location: Windhoek, Namibia

Re: Tamiya 1 35 Sd.Kfz.173 Jagdpanther Late

Post by NAMBiohazard »

welcome
wow..... that texturing really looks good
good luck on your build :thumb2:
Keep the glue on the Sprue

Bjorn
User avatar
PaulAyrey
Sergeant Major of the Army
Posts: 1141
Joined: Tue Feb 04, 2014 5:24 pm
Location: Worthing, West Sussex, UK
Contact:

Re: Tamiya 1 35 Sd.Kfz.173 Jagdpanther Late

Post by PaulAyrey »

Welcome to the SIG, look forward to seeing your progress.
User avatar
mannloon
Command Sergeant Major
Posts: 985
Joined: Thu Apr 17, 2014 10:57 pm
Location: Madison, WI USA
Contact:

Re: Tamiya 1 35 Sd.Kfz.173 Jagdpanther Late

Post by mannloon »

Lee and i are also both doing this kit. I foolishly chose to heavily modify the kit to a G2, but it is pretty solid. I have a dragon Panther i've been raiding for spares, and most of the detail missing from the Tamiya kit is on the Dragon kit. Really drives that home comparing them.

But what's there is good enough and a fast and easy build.

Have fun, i look forward to seeing it.
On the bench:
Cyber-Hobby T-34 Under New Management
Cyber-Hobby Tiger I Kursk
Rye Field Tiger I w/ Interior
Academy T-34 with bed spring armor
User avatar
WirbelwindModelling
Corporal
Corporal
Posts: 91
Joined: Sun Mar 30, 2014 5:16 pm
Location: Suffolk, UK

Re: Tamiya 1 35 Sd.Kfz.173 Jagdpanther Late

Post by WirbelwindModelling »

Thanks guys!!! :cheers2: Sorry i'm a bit late in replying (This build seems to be developing a late theme...) been a wee bit busy anyway here goes again.

So the first thing i did was come up with a concept, i want to build a late G2 and while brainstorming ideas i came up with one that stuck: While looking at reference pics and taking apart the inaccuracies of the Tamiya kit regarding a late G2 i thought it would be a cool idea to make a "Panzer 46" Jagdpanther. What this will encompass is late features but the tank will be a "hybrid" to resolve the problem of a lack of all the proper late vehicle features. i will build it as though a German factory has built a jagdpanther out of spare and old parts. I had a few ideas such as adding a anti air roof plating like those seen on late panthers:

Image
This is not my work and it is a picture from alliance models site the maker of this upgrade set

This of course will be made out of the trusty beer can. It also makes up for one of the glaring problems with the kit which is of course the lack of engine grills but i will get into more detail on that at a later date.

Apart from that i don't really have any more specific ideas for the build but i just thought i would highlight how important it is to know how you want to build your kit and have a plan.

Onto the build....

Now for this thread as most of you are capable armour builders i am not going to go into to much detail but instead work on a "tips" based scheme where anything i think is a useful idea will be highlighted and explained.

Tip 1 Cleaning up double road wheels

Now on the panther the inner set of road wheels is made up of two wheels put together, Tamiya provide them as two separate wheels so to save time and your sanity put both wheels together and file the attachment points of together and viola two for the price of one.

Image


Tip 2 Assembling sprockets

Most sprocket wheels in kits are provided in two separate halves and lots of kits i have built you put the sprocket together and the... not really sure what to call them... ya know the pointy out bits... that turn the track....well they are not lined up so when you come to track up it bends your vinyls or makes it hard to apply link and lengths.
So ,although this is not usually a problem with Tamiya kits, what i do is assemble the sprocket wheel and then run it over a track length to make sure it is lined up so it fits

Image


Tip 3 Make those road wheel look used

After a few hours of filing you've removed the attachment points from all of your road wheels and it's lovely and smooth. Now look at tires in real life they maintain a far bit of wear and tear and lot of "graining".

For example:

Image

You can see on that F1 tire where the rubber has been worn away now imagine the effect of been scraped across rough metal tracks on rubber, here's how i create that effect:

Step 1) With course sanding sponge rub in the direction of the tire holding the tire still and moving the file around it to create basic graining with the direction of tire movement

Step 2) Now comes the hard and boring bit get a metal needle file and scrape along the outside rim of the tire this step is hard and time consuming but it stops the contrast between tire surface and rim looking weird.

Step 3) Pick up the trusty course sander and now hold the file still and randomly move your tire in fast movements onto and off the sandpaper don't over do this as the purpose is to create some areas with more wear

Step 4) Parallel to the direction of the tire smooth the edges of the tire to create a soft edge, again vary the effect in certain areas

Step 5) Now the fun bit with a metal needle file with a sharp edge hold the tire flat in the air and make random cuts and dents in the tires surface to represent the cuts you can see in the picture of the F1 tire

Step 6) Last but not least lightly repeat step 1 very quickly to reestablish light graining but make sure you don't over do it so you can still see the wear and tear you made

Here are a few i made earlier:

Image

Image

You can see the effect which looks rather nice and makes the road wheels rather interesting

Now the small print: most importantly DO NOT over do this as once you have there's no going back

Remember to make it suit how old your vehicle is, the amount it's been used and the type of rubber and don't do it on steel wheels

A couple of other tips: Don't do any wheels that will not be seen and don't do it if the tank is going to be covered in mud

Oh and to hold the wheel i use a q tip or ear bud, depending on what side of the Atlantic you inhabit, i take the cotton of and then use bits of it to help the stick firmly stick in the hole


Alright that's the tips done now i'll just mention a few things about the build:

Firstly i decided to leave of one of the curved exhaust attachments to add some interest and of course to fit with my theme

Image


The gun mechanism is very nice it's just a shame it's a two piece barrel

Image


I replaced the crappy gun from the kit with a nice one from Dragon

Image


And this is the stage i'm at:
Lower Hull done
Lower and Upper Hull attached
Gun completed and attached
Exhausts done
Wheel all prepared for painting
Some upper hull detail done


Image

Image

Bye for now

Wirbel ~ Rufus :hi:
On the small desk in the corner of my room:

Zvezda 1/72 IS-2

And i have YouTube now: https://www.youtube.com/channel/UClMVSN ... LouPy4IM_Q
User avatar
AchtungPanzer
Chief Warrant Officer 3
Posts: 2299
Joined: Mon Oct 07, 2013 7:59 am
Location: Cracow PL

Re: Tamiya 1 35 Sd.Kfz.173 Jagdpanther Late

Post by AchtungPanzer »

Nice model. Goos start :th: . Good luck in work and well done mate
User avatar
NAMBiohazard
Master Sergeant
Master Sergeant
Posts: 474
Joined: Fri Jun 21, 2013 3:21 pm
Location: Windhoek, Namibia

Re: Tamiya 1 35 Sd.Kfz.173 Jagdpanther Late

Post by NAMBiohazard »

Love the idea you have there......
and thx for the tip on the tyre wear..... :th:
Keep the glue on the Sprue

Bjorn
User avatar
UKguyInUSA
Second Lieutenant
Second Lieutenant
Posts: 3429
Joined: Sun Mar 30, 2014 10:19 pm
Location: New Hampshire, USA formerly Palm Beach, Florida, USA and Leicestershire, UK (until 1999)
Contact:

Re: Tamiya 1 35 Sd.Kfz.173 Jagdpanther Late

Post by UKguyInUSA »

This tank destroyer by Tamiya seems to be a popular choice with the Armor builders!

Look forward to seeing your end result and hope that your exam results are as rewarding! :)

Good luck. :thumb1:
WIP:: Tamiya 1/48 F4U-1A Corsair

Non-WIP::Eduard 1/48 Fokker DVII, Revell 1/32 Arado AR196 and 1/32 BF109G10 Erla,
User avatar
mannloon
Command Sergeant Major
Posts: 985
Joined: Thu Apr 17, 2014 10:57 pm
Location: Madison, WI USA
Contact:

Re: Tamiya 1 35 Sd.Kfz.173 Jagdpanther Late

Post by mannloon »

Cool idea. Looking good so far.
On the bench:
Cyber-Hobby T-34 Under New Management
Cyber-Hobby Tiger I Kursk
Rye Field Tiger I w/ Interior
Academy T-34 with bed spring armor
User avatar
felisbarcinonensis
Command Sergeant Major
Posts: 860
Joined: Tue Jun 10, 2014 9:42 pm
Location: BCN

Re: Tamiya 1 35 Sd.Kfz.173 Jagdpanther Late

Post by felisbarcinonensis »

This is an ambitous project! Looking good! :thumb1: :thumb1: :thumb1:
User avatar
WirbelwindModelling
Corporal
Corporal
Posts: 91
Joined: Sun Mar 30, 2014 5:16 pm
Location: Suffolk, UK

Re: Tamiya 1 35 Sd.Kfz.173 Jagdpanther Late

Post by WirbelwindModelling »

Thanks again guys a short update this time!!! :o

So after posting yesterday i decided to get on with the anti-air armour plates...

So a recap on what these "anti air" plates are:

These plates where thin armour sheets like Panzer IV schurzen that were added a few inches above the upper surface of the Panther turret. The reason behind this was, especially after the experiences in Normandy, the weak top of the turret armour had been exposed. The Panther could easily be penetrated by a strafing aircraft even using 50. cals on some of the extreme weak points. So the Germans solved it the same way that they solved the problem of the weak side armour on the panther that could be penned by those pesky Russian anti-tank rifles. They stuck thin armour plates over the turret roof these plates where spaced about 5 inches above the turret roof and had the effect of reducing the shell velocity reducing it's potential penetration therefore reducing the chance the shell would penetrate. Now these sheets also had an added bonus that they could prevent grenades landing directly on the turret roof and the Panther had another problem which was even though the engine air intakes had grills over them sometimes repeated damage allowed grenades through. So the Germans used the same idea and stuck armoured plates a few inches above the grills reducing the effect of grenade blasts while also protecting the grills form aircraft shells which could easily slice through the mesh and cause engine damage and explosions.

Whether the idea was an idea of the Wehrmacht high command or just a commonly used field mod is unknown (well to me at least) and i have managed to find no info on how successful it was.

Anyway here's a pic:

Image
Image from one of those wonderful Panzerwrecks books

And here's the one i posted earlier showing alliance models PE set

Image


So as you can the plates do not cover the hatches so with this in mind i got started:


Ok what do you need?
-Alumiunm drink can (Beer, coke etc...)
-Pin vice and drill bit (Or another hole punching tool)
-Sharp knife or small saw
-Ruler
-Pen (capable of writing on the inside of the can)

Step 1

Consume beverage :cheers2: and remove all liquid :tongue: (If large beer i suggest you do this the night before and leave a night to recover :lol:)

Step 2

Punch two holes, using the pin vice, one above the other on the top and bottom of the can as illustrated in the picture below

Image

Step 3

Cut parallel to the holes across the can to make a round tube of metal and removing the unusable top and bottom

Image

And you should be left with something like the one i prepared earlier:

Image

Step 4

Cut down the middle of the tube so you end up with a sheet and flatten the sheet

Step 5

Draw the shape you want to cut out like i have done on the painting instructions and then make measurements according to the actual vehicle using the ruler

Image

Image

Step 6

Know mark up the shape on the metal sheet using the pen, i like to just mark up the corners

Step 7

Then using the ruler as a guide with your knife cut the shape onto the metal sheet

Now a key tip here: the metal is quite hard to cut so what i like to do is to scribe into the metal all the way across the sheet and then fold along that cut line until the metal snaps leaving you a straight edge.

This diagram shows a basic plan:

Image

Know lets have a look at what i have achieved:

The Casement roof plate: which as you can see i left gaps for the hatches

Image

Image


The engine deck covers

Image

Image

Image

Image


And all in place:

Image


So next i will add the support that hold these plates in place over the top, they look kind of rough and badly made but with a bit more battle damage and it will perfectly fit the theme.

Well that's it a very useful skill to know, great for make Schurzen for those Tamiya kits and a lot cheaper than buying PE sets

I got a few other things done:
-Upper Hull detail finishede
-Spare Track links done
-Commander figure assembled

Oh, one last thing....

Remember to paint inside those vents before you put them on:

Image

Bye for know folks

:hi:

Wirbel ~ Rufus
On the small desk in the corner of my room:

Zvezda 1/72 IS-2

And i have YouTube now: https://www.youtube.com/channel/UClMVSN ... LouPy4IM_Q
User avatar
Willem
Warrant Officer
Warrant Officer
Posts: 1556
Joined: Sun Apr 13, 2014 1:39 pm
Location: Leicestershire, UK.
Great Britain

Re: Tamiya 1 35 Sd.Kfz.173 Jagdpanther Late

Post by Willem »

Great tips and 'how to'. Looks like it's shaping up to be a cracking build.

:cheers2:
Will

"A thing of orchestrated hell- a terrible symphony of light and flame."

Edward R Murrow
User avatar
UKguyInUSA
Second Lieutenant
Second Lieutenant
Posts: 3429
Joined: Sun Mar 30, 2014 10:19 pm
Location: New Hampshire, USA formerly Palm Beach, Florida, USA and Leicestershire, UK (until 1999)
Contact:

Re: Tamiya 1 35 Sd.Kfz.173 Jagdpanther Late

Post by UKguyInUSA »

That was like watching "Blue Peter" when I was a boy! Looking good so far, mate! :thumb1:
WIP:: Tamiya 1/48 F4U-1A Corsair

Non-WIP::Eduard 1/48 Fokker DVII, Revell 1/32 Arado AR196 and 1/32 BF109G10 Erla,
User avatar
WirbelwindModelling
Corporal
Corporal
Posts: 91
Joined: Sun Mar 30, 2014 5:16 pm
Location: Suffolk, UK

Re: Tamiya 1 35 Sd.Kfz.173 Jagdpanther Late

Post by WirbelwindModelling »

Hello again,

I'd like to say sorry first as i haven't posted an update in a while :oops: i lost my motivation for a few days and started working on Coen's Kursk group build and then over the last week i've done LOADS of work without taking hardly any photos after getting my mojo back i lost my motivation to post updates.... urgggghhh :wall: :wall: Also thank you for your comments and i am sorry i did not reply to any of them :oops: :oops:

So anyway here's the first post of what will be quite a busy few days of retrospective updates from me...

I finished the build on the tank before the stage of painting and here are the photos of the finished build:

Image


First of all i would like to talk about the changed tool layout, reference material shows that tools were often attached at different places on the tank so therefore i ignored the instructions and added them in places that matched the pictures:
I also added an extra fire extinguisher from the spares

Image

Image


Now, the theme for the build was "What If" and that the Jagdpanther had been factory modified from an old KO'd tank.
So i decided to make it as though the front plate had been damaged and replaced.
To show this i used Milliput to make an exaggerated weld seem on the front plate.
I simply rolled out some Milliput into a thin cylinder and then pressed against the seem line. Then i used a knife to create the cuts in it like you see on German welding in the late war. This is the result of the process:

Image

Image

Image


A couple of other features were added:

Some grab handles on the "New" front plate to symbolize makeshift steps for the crew to use or handles for attaching camouflage:

Image


An attachment strip for spare tracks on the front using a Panzer III part from the spares (Not attached yet):

Image


Two other spare track sections on the front (Not attached yet):

Image

Image


Last but not least remember to always brush down your model with a paintbrush to remove any particles from sanding that may affect paint adhesion

And that's it from the build next update will focus on the painting, then the one after that will tell of my weathering techniques...

See you soon, :hi:

Wirbel ~ Rufus
On the small desk in the corner of my room:

Zvezda 1/72 IS-2

And i have YouTube now: https://www.youtube.com/channel/UClMVSN ... LouPy4IM_Q
User avatar
felisbarcinonensis
Command Sergeant Major
Posts: 860
Joined: Tue Jun 10, 2014 9:42 pm
Location: BCN

Re: Tamiya 1 35 Sd.Kfz.173 Jagdpanther Late

Post by felisbarcinonensis »

Wow man! Very original work :bow:: You do put that milliput into use! Thanks for sharing :D
User avatar
PaulAyrey
Sergeant Major of the Army
Posts: 1141
Joined: Tue Feb 04, 2014 5:24 pm
Location: Worthing, West Sussex, UK
Contact:

Re: Tamiya 1 35 Sd.Kfz.173 Jagdpanther Late

Post by PaulAyrey »

Looking great, a great idea and execution!
User avatar
WirbelwindModelling
Corporal
Corporal
Posts: 91
Joined: Sun Mar 30, 2014 5:16 pm
Location: Suffolk, UK

Re: Tamiya 1 35 Sd.Kfz.173 Jagdpanther Late

Post by WirbelwindModelling »

Thanks again for the kind comments,

So another "update" from the past, this time painting time... Yeahh

First point i brush paint..... yes do not re-adjust your sets i did say... brush paint, i have always used the hairy stick from when i started and i could explain why i am not going to get an airbrush in the foreseeable but it's a long story...

So here is the painted subject (Please note i touched up the camo afterwards):

Image


So i painted the Front hull plate in a rust colour (Mix of Revell 83 and Vallejo german.camouflage.medium.brown) to represent that it had been hastily added with no time to paint in camouflage.
I painted the gun barrel Dunkelgrau (Revell 78) because.... urrmm... oh well it's a what if and i think it looks cool... all well be explained below

Image


I decided to show the battle hardened veteran that had been re fitted in the factory and "re decorated" so i painted the lower hull in the standard Dunkelgelb as the original tank would be. Then i painted the rest Dunkelgelb apart from the the sides...

...so i painted the sides green to show an attempt at repainting while the front plate renovating was going on, however the factory ran out of green paint so they could not paint the rest :o then i thought what cool late war camo could i do hmmmm of course! Octopus camo!!! (running out of green could also explain the grey barrel, you can just imagine a german factory worker looking for paint and finding a 1942 tin of Dunkelgrau tucked away in the paint store rusting away)

Now octopus camo is the unofficial name of a camo that appeared on a few late war German tanks (King Tigers). It consisted of a, slightly lighter than normal, olive green base and then large yellow hard edged bands with green hollow circles which looked like octopus tentacles, here are some examples:

Image

Image


I would post a real life example but unfortunately swastikas and although i and many others are fine with them i don't want to some how offend someone and i am not sure of forum etiquette on such matters, so instead here is just a url link:

http://www.lg-c.dk/uploads/tiger_octop.jpg


Anyway the camo supposedly only appeared on one vehicle very late in the war and i have seen a couple of very shouty arguments about on the some what famously aggressive Missing Lynx discussion groups (The braille scale group is sometimes hilarious they argue like a bunch of school girls and most of them are grown men :lol: ) about whether it's fake but meh i like it.

So i painted a olive green base coat. then masked of the sections of green and masked green dots in the soon to be yellow zones...
Then i painted the yellow and once dried i peeled of the Humbrol Maskol...
After that i simply painted yellow spots in the green dots to make rings,
I did this as it was much easier to mask circles than rings.

The colours used were: a mix of Vallejo beige and brown to make Dunkelgelb
and a mix of Vallejo Olive green, ger.cam.med.brown and Revell 78 panzer grey

So there ya go thats the camouflage painting done, i really like the look of the miss match of schemes.

Just a note on brush painting: Keep your paint thin and do 2 to 3 coats ( i Like to do the top coat slightly lighter it creates a bit of depth)

Next step weathering

Bye for now, :hi:

Wirbel ~ Rufus
On the small desk in the corner of my room:

Zvezda 1/72 IS-2

And i have YouTube now: https://www.youtube.com/channel/UClMVSN ... LouPy4IM_Q
User avatar
mannloon
Command Sergeant Major
Posts: 985
Joined: Thu Apr 17, 2014 10:57 pm
Location: Madison, WI USA
Contact:

Re: Tamiya 1 35 Sd.Kfz.173 Jagdpanther Late

Post by mannloon »

WirbelwindModelling wrote:Thanks again for the kind comments,

So another "update" from the past, this time painting time... Yeahh

First point i brush paint..... yes do not re-adjust your sets i did say... brush paint, i have always used the hairy stick from when i started and i could explain why i am not going to get an airbrush in the foreseeable but it's a long story...

So here is the painted subject (Please note i touched up the camo afterwards):

Image


So i painted the Front hull plate in a rust colour (Mix of Revell 83 and Vallejo german.camouflage.medium.brown) to represent that it had been hastily added with no time to paint in camouflage.
I painted the gun barrel Dunkelgrau (Revell 78) because.... urrmm... oh well it's a what if and i think it looks cool... all well be explained below

Image


I decided to show the battle hardened veteran that had been re fitted in the factory and "re decorated" so i painted the lower hull in the standard Dunkelgelb as the original tank would be. Then i painted the rest Dunkelgelb apart from the the sides...

...so i painted the sides green to show an attempt at repainting while the front plate renovating was going on, however the factory ran out of green paint so they could not paint the rest :o then i thought what cool late war camo could i do hmmmm of course! Octopus camo!!! (running out of green could also explain the grey barrel, you can just imagine a german factory worker looking for paint and finding a 1942 tin of Dunkelgrau tucked away in the paint store rusting away)

Now octopus camo is the unofficial name of a camo that appeared on a few late war German tanks (King Tigers). It consisted of a, slightly lighter than normal, olive green base and then large yellow hard edged bands with green hollow circles which looked like octopus tentacles, here are some examples:

Image

Image


I would post a real life example but unfortunately swastikas and although i and many others are fine with them i don't want to some how offend someone and i am not sure of forum etiquette on such matters, so instead here is just a url link:

http://www.lg-c.dk/uploads/tiger_octop.jpg


Anyway the camo supposedly only appeared on one vehicle very late in the war and i have seen a couple of very shouty arguments about on the some what famously aggressive Missing Lynx discussion groups (The braille scale group is sometimes hilarious they argue like a bunch of school girls and most of them are grown men :lol: ) about whether it's fake but meh i like it.

So i painted a olive green base coat. then masked of the sections of green and masked green dots in the soon to be yellow zones...
Then i painted the yellow and once dried i peeled of the Humbrol Maskol...
After that i simply painted yellow spots in the green dots to make rings,
I did this as it was much easier to mask circles than rings.

The colours used were: a mix of Vallejo beige and brown to make Dunkelgelb
and a mix of Vallejo Olive green, ger.cam.med.brown and Revell 78 panzer grey

So there ya go thats the camouflage painting done, i really like the look of the miss match of schemes.

Just a note on brush painting: Keep your paint thin and do 2 to 3 coats ( i Like to do the top coat slightly lighter it creates a bit of depth)

Next step weathering

Bye for now, :hi:

Wirbel ~ Rufus

That is some very good brush painting man. I suck at it, but it can be done well.
On the bench:
Cyber-Hobby T-34 Under New Management
Cyber-Hobby Tiger I Kursk
Rye Field Tiger I w/ Interior
Academy T-34 with bed spring armor
User avatar
PaulAyrey
Sergeant Major of the Army
Posts: 1141
Joined: Tue Feb 04, 2014 5:24 pm
Location: Worthing, West Sussex, UK
Contact:

Re: Tamiya 1 35 Sd.Kfz.173 Jagdpanther Late

Post by PaulAyrey »

That is looking mighty fine. Well done so far!
User avatar
WirbelwindModelling
Corporal
Corporal
Posts: 91
Joined: Sun Mar 30, 2014 5:16 pm
Location: Suffolk, UK

Re: Tamiya 1 35 Sd.Kfz.173 Jagdpanther Late

Post by WirbelwindModelling »

Cheers Mannloon and Paul :cheers2:

Well weathering time, :banana: I tried lots of new techniques so here's how i did with a full explanation of What, Why and How

One thing: sorry for the crap pictures my camera needs upgrading :cry:

So here are all the products used:

Image


Step 1: Satin or Gloss Varnish

What: Vallejo Acrylic Satin Varnish

Why: To protect paint, satin provides a good surface for filters and washes

How: Can be sprayed from a can or airbrush or hand painted in fine coats (Sometimes a couple of coats are better)

Image


Step 2: Filters 5% method

What: Humbrol enamels and white spirit

Why: To vary the tone of the base colour

How: Probably a bit of para coming on here.... Filters aren't scary guys and they are very different from a wash in fact the name filter annoys me as it gives no hint of what you do, I am an advocate of, as Miguel Jemenze (MIG) once was, of calling it the 5% technique and here's why and rather than re-scribing his wonderful article; i STRONGLY recommend you have a read of it yourself:

http://www.missing-lynx.com/rare_world/rw02.htm

And a read of the other articles would do you no harm:

http://www.missing-lynx.com/rareworld.htm

But here it is in brief:

Mix 5% enamel and 95% white spirit
Wipe residue of brush
Apply quickly to the model surface
Apply several different coats of different colours
You shouldn't see the effect unless you compare against a "un-filtered" area

On my model i used:
Humbrol 76 uniform green and Revell 56 mouse grey and 79 blue grey on the Dunkelgelb and green surface (Coats: 76 then 79 then 56 the another 76)
Humbrol 19 gloss red, 15 gloss blue and Revell 79 grey on the Red surface (Coats: 19 then 15 then 79 then 2 more coats of 19)
Humbrol 15 gloss blue, Revell 56 and 79 (Coats: 15 then 79 then 56 then 79)

I choose these colours because:
The green blended the dunkelgelb and green on the sides together and gave the dunkelgelb a greenish hint.
Using grey all on the model gave it a uniform dull theme and toned down the colours.
The colours on the Rot oxide front plate helped produce brighter red and purple tones of interest on the front plate

Image


Step 3: Pin Wash

What: Mig dark wash (Although there is no reason why you can't make your'e own washes with oils or enamels and white spirit)

Why: To create shadows

How: Using a thin brush drop wash around details and in holes and channels and let it flow then 15 minutes later clean up stains with a brush humidified in white spirit. Tip: Do this on a Gloss or Satin surface (Hence the satin varnish)

Image


Step 4: Chipping

What: Acrylic paints and a sponge

Why: To show chipped paint

How: First you may ask why chipping now? Why not streaking next? Well streaking, especially rust often happens as a result of chipping with a streak of rust running down form where chipping has exposed the base metal.

Mix a medium/dark grey (Revell 78) with a metallic steel colour (Revell 91) and make a metallic grey not a grey metal colour (More grey than metal) then with a sponge apply to edges and area where the paint would get chipped, don't over do it!!!

You can also add rusty chips as well using orange, red and brown colours

Also on the sides where it was yellow on a green base coat i added green chips to show where the yellow paint had chipped away to show the green base coat

I went for heavy chipping to show the battle hardened veteran

Image


Step 5: Streaking

What: AK DAK streaking grime and felt pens... say whaaaaaat!!!!! (You can also use enamels which will be explained in the "how" part)

Why: To show dirt, grime and dust streaks caused by the rain

How: I could explain how to use AK's streaking grime but it says on the bottle and the felt tip pens is more intriguing for the reader

Felt tip pen streaking

This is an idea that popped into my head when i was marking camo with a black felt tip pen and i applied some water and the pen ran. So the idea is the same as most streaking:

Apply thin lines of pen along the flat surface and from where the paint has chipped
Then do not leave to dry for to long about 30 seconds otherwise they will dry and be hard to remove
Then use water to blend the streaks into the surface

(You can do basically the same with enamels and white spirit)

I recommend you practice on some spare parts before

Simple!!!! and it doesn't smell!!!!! and it's cheap!!!!

Colours used:

Black for general grime
Green on the green base for subtle rain marks
Yellow on the Yellow base for more subtle rain marks
And Red/Orange for rust

Image

Image


So here's the finished product:

Image

Image

Image

Image

Image

Image


It could be better, i overdid the streaking and some of the chipping but i'm still learning, i like the filters even though the effect doesn't pick up well on camera and you can't really see the difference in the pictures, but it looks good to eye.

Weathering Done.... well at least for now... pigments will come later

Details and lots of other stuff to come next...

Once again please please please do read these articles they have helped me no end in weathering

http://www.missing-lynx.com/rareworld.htm

Bye for now, :hi:

Wirbel ~ Rufus
On the small desk in the corner of my room:

Zvezda 1/72 IS-2

And i have YouTube now: https://www.youtube.com/channel/UClMVSN ... LouPy4IM_Q
User avatar
WirbelwindModelling
Corporal
Corporal
Posts: 91
Joined: Sun Mar 30, 2014 5:16 pm
Location: Suffolk, UK

Re: Tamiya 1 35 Sd.Kfz.173 Jagdpanther Late

Post by WirbelwindModelling »

Thanks Felis

Short Update just to show the figure:

Image


It's probably the best figure I've ever done, I studied references and the beige trousers and green Panzer jacket appealed to me so that's what i choose to represent. I also added a pistol to the back from the spares

Image

Image


I painted the face with a mix of wood brown and white to make a tanned skin tone and the hair was painted dark brown

Then I painted the Cap in Black grey, the trousers in Vallejo Beige and the jacket was painted with a mix of Green, brown and grey to make the appropriate camouflage green grey colour. The boots were painted in a slightly lightened black

I gave the face a brown wash and dry brushed it pink

The trousers and jacket received a darkened colour painted into the creases and lighter highlights on the raised creases

I then picked out the belt with a dark brown. Then the badges, buttons and medals were painted with a slightly metallic white

That's it, Of on holiday for a week so speak to you then

Bye for now, :hi:

Wirbel ~ Rufus
On the small desk in the corner of my room:

Zvezda 1/72 IS-2

And i have YouTube now: https://www.youtube.com/channel/UClMVSN ... LouPy4IM_Q
User avatar
PaulAyrey
Sergeant Major of the Army
Posts: 1141
Joined: Tue Feb 04, 2014 5:24 pm
Location: Worthing, West Sussex, UK
Contact:

Re: Tamiya 1 35 Sd.Kfz.173 Jagdpanther Late

Post by PaulAyrey »

It's all looking great and coming along nicely.
Post Reply

Return to “Builds”