Italeri 1/48 F3 Tornado

Post Reply
User avatar
m0gb0y74
Staff Sergeant
Staff Sergeant
Posts: 165
Joined: Thu Feb 06, 2014 10:04 pm
Location: Dumfries, Scotland
Contact:

Italeri 1/48 F3 Tornado

Post by m0gb0y74 »

The Kit

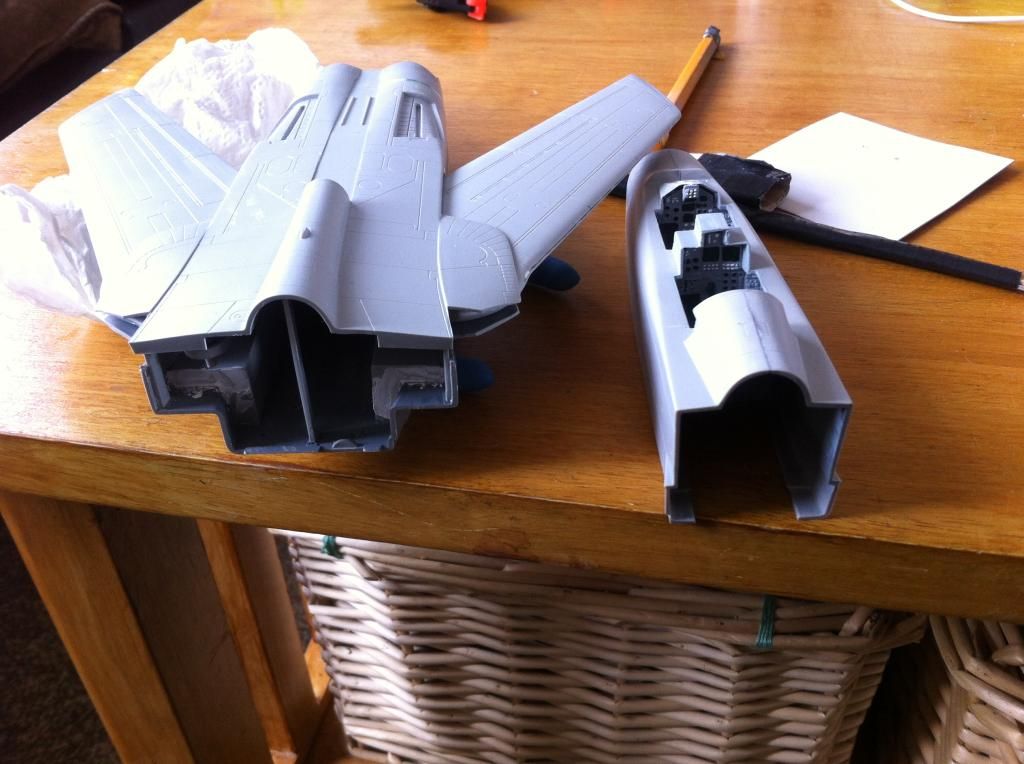
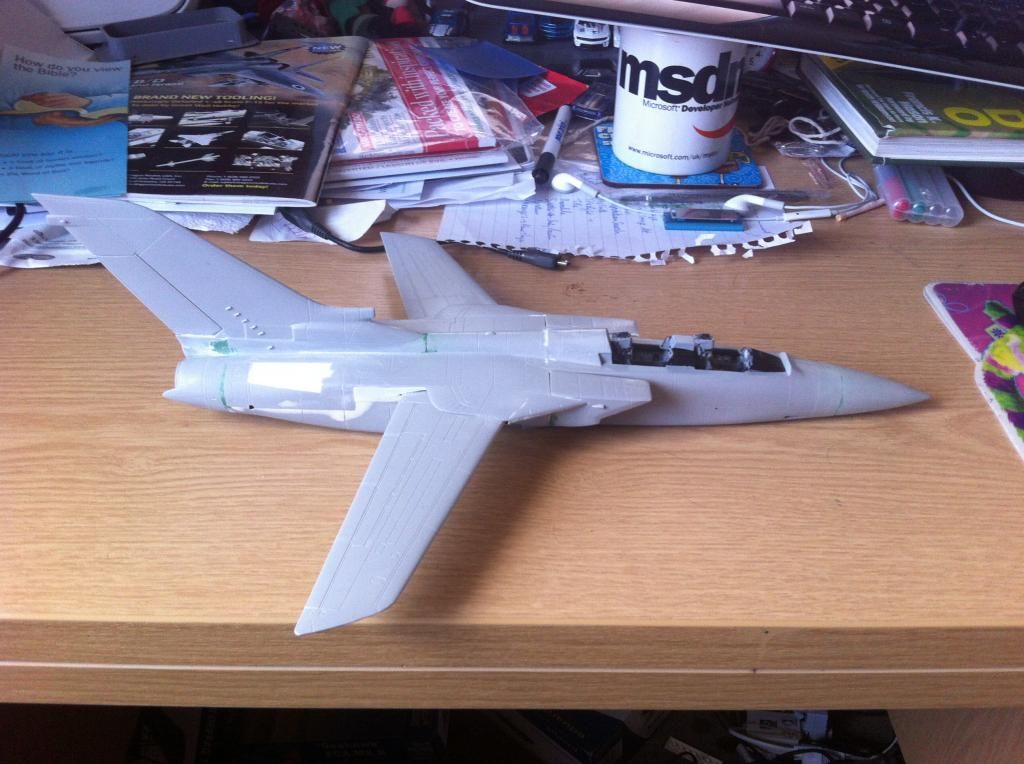
I originally began this kit at the start of the year, but I started to get to the limits of my skills and also I was distracted by other models so it got put on the shelf.
IMG_0871.JPG
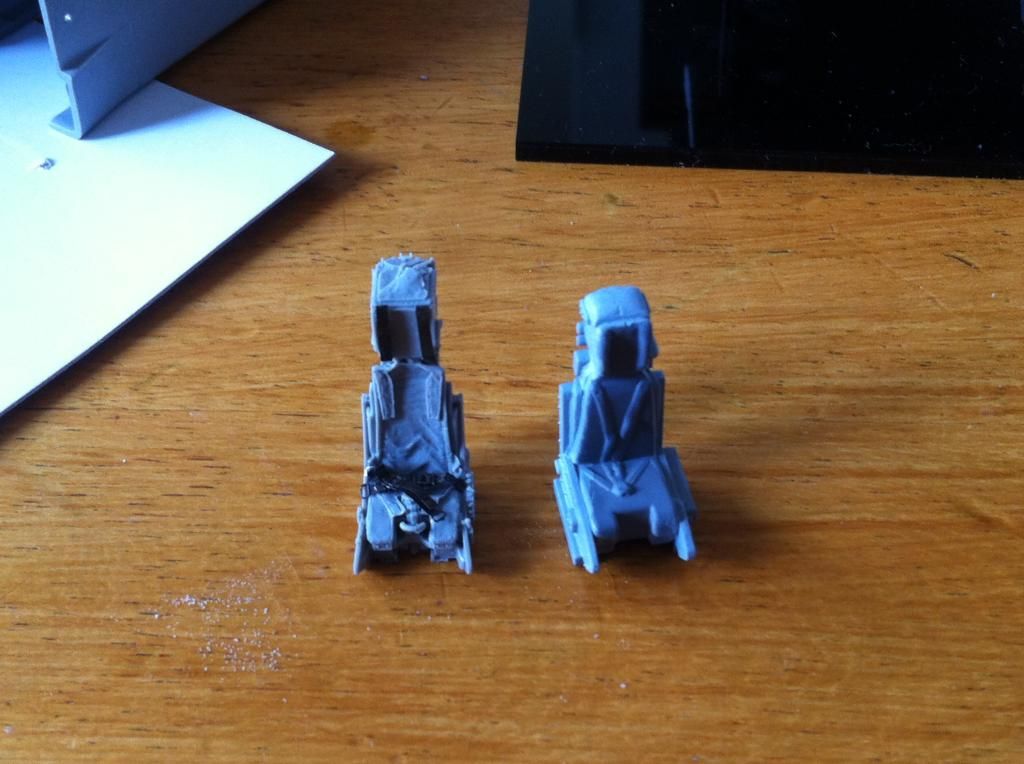
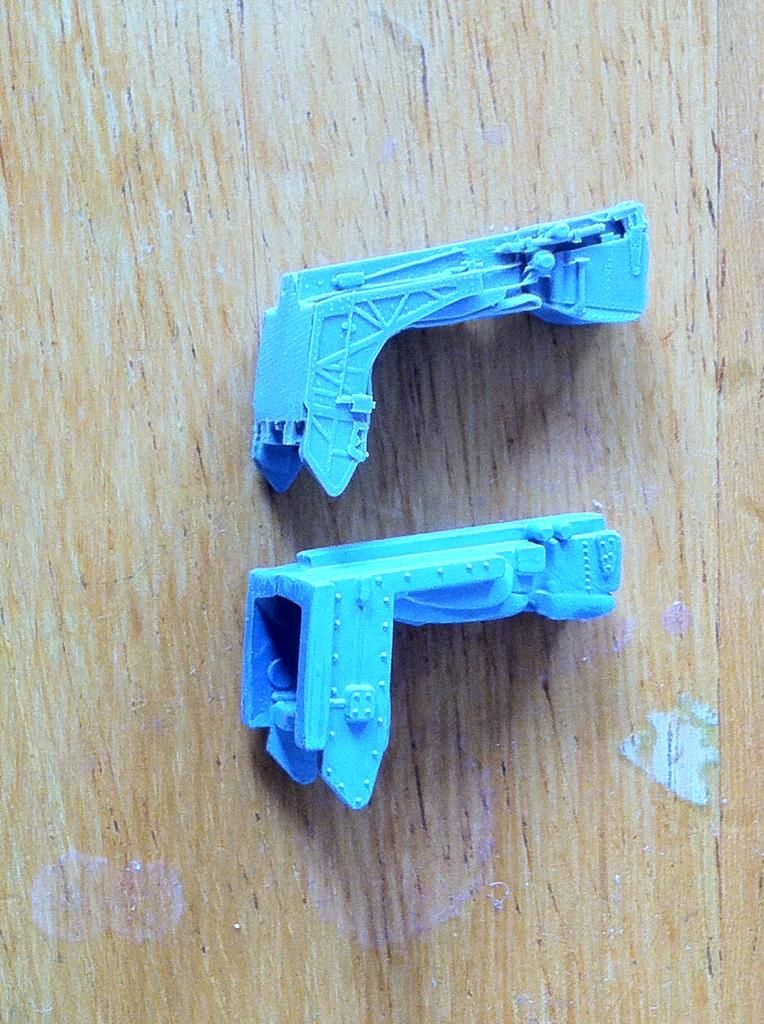
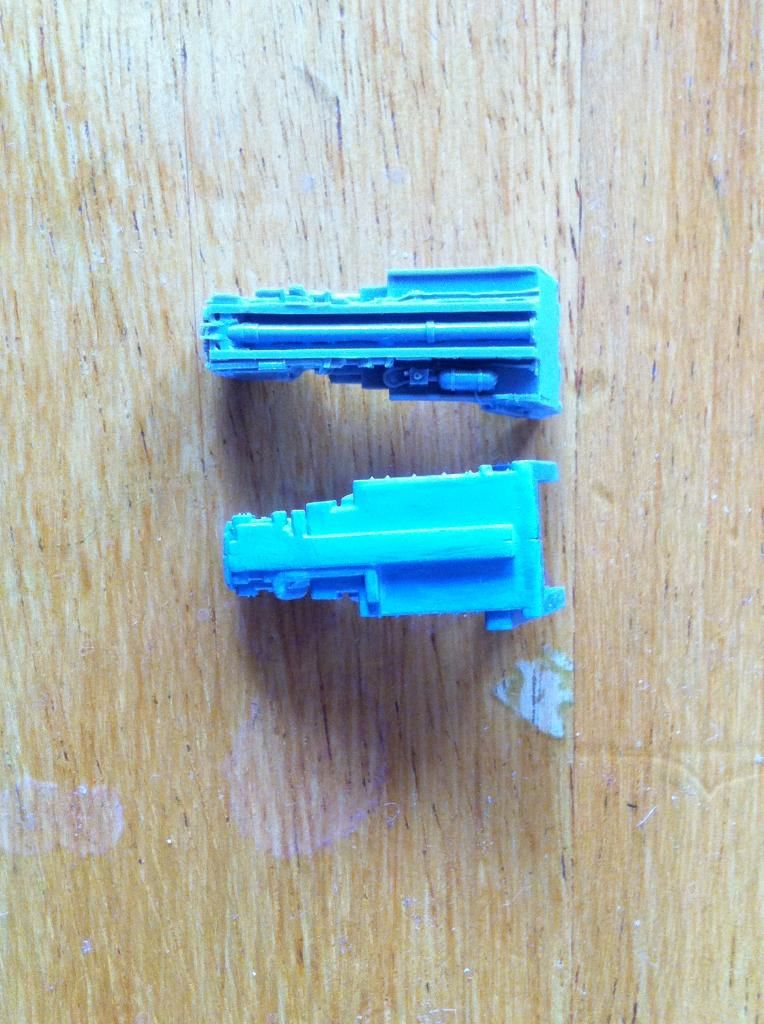
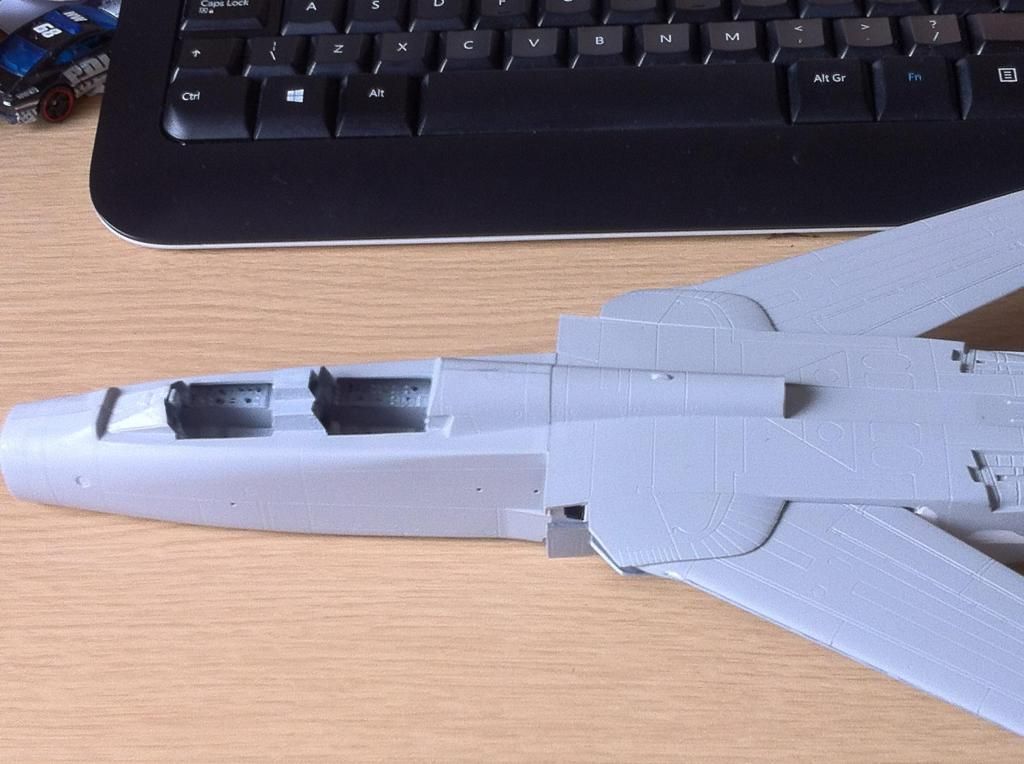
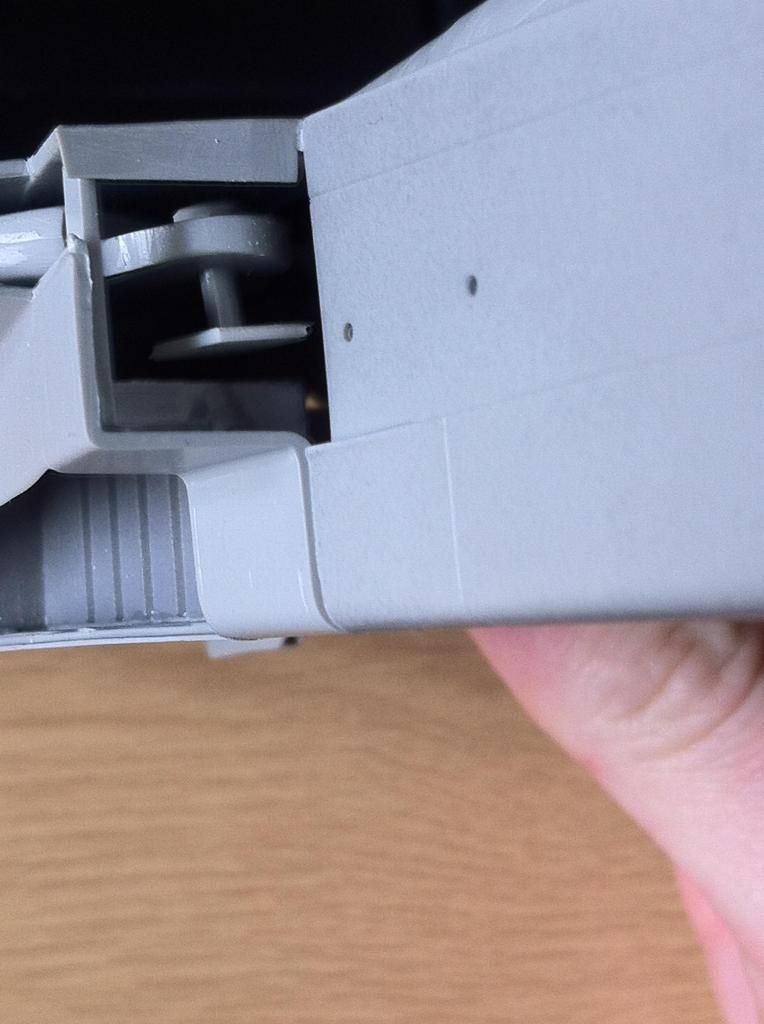
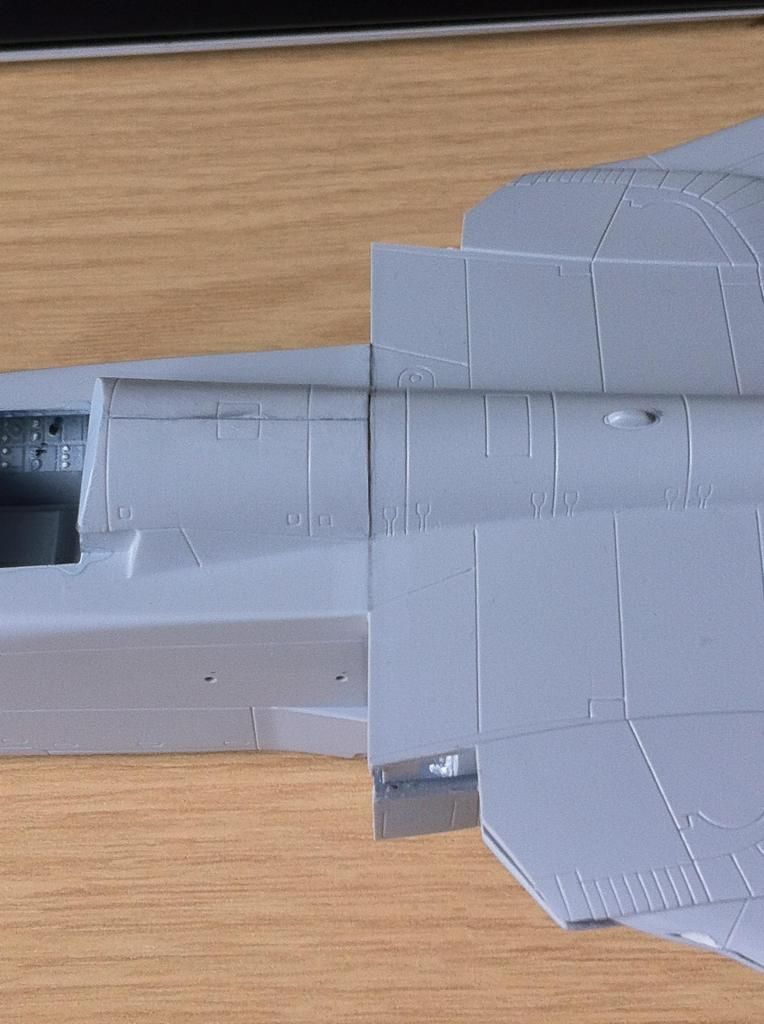
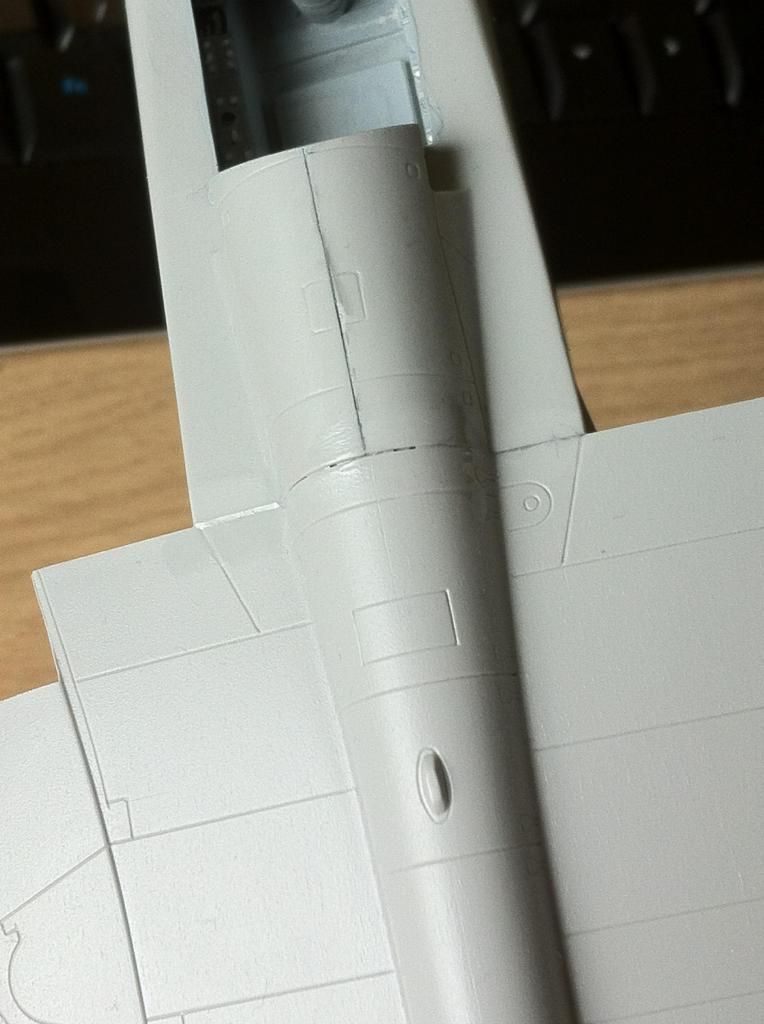
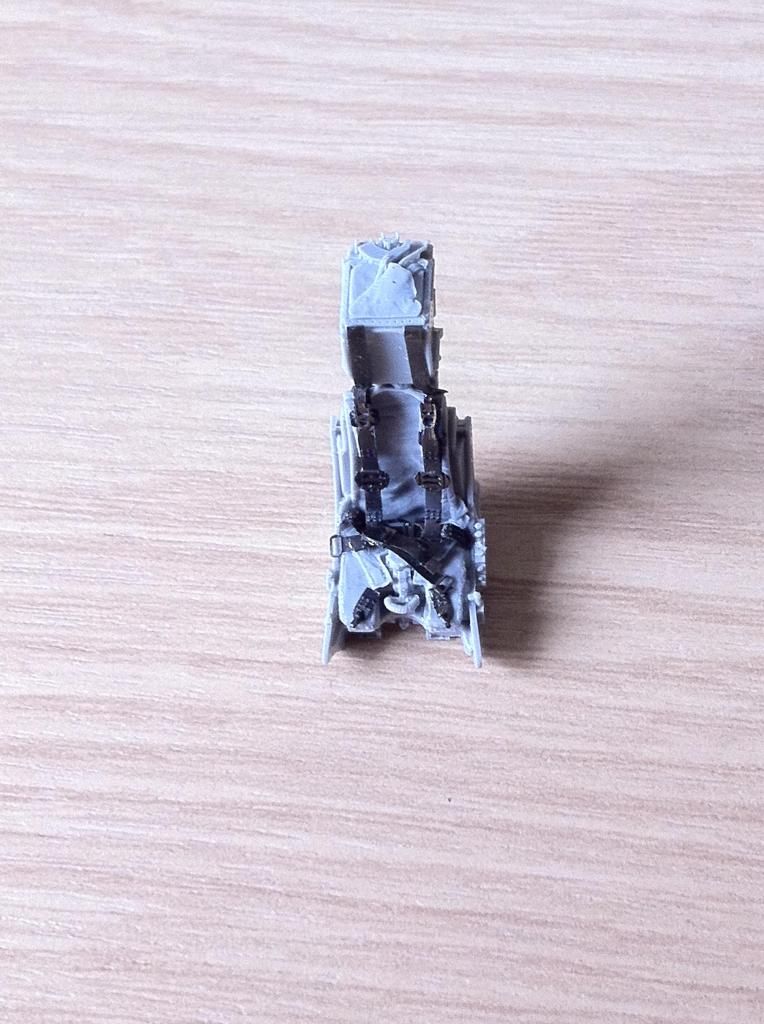
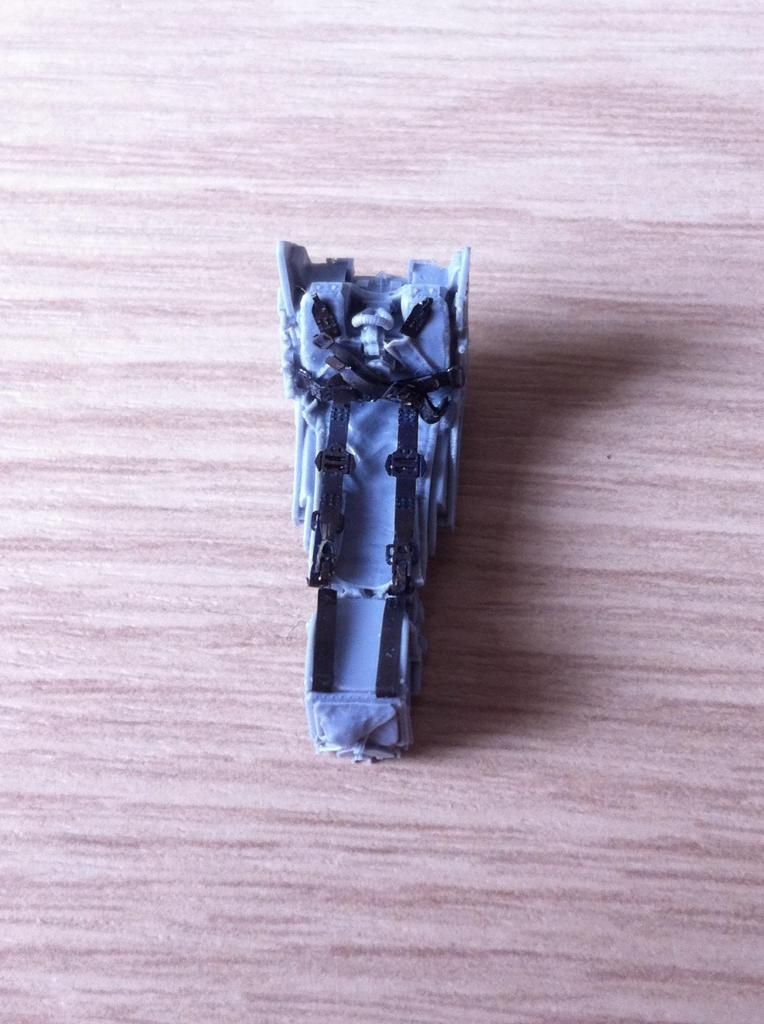
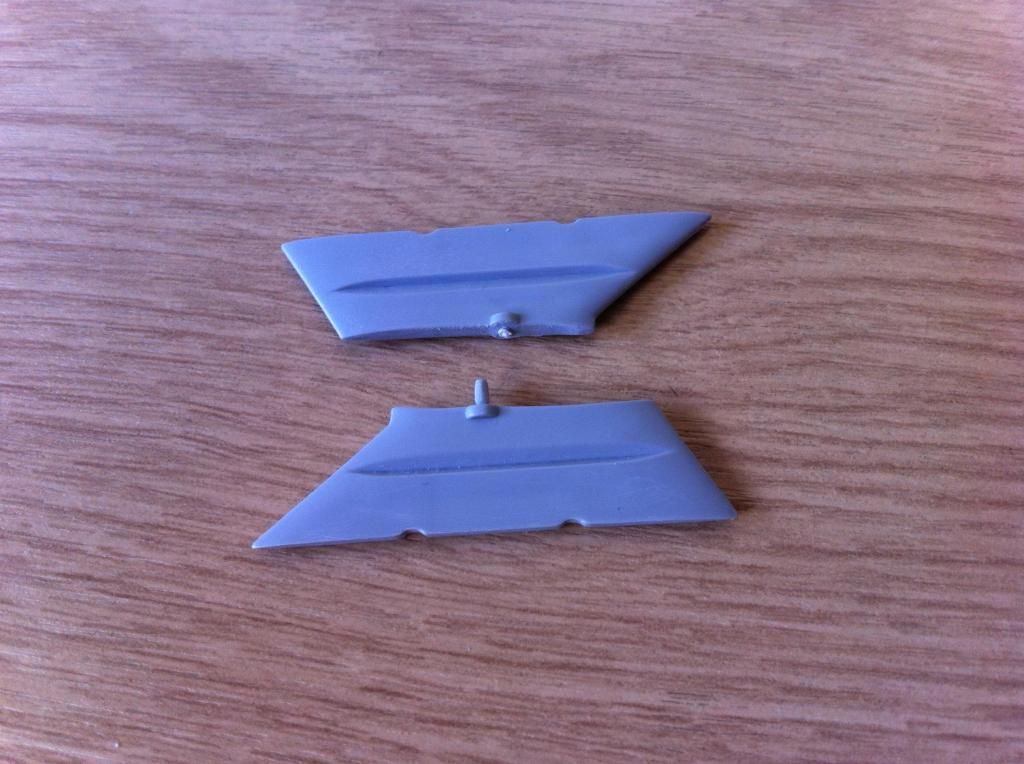
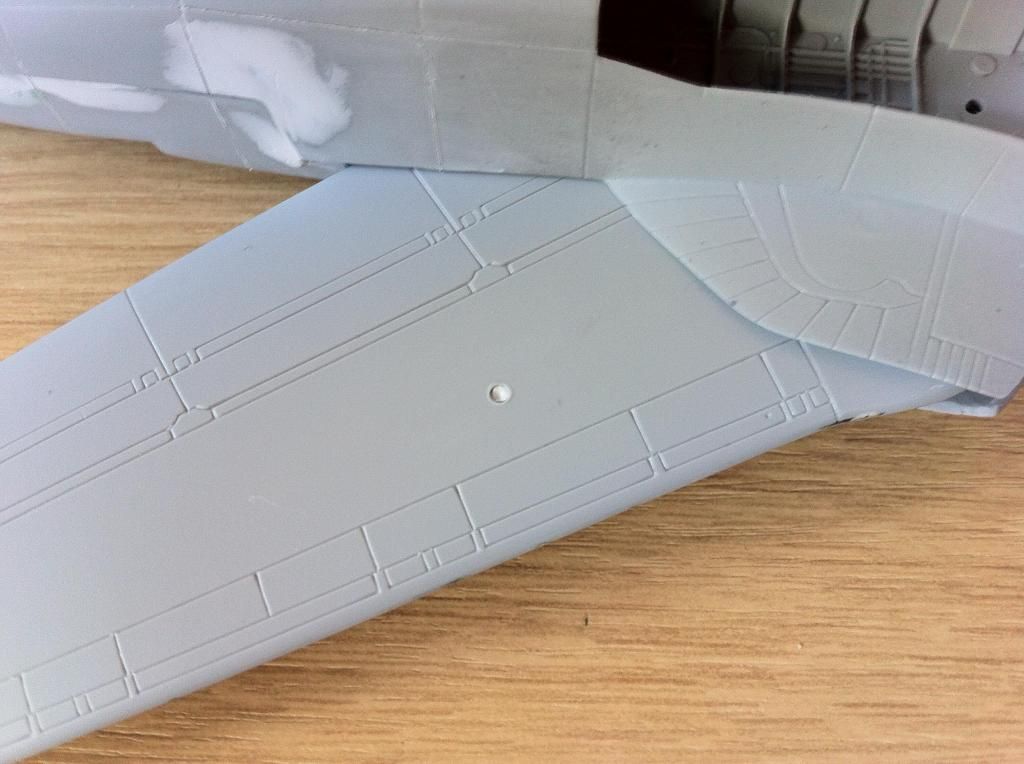
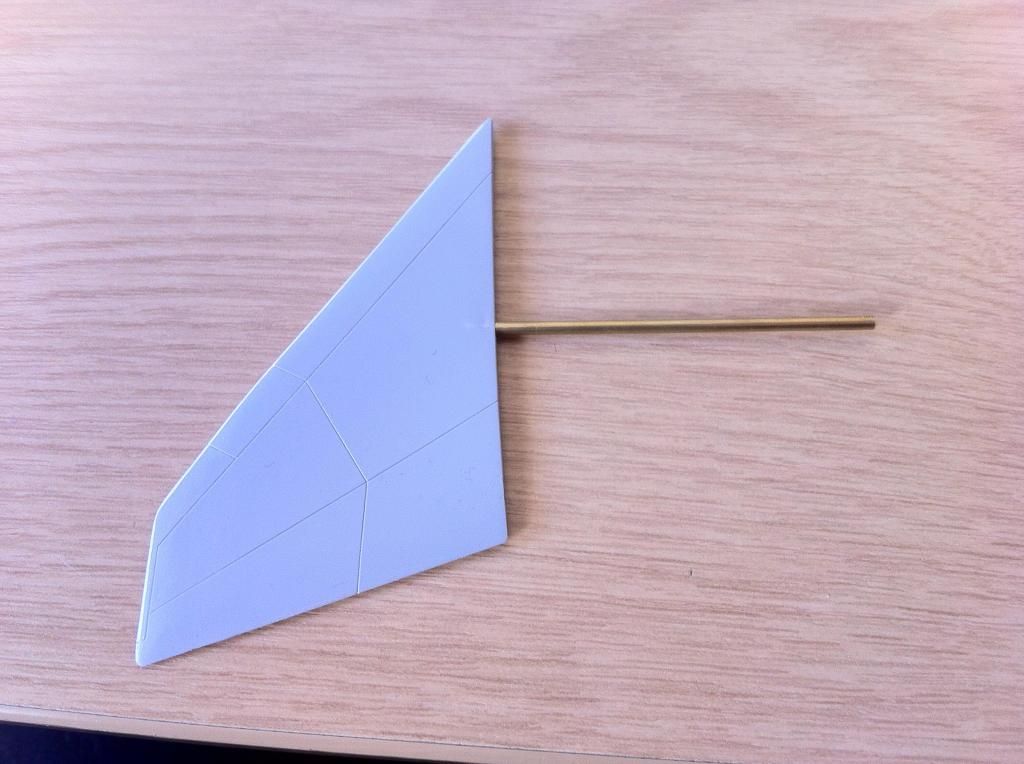
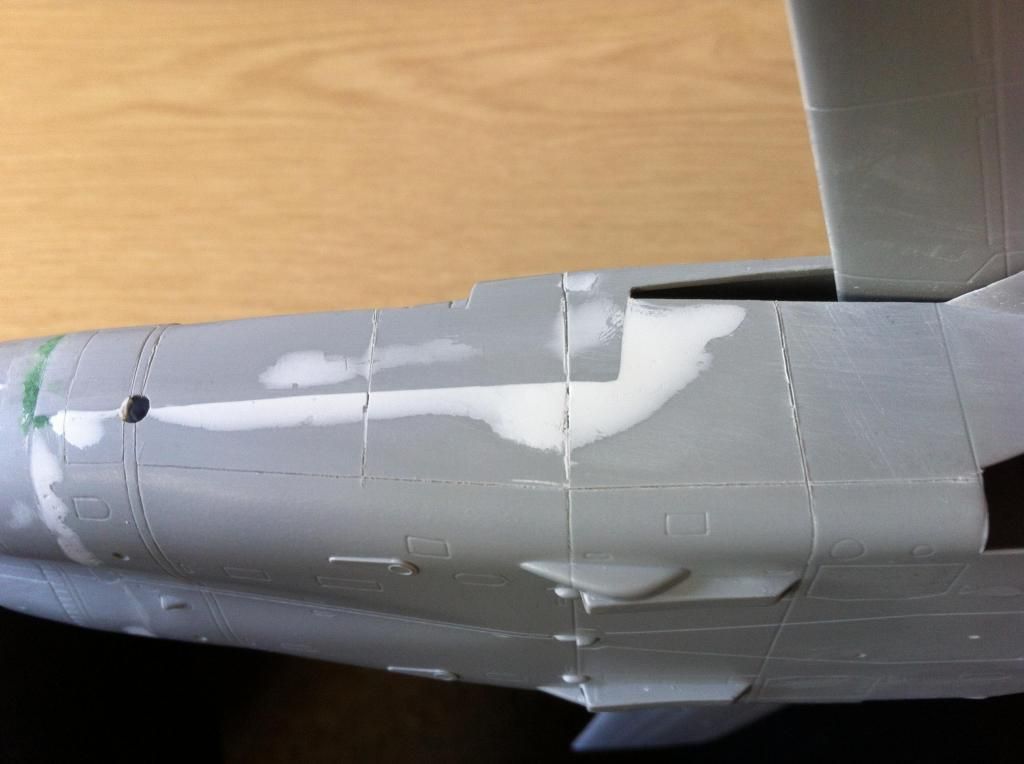
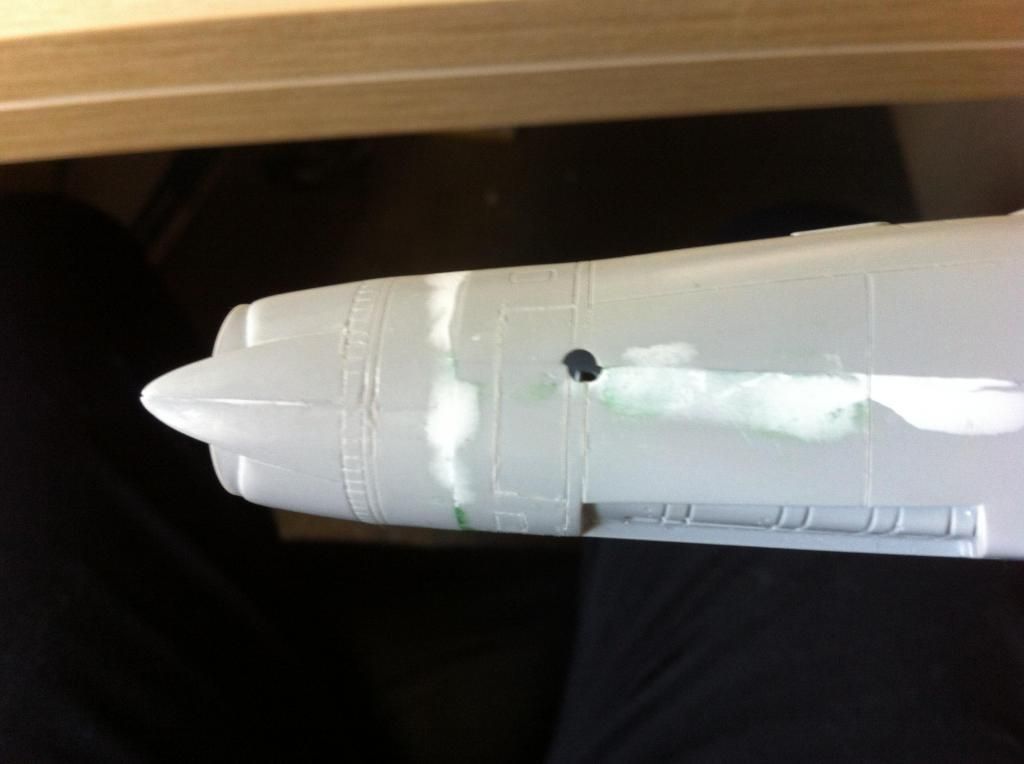
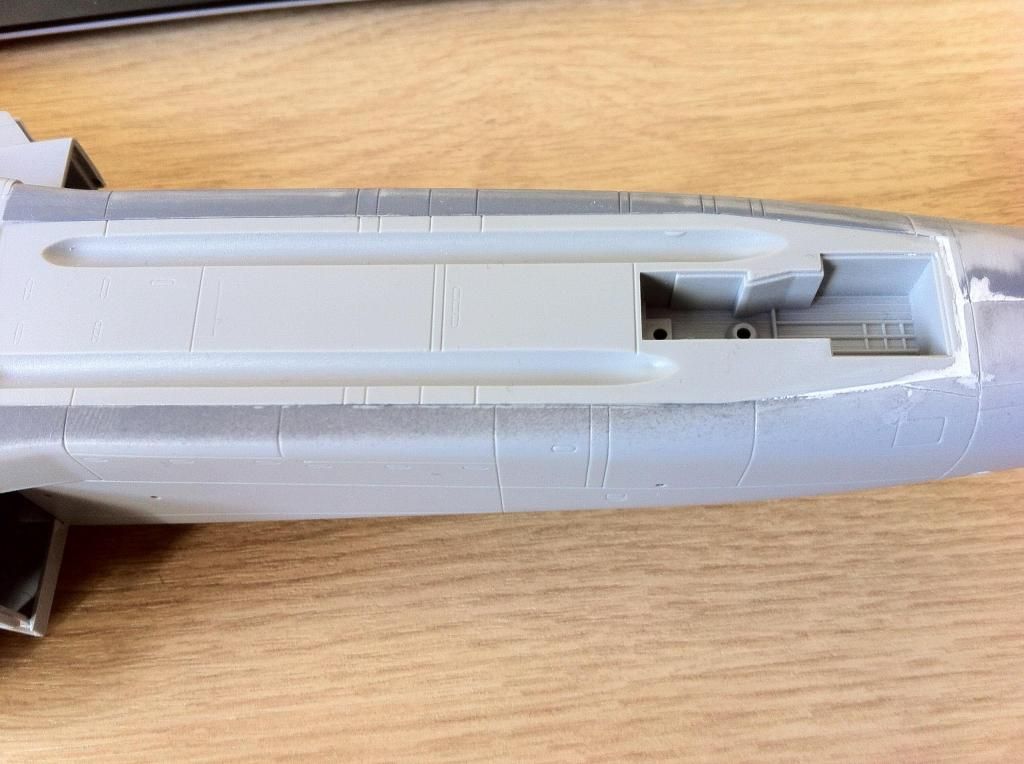
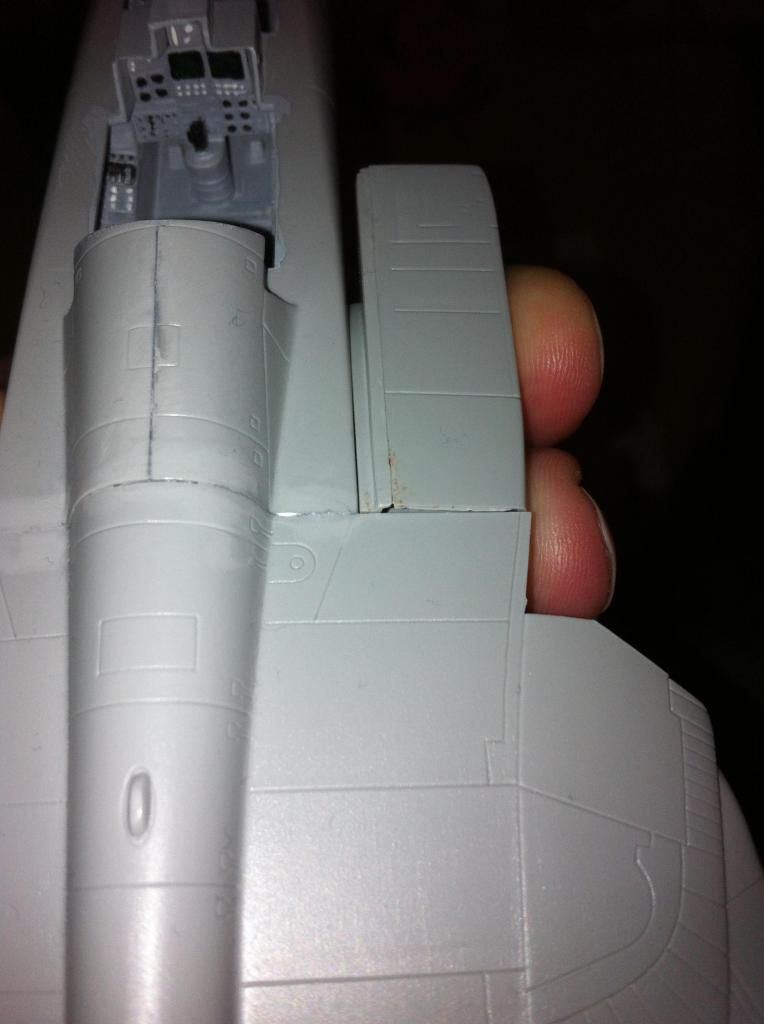
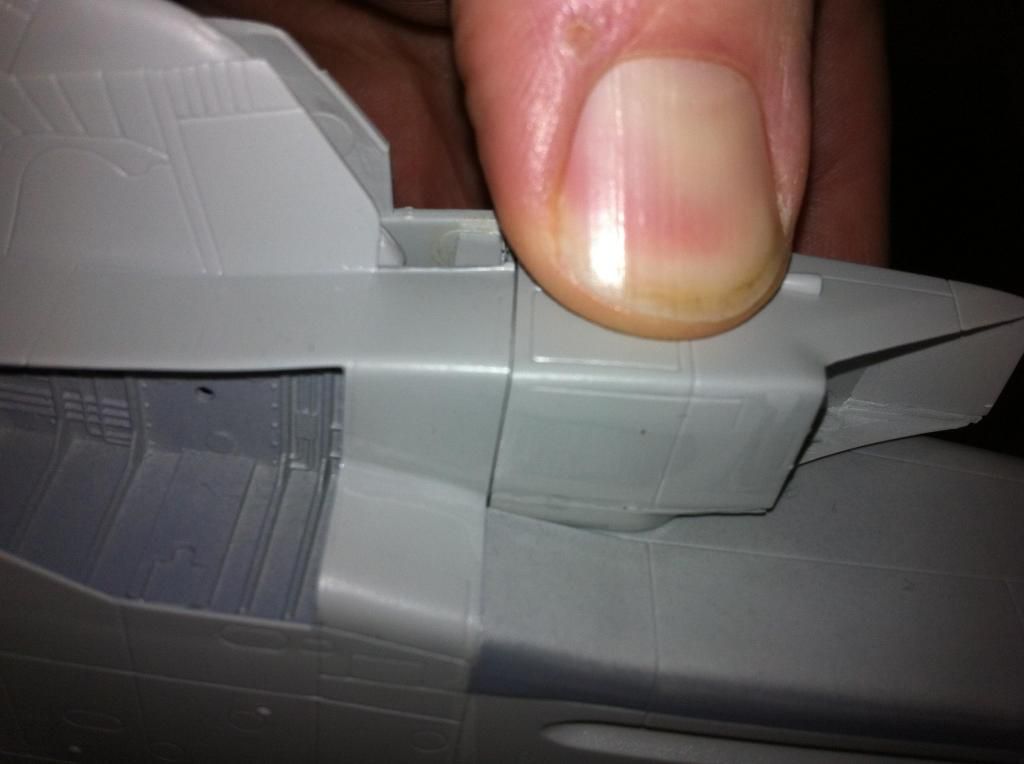
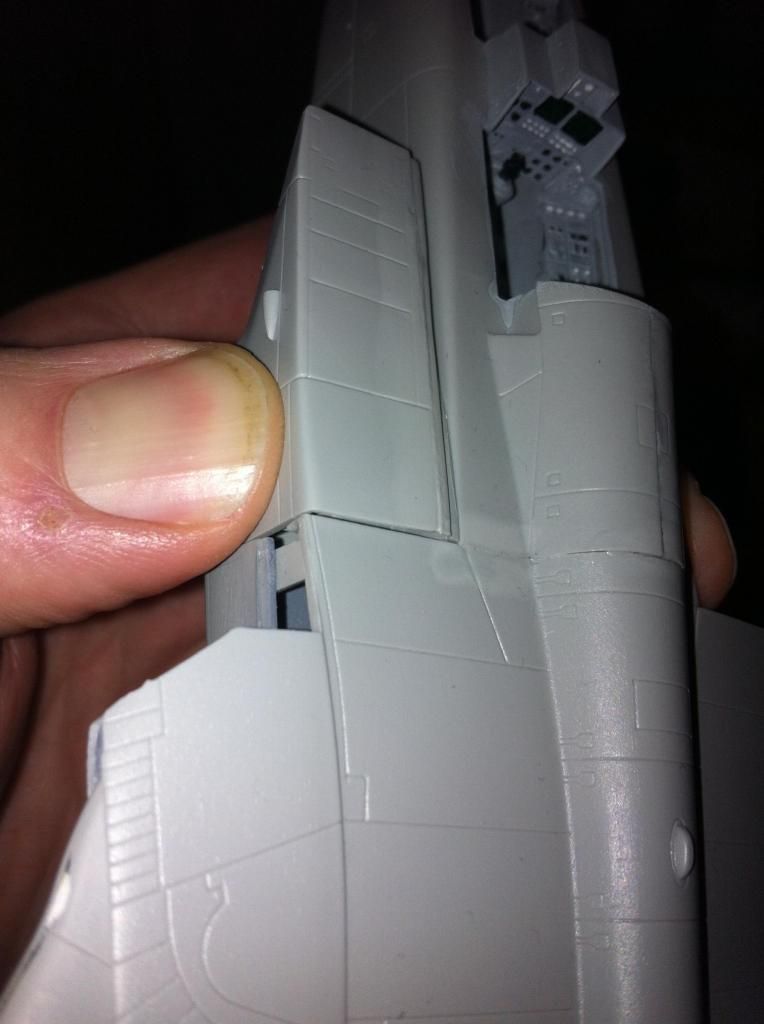
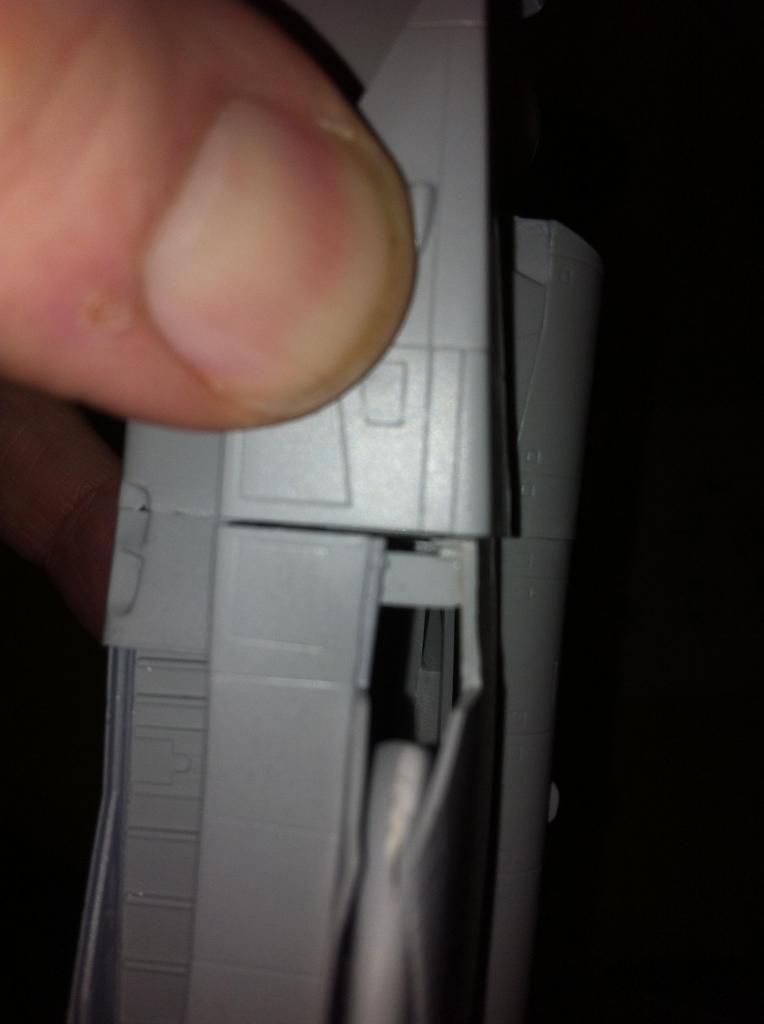
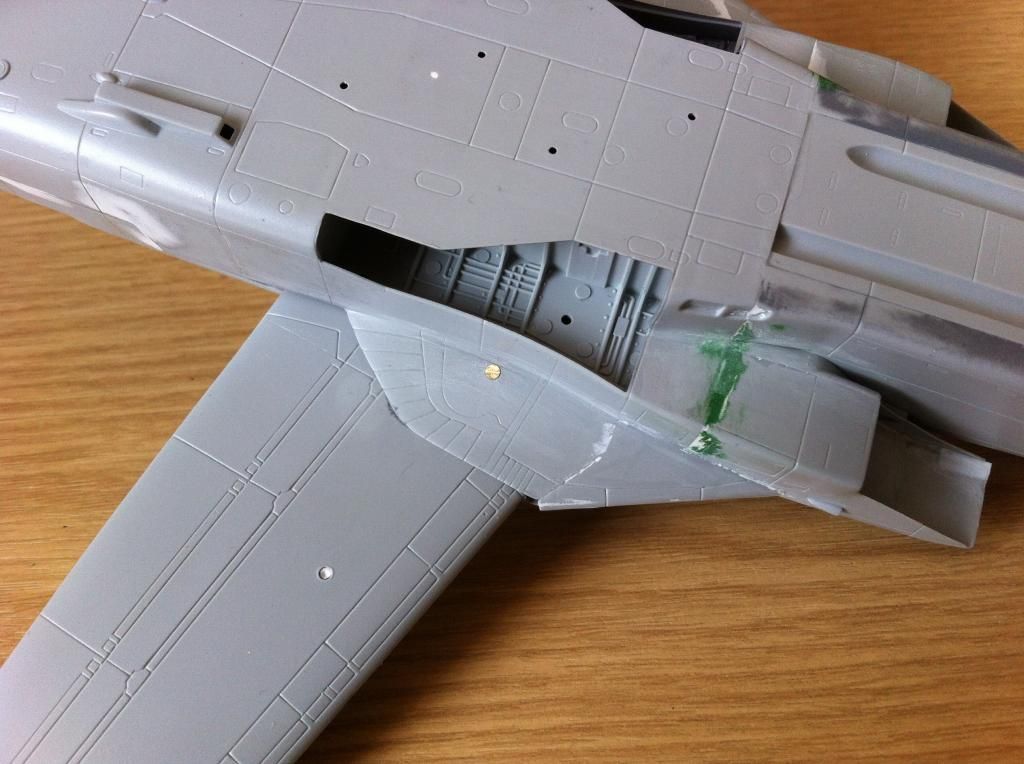
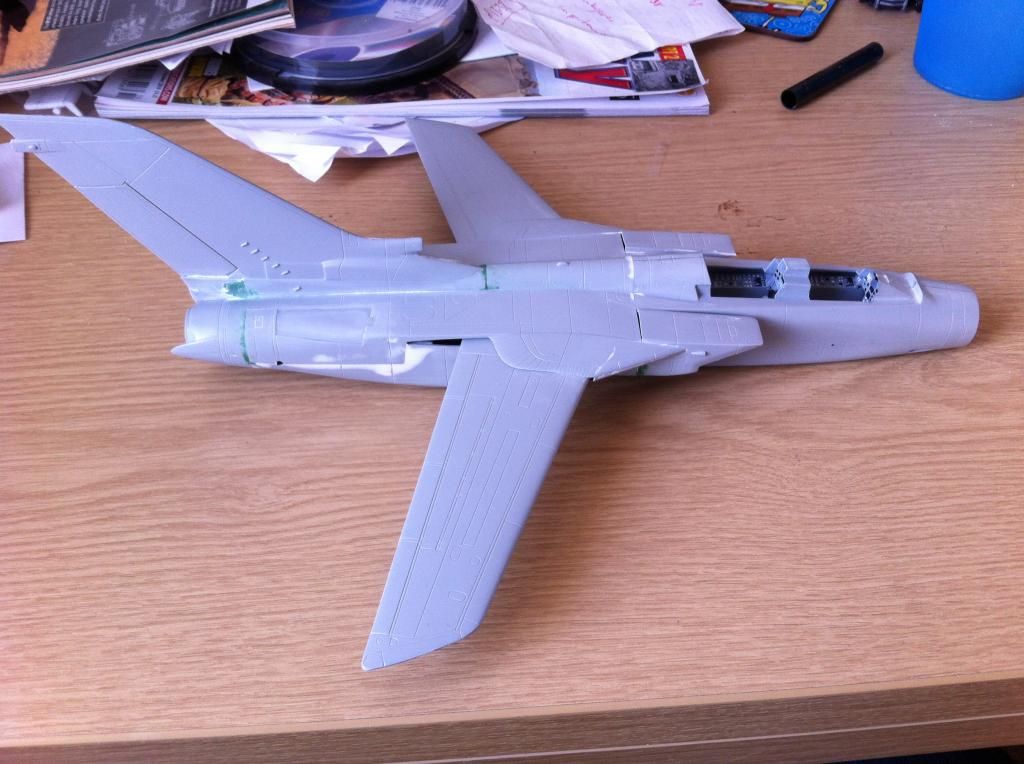
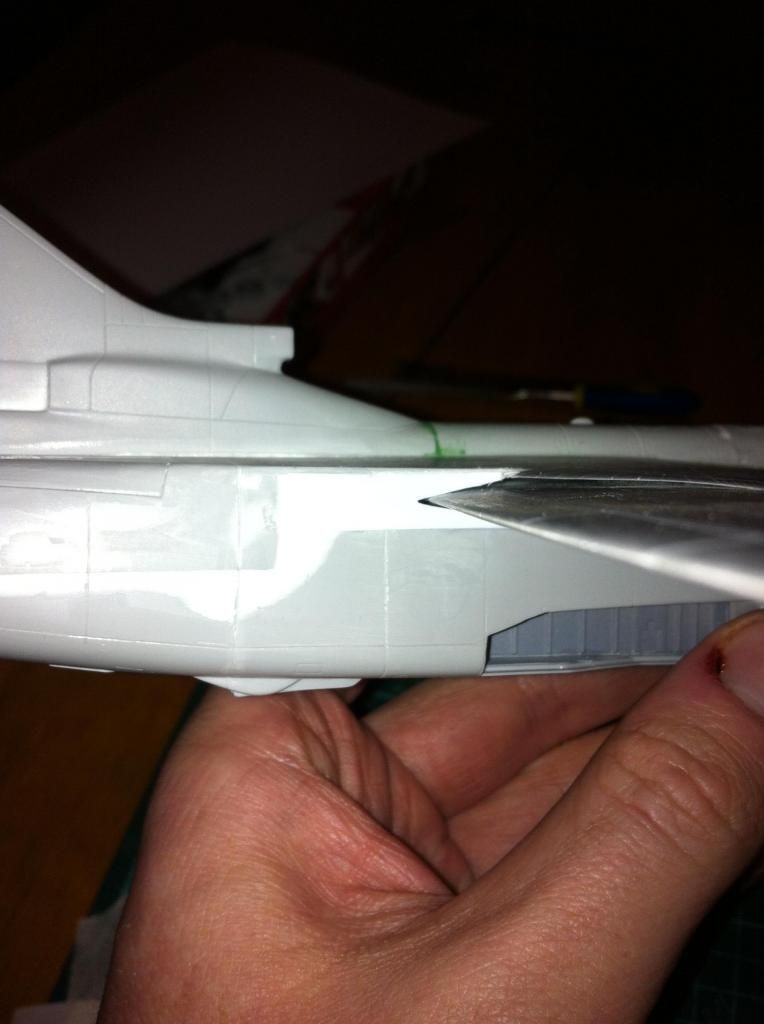
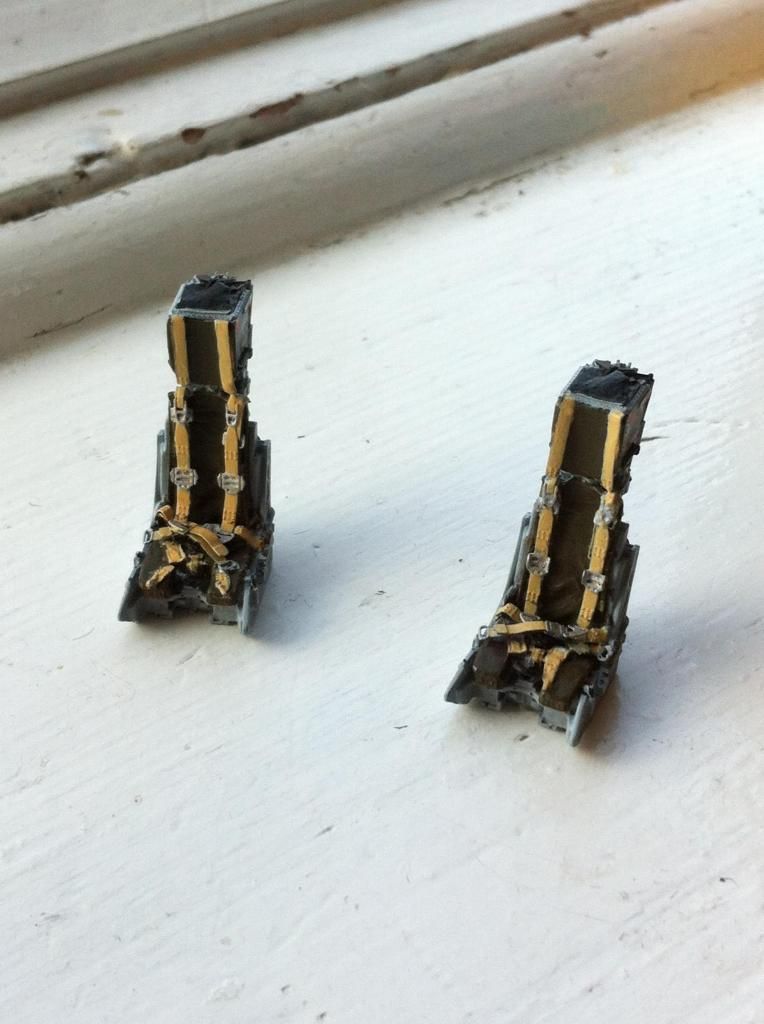
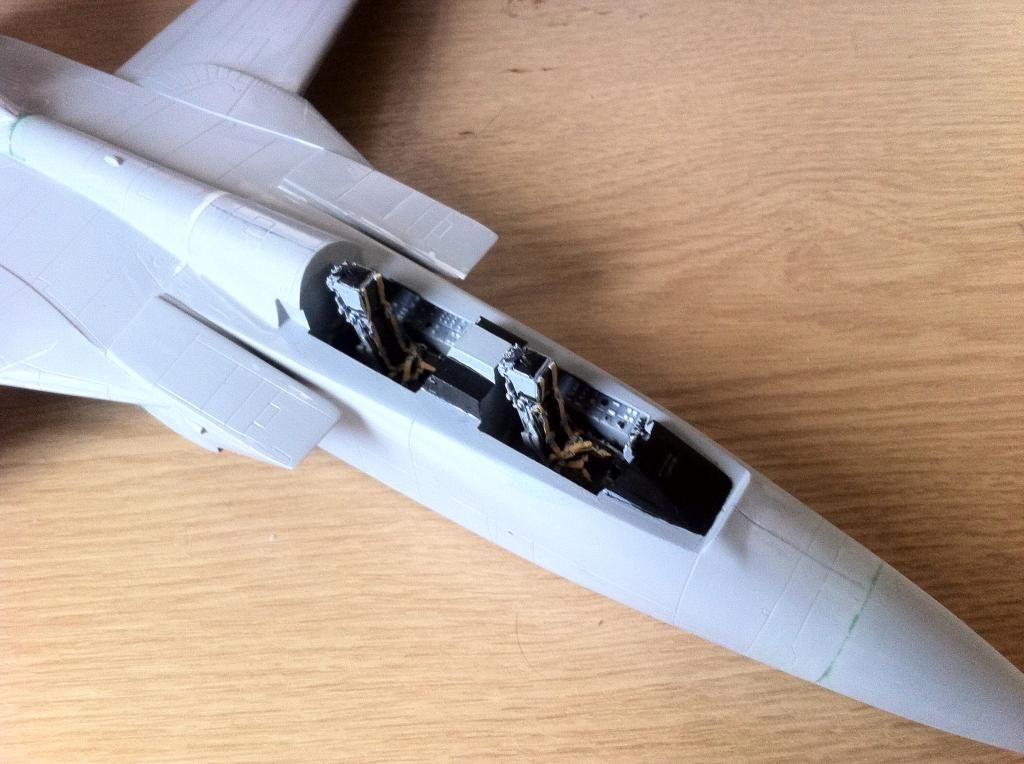
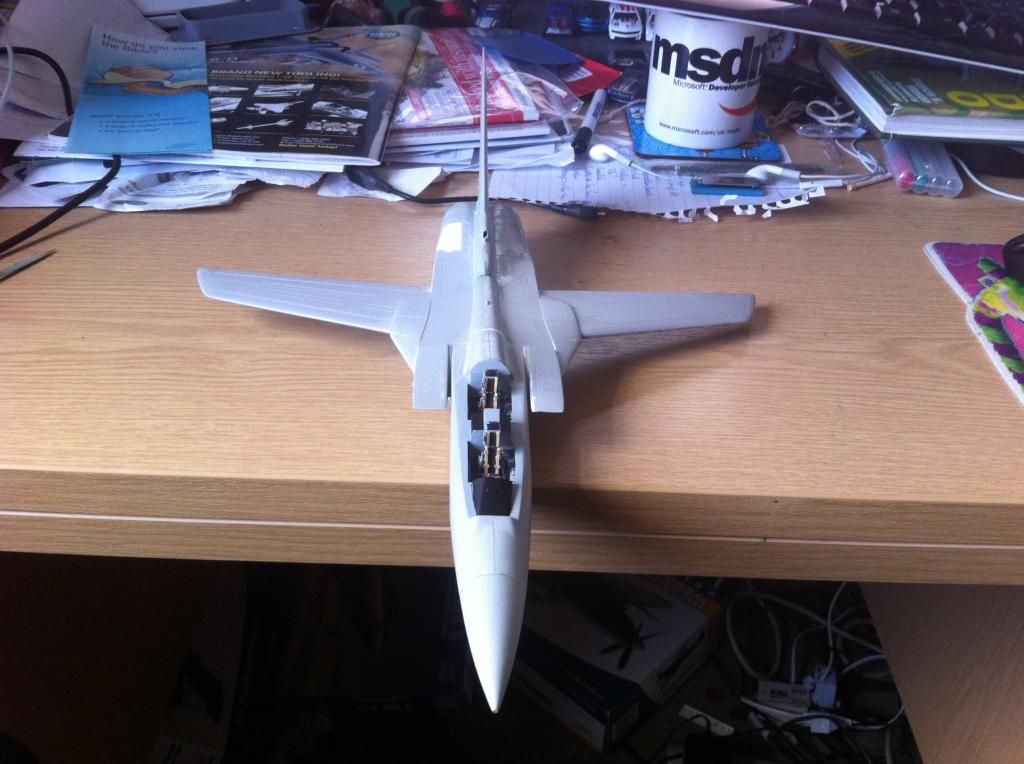
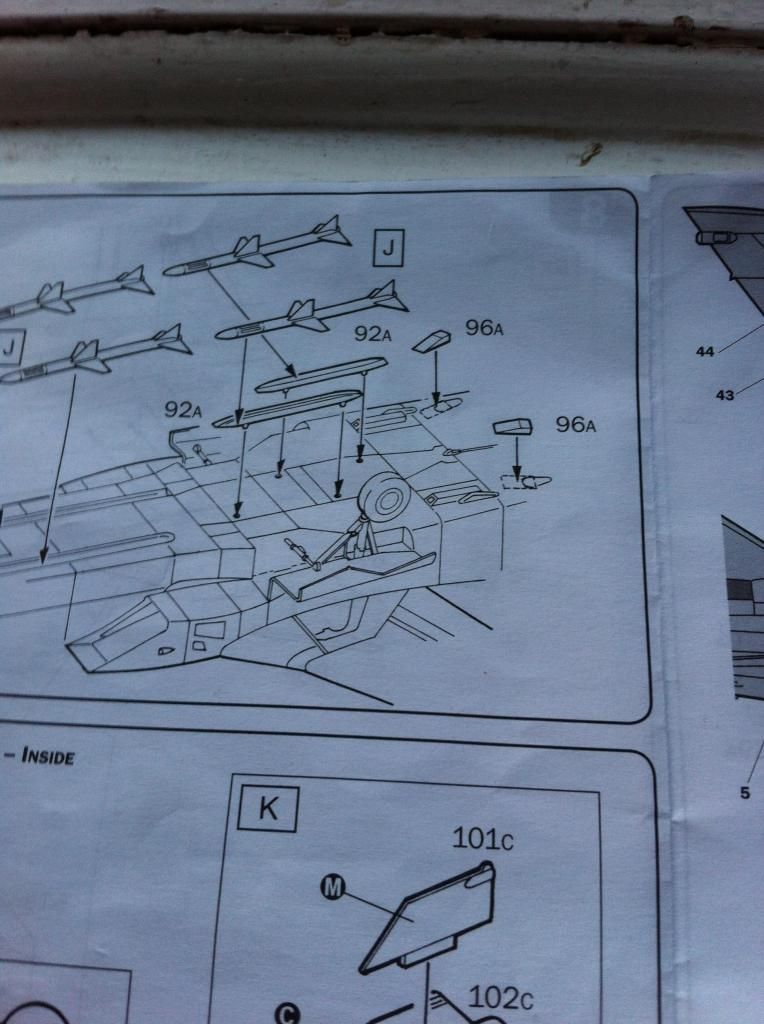
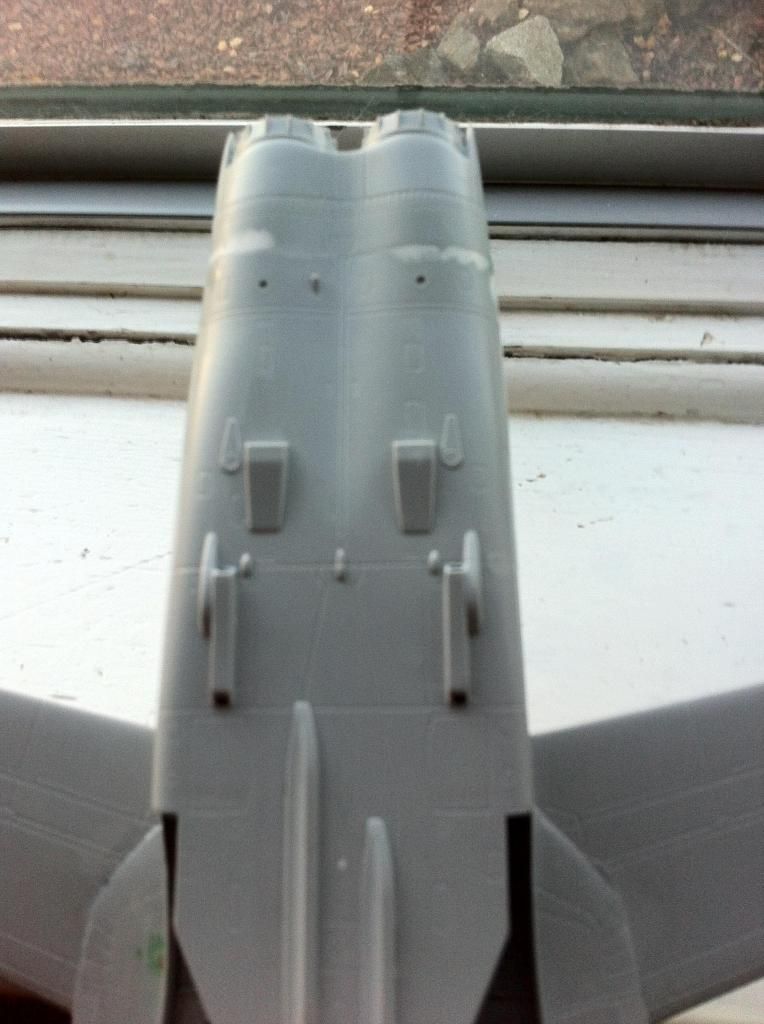
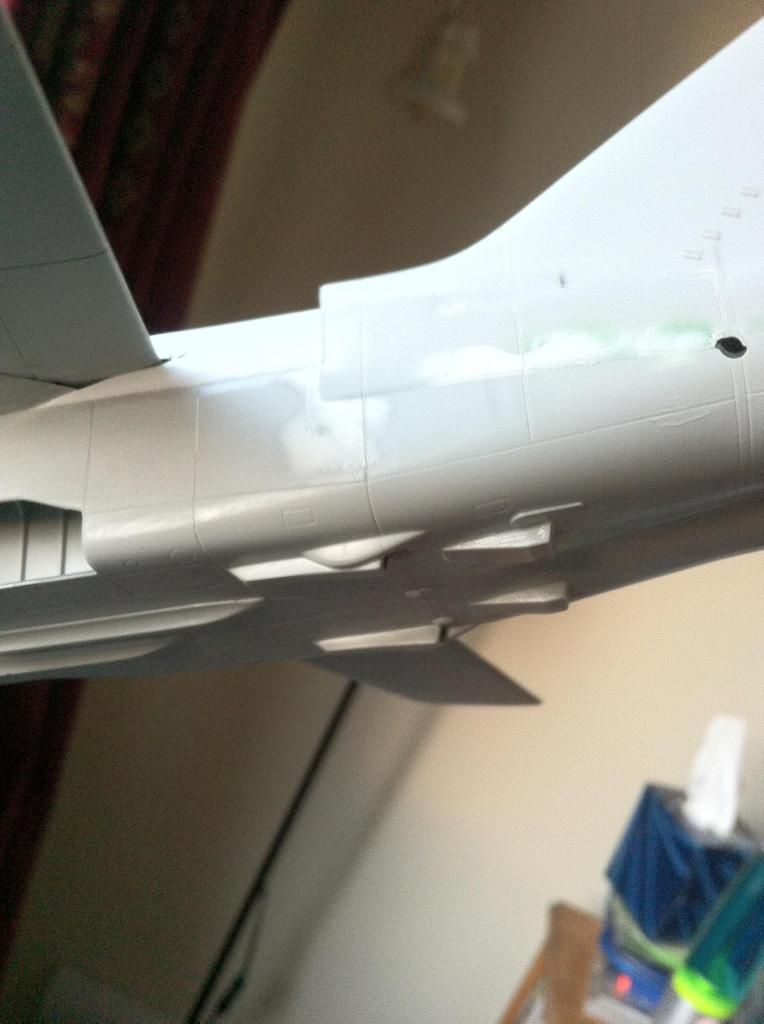
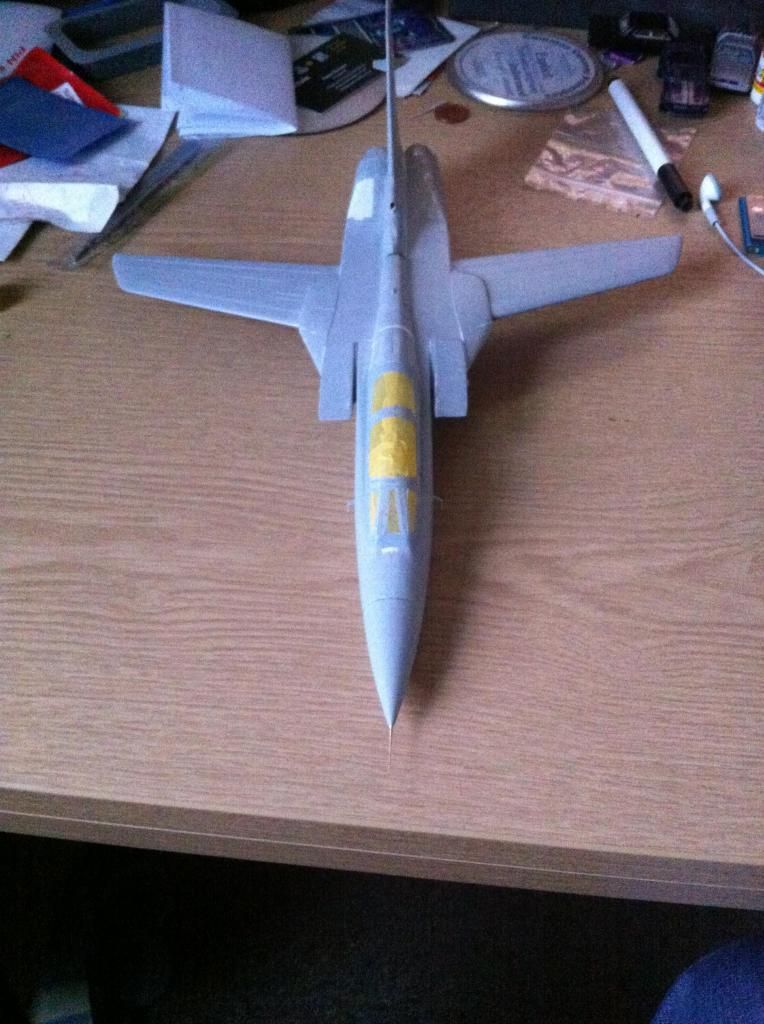
As you can see I have a reasonable chunk the body done I just have to mate it all together. I have some Aires seats to fit and I have a metal probe set as I knew I was guaranteed to snap them :bash:

I have read that there are a few interesting fit issues with this kit and I did have a real interesting time with the cockpit - gaps everywhere - although I did manage to fill them. One of the reasons I relegated it to the shelf!

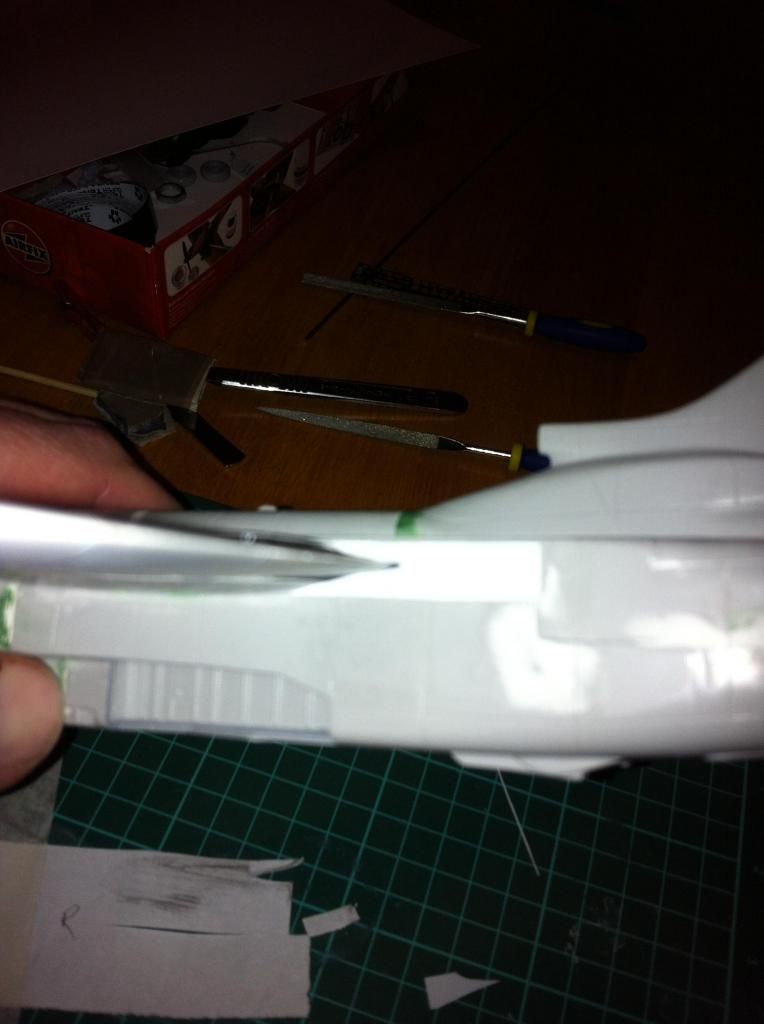
Here's hoping I can get it put together reasonably well as it was meant to be one of the centrepieces of my set of 111 Squadron planes.
IMG_0873.JPG
IMG_0875.JPG

About the Tornado F3

From Wikipedia

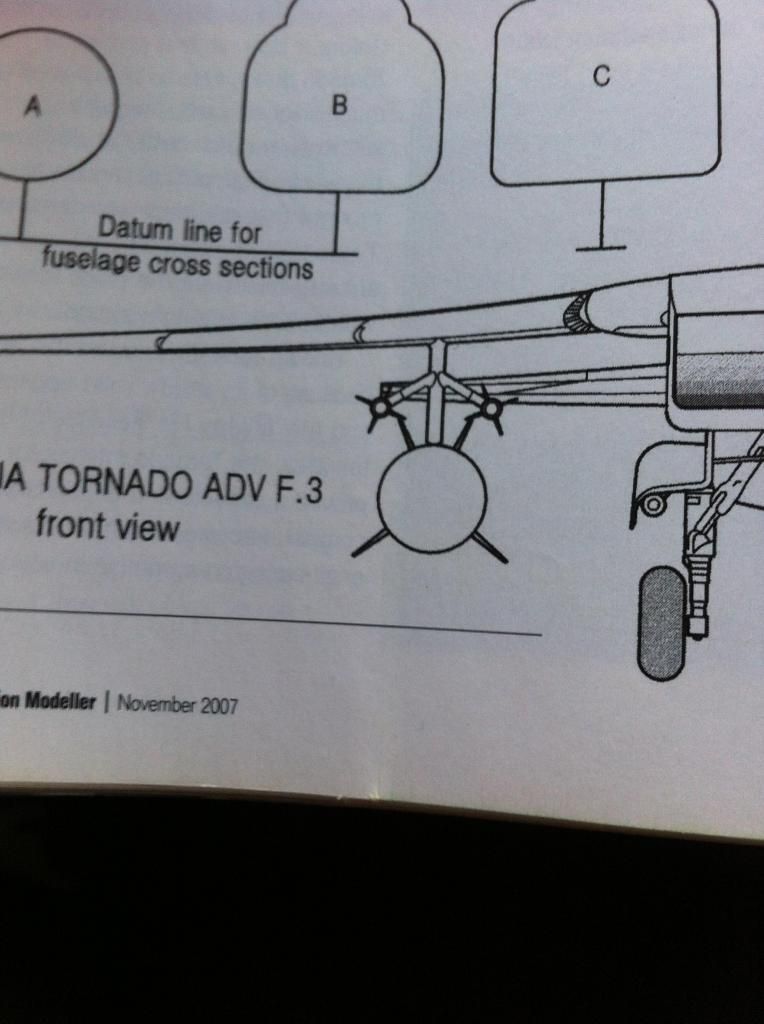
The Panavia Tornado Air Defence Variant (ADV) is a long-range, twin-engine interceptor version of the swing-wing Panavia Tornado. The aircraft's first flight was on 27 October 1979, and it entered service in 1986. It was retired on 22 March 2011 by the Royal Air Force, and is currently in service only with the Royal Saudi Air Force. It was also previously operated by the Italian Air Force.

The aircraft was originally designed to intercept Soviet bombers if they came in from the East to strike the United Kingdom. The Tornado ADV for the Royal Saudi Air Force were produced to F3 standard. Both the RAF and RSAF have or are replacing the Tornado ADV with the Eurofighter Typhoon.

The Tornado ADV had its origins in an RAF requirement (Air Staff Requirement 395 or ASR.395), which called for a long-range interceptor to replace the Lightning F6 and Phantom FGR2. The requirement for a modern interceptor was driven by the threat posed by the large Soviet long-range bomber fleet, in particular the supersonic Tupolev Tu-22M. From the beginning of the Tornado IDS's development in 1968, the possibility of a variant dedicated to air defence had been quietly considered; several American aircraft had been evaluated but found to be unsuitable. The concept was not attractive to other European partners, thus UK proceeded alone; development of the Tornado ADV was approved on 4 March 1976, with British Aerospace (BAe, now BAE Systems) to provide 3 prototypes.

The first prototype was rolled out at Warton on 9 August 1979, before making its maiden flight on 27 October 1979. The second and third development aircraft made their first flights on 18 July and 18 November 1980, respectively. During the flight testing, the ADV demonstrated noticeably superior supersonic acceleration to the IDS, even while carrying a full weapons loadout. The testing of the prototypes was greatly aided by the use of real-time telemetry being broadcast back to ground technicians from aircraft in flight. The third prototype was primarily used in the testing of the new Marconi/Ferranti AI.24 Foxhunter airborne interception radar.

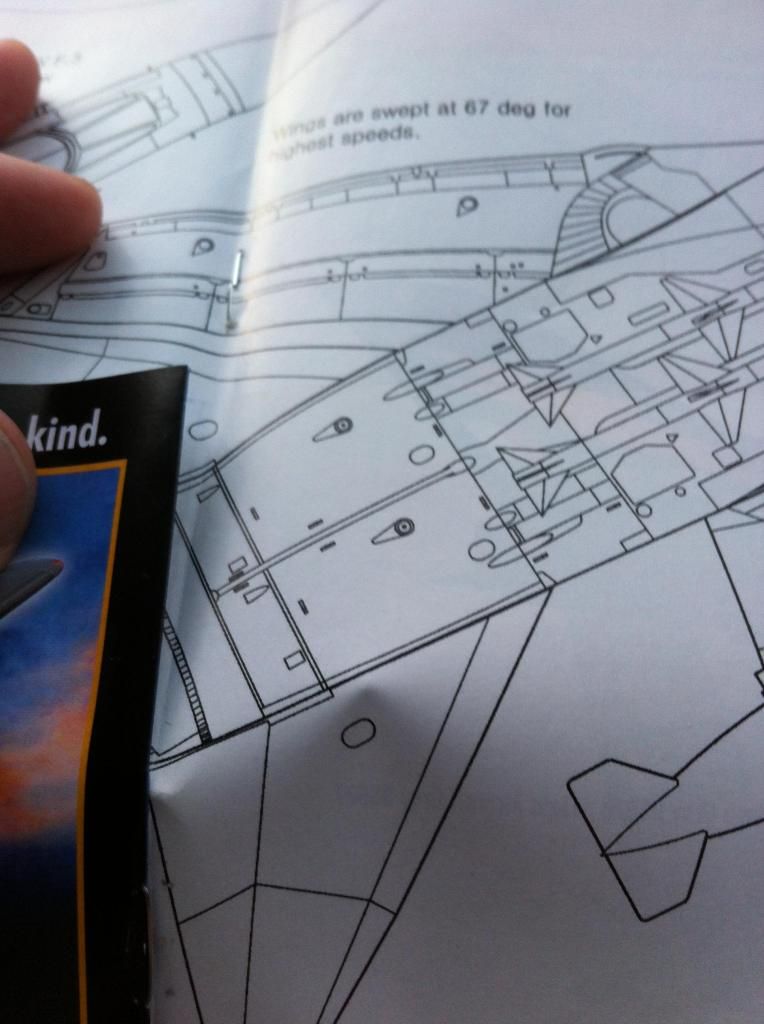
The Tornado ADV's differences compared to the IDS include a greater sweep angle on the inboard fixed wing sections, deletion of the Krueger flaps and the port cannon, a longer radome for the Foxhunter radar, and a fuselage stretch of 1.36 m to allow the carriage of four Skyflash semi-active radar homing missiles. The stretch was applied to the Tornado front fuselage being built by the UK, with a plug being added immediately behind the cockpit, which had the incidental benefit of reducing drag and making space for an additional fuel tank (Tank '0') carrying 200 imperial gallons (909 L; 240 U.S. gal) of fuel. The artificial feel of the flight controls was lighter on the ADV than on the IDS. Various internal avionics, pilot displays, guidance systems and software also differed; including an automatic wing sweep selector not fitted to the strike aircraft.

The Tornado F2 (sometimes written as F.2) was the initial version of the Tornado ADV in Royal Air Force service, with 18 being built. It first flew on 5 March 1984 and was powered by the same RB.199 Mk 103 engines used by the IDS Tornado, capable of four wing sweep settings, and fitted to carry only two underwing Sidewinder missiles. Serious problems were discovered with the Foxhunter radar, which meant that the aircraft were delivered with concrete and lead ballast installed in the nose as an interim measure until they could be fitted with the radar sets. The ballast was nicknamed Blue Circle, which was a play on the Rainbow Codes nomenclature, and a British brand of cement called Blue Circle.

A total of 165 Tornado ADVs were ordered by Britain, the majority being the Tornado F3.

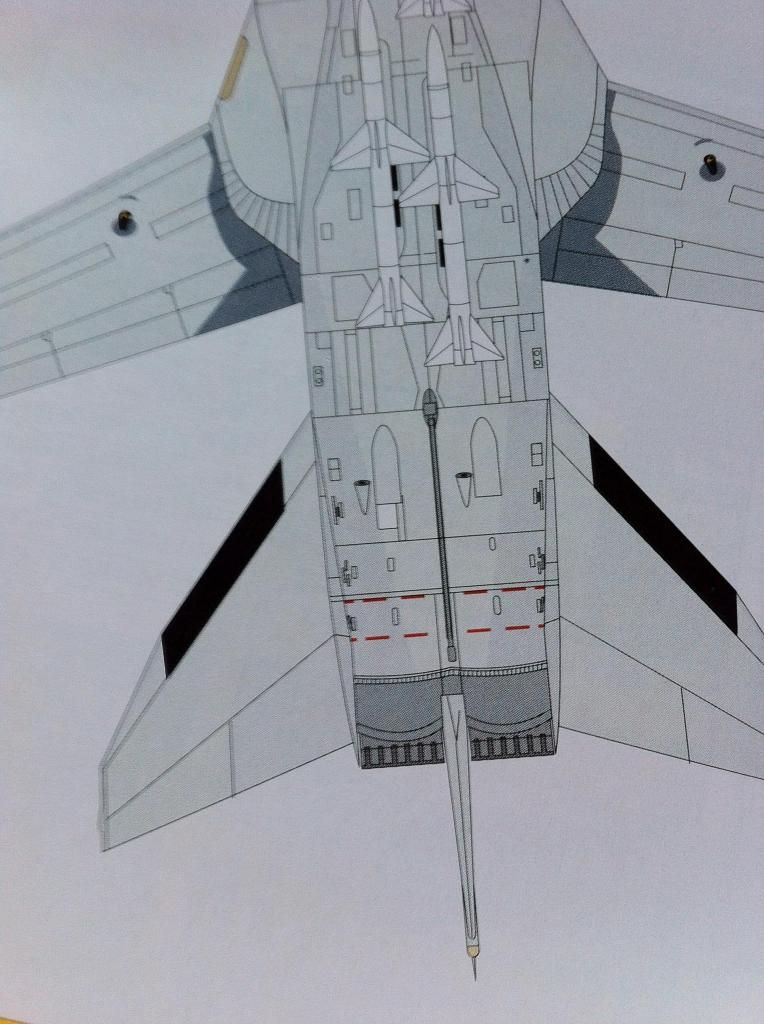
The Tornado F3 made its maiden flight on 20 November 1985. Enhancements over the F2 included RB.199 Mk 104 engines, which were optimised for high-altitude use with longer afterburner nozzles, the capacity to carry four underwing Sidewinder missiles rather than two, and automatic wing sweep control. The F3's primary armament when it was introduced into service was the short-range Sidewinder and the medium-range Skyflash missiles, a British design based on the American AIM-7 Sparrow.

In order to maintain the Tornado F3 as an effective platform up to its planned out-of-service date of 2010, the Ministry of Defence initiated the Capability Sustainment Programme (CSP). This project, announced on 5 March 1996, involved many elements, including the integration of ASRAAM and AMRAAM air-to-air missiles, and radar upgrades to improve multi-target engagement. Additionally, pilot and navigator displays would be improved, along with the replacement of several of the onboard computer systems. The CSP would see the removal of a non-standard state of aircraft; various upgrades, in particular to the Foxhunter radar, had led to a situation described as "fleets within fleets." The Foxhunter radar was a source of difficulties in the upgrade programme, in particular the integration of the new AMRAAM missile.

The Tornado F3 was not able to exploit the full capabilities of either the AMRAAM or ASRAAM missiles. AMRAAM uses two mid-course updates after launch to refresh target information prior to its own seeker taking over, however the CSP did not include the datalink to provide this capability, as it was considered to be too expensive. In addition, the ASRAAM was not fully integrated, which prevented the full off-boresight capability of the missile being exploited. On 8 June 2001, the MoD signed a contract for a further upgrade to the F3 force to allow these midcourse updates. The upgrade to give full AMRAAM capability, together with updated IFF, known as the AMRAAM Optimisation Programme (AOP) was incorporated in the remaining F3 fleet between December 2003 and September 2006.

A further upgrade, disclosed in early 2003, was the integration of the ALARM anti-radiation missile to enable several Tornado ADVs to conduct suppression of enemy air defence (SEAD) missions. The F3's existing radar warning receivers formed the basis of an Emission Location System (ELS), which can be employed to detect and locate operational radar systems in the aircraft's vicinity. These modified aircraft were re-designated Tornado EF3 and operated by No. 11 Squadron RAF.

Image

The Tornado ADV was designed to serve in the role of an interceptor against the threat of Soviet bombers, rather than as an air superiority fighter for engaging in prolonged air combat manoeuvering with various types of enemy fighters. In order to perform its anti-bomber primary mission, it was equipped with long range beyond visual range missiles such as the Skyflash, and later the AMRAAM; the aircraft also had the ability to stay aloft for long periods and remain over the North Sea and Northern Atlantic in order to maintain its airborne patrol. The Ministry of Defence acknowledged the Tornado ADV was not significantly superior as an aircraft to the Phantoms it had replaced in the air-defence role, however the capability of its weapon systems was a dramatic improvement; in particular the radar and onboard computer facilities. Compared with the Phantom, the ADV had greater acceleration, twice the range and loiter time, and was more capable of operating from short 'austere' air strips.

The Tornado's advanced avionics meant it could be more effective than previous British interceptors like the Lightning. While older aircraft were reliant on a network of ground-based radar stations, the onboard Foxhunter radar was capable of performing much longer and wider scans of surrounding airspace; the Tornado could track and engage targets at far greater distances. The Tornado also had the ability to share its radar and targeting information with other aircraft via JTIDS Link 16 and was one of the first aircraft to have a digital data bus, used for the transmission of data between onboard computers.


111 Squadron

From raf.mod.uk

Image

Formed at Dier-el-Belah, Palestine on 1 August 1917 as the first dedicated fighter squadron in the region, its two main tasks were to restrict enemy reconnaissance flights and counter the increasing German fighter threat over the Suez. The Squadron flew a variety of types available including Bristol Scouts, Monoplanes and Fighters, DH2s and SE5s until standardising on the latter type in 1918. As the tide of the War turned, the unit started ground-attack patrols and such was the pilot's skill, that the Squadron was able to turn the Turkish retreat into a rout. 'Treble One' withdrew to Egypt after the end of the War and was renumbered No 14 Squadron in February 1920. 1 October 1923, saw 111 Squadron reform, this time at Duxford, but again with a variety of types namely Grebes, Snipes and Siskins, the latter eventually equipping the whole Squadron until the arrival of Bulldogs in 1931.

Five years later, No 111 received Gladiators, and in January 1938 the unit had the distinction of becoming the first Hurricane squadron. The Squadron flew as part of both Nos 11 and 12 Groups during the Battle of Britain and replaced its Hurricanes with Spitfires in April 1942. In November the unit moved to Gibraltar in preparation for Operation Torch - the invasion of North Africa - where it supported the 1st Army through Algeria and Tunisia before moving to Malta in June 1943 to cover the invasion of Sicily. With the Allies advancing through Italy, No 111 moved with them, remaining there until after the cessation of hostilities when it moved to Austria. It was disbanded May 1947 and did not rejoin the RAF's order of battle until December 1953 when it was reformed with Meteors at North Weald.

In 1955 the first Hunters had arrived, and two years later No 111 Squadron was nominated as the official RAF aerobatic team. At first the team, known as the 'Black Arrows', flew five and then nine aircraft until, at the 1958 Farnborough airshow, the Squadron, aided by No 56 Squadron, entered the record books when it successfully looped twenty-two aircraft! In 1961, the unit converted to Lightnings, successive marks staying until 1974 when Phantoms arrived. Following a move from Coningsby to Leuchars, the Squadron re-equipped with ex-Royal Navy Phantoms and these survived until the early 1990s when Tornado F3s became the Squadron mount.

Image
You do not have the required permissions to view the files attached to this post.
Last edited by m0gb0y74 on Mon Oct 13, 2014 6:55 pm, edited 3 times in total.
User avatar
UKguyInUSA
Second Lieutenant
Second Lieutenant
Posts: 3429
Joined: Sun Mar 30, 2014 10:19 pm
Location: New Hampshire, USA formerly Palm Beach, Florida, USA and Leicestershire, UK (until 1999)
Contact:

Re: Italeri 1/48 F3 Tornado

Post by UKguyInUSA »

Well, I for one hope you get back o with it and stick to it, I love the Tornado, and I don't think that I've seen one modeled on here since I joined at the end of March this year? :) :thumb1:
WIP:: Tamiya 1/48 F4U-1A Corsair

Non-WIP::Eduard 1/48 Fokker DVII, Revell 1/32 Arado AR196 and 1/32 BF109G10 Erla,
User avatar
Unit53
Staff Sergeant
Staff Sergeant
Posts: 204
Joined: Wed Oct 09, 2013 4:23 pm
Location: Kent

Re: Italeri 1/48 F3 Tornado

Post by Unit53 »

I do like a Tornado as well, I have intentions of building one too one day but you know how it goes. Good luck with the build and looking forward to seeing this one progress.

:cheers2:
Martin
User avatar
m0gb0y74
Staff Sergeant
Staff Sergeant
Posts: 165
Joined: Thu Feb 06, 2014 10:04 pm
Location: Dumfries, Scotland
Contact:

Re: Italeri 1/48 F3 Tornado

Post by m0gb0y74 »

Here's some comparisons of the Aires seats (left) and the kit seats. As you can see the kit seats a shorter. The tub has a raised area for the seats to sit on so I had to file the Aires seats down to the bottom of the sides so that they would fit. I can now fit them with a small gap between the top of then and the canopy in the navigators position.

It's my first time with etched seat belts and they are soooooo fiddly so any help and advice will be greatly accepted :D

Image

Image

Image

Image

This is both Aires seats and I have started to fit the etch to one of them.

Image
User avatar
Unit53
Staff Sergeant
Staff Sergeant
Posts: 204
Joined: Wed Oct 09, 2013 4:23 pm
Location: Kent

Re: Italeri 1/48 F3 Tornado

Post by Unit53 »

Looks like your doing a great job on those belts already! :th:

Fiddly yes but definitely worth the perseverance as they look the business, keep you the great work...

:cheers2:
Martin
User avatar
m0gb0y74
Staff Sergeant
Staff Sergeant
Posts: 165
Joined: Thu Feb 06, 2014 10:04 pm
Location: Dumfries, Scotland
Contact:

Re: Italeri 1/48 F3 Tornado

Post by m0gb0y74 »

I've just fitted the front and rear halves together. I added some supporting strips of Evergreen to the top joint as I felt it would have been incredibly weak otherwise. They provided some supports at the bottom but not the top!

As you can see the fit is atrocious. It was the same for putting the rear top and bottom together. Loads of filler and filing. I'm not sure how I will deal with these gigantic steps. I was thinking maybe filing them down into a smooth gradient so as to lose the step. I can't immediately see any other way.

Before fitting the bottom onto the front half I stuck some self-adhesive tire balancing weights to the bottom of the cockpit tub. These things are perfect for that sort of thing and they are stamped with their weight. I had some of two different weights (and thus sizes).

To make sure I had enough weight I glued a small old style lead type balancing weight into the nose cone, which I will leave off until near the end so I can check it's not a tail sitter. If I do need some more weight I have some tiny ball-bearings that I bought from a bicycle supplier that I can pour in the nose-cone to add some more weight.

Image

Nice supporting lip(s) at the bottom but none at the top :(

Image

Image

Mount Everest size step at the sides at the bottom :eeek: :eeek:

Image

I added a sqaure of Evergreen to the bottom of the peg on the cross-piece for the wings as when the wings move it comes perilously close to popping out.

Image

Image

Image
Last edited by m0gb0y74 on Tue Oct 14, 2014 12:11 pm, edited 4 times in total.
User avatar
m0gb0y74
Staff Sergeant
Staff Sergeant
Posts: 165
Joined: Thu Feb 06, 2014 10:04 pm
Location: Dumfries, Scotland
Contact:

Re: Italeri 1/48 F3 Tornado

Post by m0gb0y74 »

A quick update on the seats. Turns out I have positioned one of the main strap parts wrongly :(

The top part of the main left and right straps should connect to a point on the back of the seat. The parts are so beeping small and the diagram was not too clear :bash: Oh well - at least the look like ejector seats...

This was the first time I had used my new hold-and-fold tool and perspex photo-etch cutting set I had bought at Dundee model show in August and it certainly makes life way easier.

I have read in a magazine that if you temper the etch by holding it a flame for a second or two it makes it more pliable so I used a tea-light and I have to say it was far easier to bend the etch than it was the last time I used it - I was able to mould and position the seat-belts using my fingertip or the tip of a pair of needle-nose tweezers.

Image

Image
User avatar
m0gb0y74
Staff Sergeant
Staff Sergeant
Posts: 165
Joined: Thu Feb 06, 2014 10:04 pm
Location: Dumfries, Scotland
Contact:

Re: Italeri 1/48 F3 Tornado

Post by m0gb0y74 »

I thought I would take a step back and look at some of the work I had done before this model was put on he shelf.

Image

The rear stabilizer, rather than having separate elevators tilts in its entirety. The kit handles this through the use of a cross-spar. The plastic that attaches the square receiver for the cross-spar peg is incredibly thin and it snapped during trying to fit the rear fuselage halves together.

Image

The same thing happened to the peg on the drop tank mount when fitting the wings together :evil: :evil:

Image

Image

After this pair of disasters I went and bought some 2mm brass rod. I drilled out some placement holes in the rear stabilizers and glued a piece of rod to one of them. This cloud actually turned out to have a silver lining :banana: I can fit the stabilizers to the model at the end after I have finished painting it. There will be no hassle making sure the entire rear fuselage is painted so there are no bare patches when the stabilizers tilt.

Image

I plan to use brass rod so solve the problem with the drop-tank wing mounts. It will mean I will be able to remove them for safe transport or storage :-)

As for the fit :bash: :bash: :bash: :bash:

Fitting the top and bottom rear fuselage halves together left a step the size of the white cliffs of dover - much the same as I described above for fitting the front to the back. I solved the problem with a lot of filler and copious amounts of sanding.

Image

The other issue was that the top and bottom halves for the hole for the rear stabilizer don't match up.

Image

Luckily as I am using brass rod and its a pretty tight fit this isn't much of an issue but it would have been for the original mounts.

Alignment seems to be a real problem across the board on this kit. Half the panel lines seem not to match up. I make sure all the part edges align correctly and then half of the panel lines are off. Sometimes its only a little bit and sometimes a very noticeable amount. I'm going to sort out some, but in the case of underneath the cockpit tub I will take a look at the real thing and some plans to see what, if anything I will do.

Image

Don't get me wrong, I'm enjoying building this kit, but it certainly doesn't make itself :wall:
User avatar
UKguyInUSA
Second Lieutenant
Second Lieutenant
Posts: 3429
Joined: Sun Mar 30, 2014 10:19 pm
Location: New Hampshire, USA formerly Palm Beach, Florida, USA and Leicestershire, UK (until 1999)
Contact:

Re: Italeri 1/48 F3 Tornado

Post by UKguyInUSA »

Sweet! You did decide to make a start on her :) Looking forward to seeing this progress! :thumb1:
WIP:: Tamiya 1/48 F4U-1A Corsair

Non-WIP::Eduard 1/48 Fokker DVII, Revell 1/32 Arado AR196 and 1/32 BF109G10 Erla,
User avatar
m0gb0y74
Staff Sergeant
Staff Sergeant
Posts: 165
Joined: Thu Feb 06, 2014 10:04 pm
Location: Dumfries, Scotland
Contact:

Re: Italeri 1/48 F3 Tornado

Post by m0gb0y74 »

More tales of woe :x

I had heard the intakes had nasty fit problems on this kit and was not to be let down. I'll let the pictures speak for themselves. I think I will try and separate the front from the back at the top and raise the rear top slightly and attempt to get a better fit. So much for the spacers that were supplied for keeping the gap between the top and bottom of the front of the rear part the correct size.

Image

Image

Image

Image
User avatar
m0gb0y74
Staff Sergeant
Staff Sergeant
Posts: 165
Joined: Thu Feb 06, 2014 10:04 pm
Location: Dumfries, Scotland
Contact:

Re: Italeri 1/48 F3 Tornado

Post by m0gb0y74 »

After a quick bit of research it seems that all the posts I have seen complaining about the intake fit are in error :jd:

There should be a step at the back of the intakes :banana: :cheers2: :banana: :cheers2: :banana:

You get a perfect view at about 0:52

[youtube]MW140MeHvsU[/youtube]

Image
User avatar
UKguyInUSA
Second Lieutenant
Second Lieutenant
Posts: 3429
Joined: Sun Mar 30, 2014 10:19 pm
Location: New Hampshire, USA formerly Palm Beach, Florida, USA and Leicestershire, UK (until 1999)
Contact:

Re: Italeri 1/48 F3 Tornado

Post by UKguyInUSA »

Apart from some of the fit issues, she's starting to take shape....look forward to seeing you get some clothes on this baby! :)
WIP:: Tamiya 1/48 F4U-1A Corsair

Non-WIP::Eduard 1/48 Fokker DVII, Revell 1/32 Arado AR196 and 1/32 BF109G10 Erla,
User avatar
m0gb0y74
Staff Sergeant
Staff Sergeant
Posts: 165
Joined: Thu Feb 06, 2014 10:04 pm
Location: Dumfries, Scotland
Contact:

Re: Italeri 1/48 F3 Tornado

Post by m0gb0y74 »

Had a near disaster on my hands :bash:

While holding the model I snapped one of the (as I was to find out) weak wing pegs. Luckily I could see the outline of the attachment point on the outside of the model. I drilled a hole through the body and then filled in the hole in the wing with sprue and after letting it cure overnight I drilled through that. I was then able to position the wing and put a piece of 2mm brass rod through the body and wing and superglue the peg in place. It was the only option I had as there was no way I was going to try and start pulling the body apart at this late stage of the game.

Image

Just thought I'd share my thoughts and findings about fillers. I now only use Squadron green filler and Deluxe's Perfect Plastic Putty. I use the squadron filler to fill large gaps and smooth over steps. Deluxe's putty is too soft for this. I fill in small gaps with Deluxe's putty as it is superb for that and you can wash away the excess with a dampened cotton wool bud. I sometimes also use a thin layer over the Squadron putty after I have sanded it down as it makes a much smoother finish.

It's now beginning to look more like a plane :-)

Image
User avatar
m0gb0y74
Staff Sergeant
Staff Sergeant
Posts: 165
Joined: Thu Feb 06, 2014 10:04 pm
Location: Dumfries, Scotland
Contact:

Re: Italeri 1/48 F3 Tornado

Post by m0gb0y74 »

I have decided that I want to have the wings open fully. This leaves a lovely gap in the fuselage behind them. I noticed that the Eduard etch kit has a set of covers to represent the soft covers over the gap on the real thing. As I'm too cheap to shell out £12 to only use 2 of the pieces of the set I decided to make some myself.

I taped a bit of paper over the gap and used a pencil to 'rub' the outline on the gaps. I then used this rubbing to fashion a couple of covers from really thin plasticard. I think the experiment was successful.

Image

Image

Image
User avatar
m0gb0y74
Staff Sergeant
Staff Sergeant
Posts: 165
Joined: Thu Feb 06, 2014 10:04 pm
Location: Dumfries, Scotland
Contact:

Re: Italeri 1/48 F3 Tornado

Post by m0gb0y74 »

Just a small update. The ejection seats are now finished and fitted. This would have been done last week if some muppet had realised earlier that he didn't have the correct paint for the seat :wall:

While fiddly to fit the etched harness straps do add a real busy look that the seat does have. I am very impressed with them. I'm glad I decided to give them a go rather than using the supplied seats.

Image

I found this superb picture of the real thing. It's a pity I didn't have decals for all the stencilling

Image

Just a quick note on the air brakes. I was a little too quick gluing these in place. If I had been more patient and dry fitted them more carefully I would have realised that I would have been better to fit some shims to make them sit properly in the closed position. :doh: As I didn't bother doing this the right-side one sat too low into the body. I rectified this by building up layers of filler and then sanding it back to the correct shape and height.

Note to self: be more patient and thorough (yeah right I'll forget that in the next 10 seconds :lol: )
User avatar
UKguyInUSA
Second Lieutenant
Second Lieutenant
Posts: 3429
Joined: Sun Mar 30, 2014 10:19 pm
Location: New Hampshire, USA formerly Palm Beach, Florida, USA and Leicestershire, UK (until 1999)
Contact:

Re: Italeri 1/48 F3 Tornado

Post by UKguyInUSA »

Nice job on those ejector seats mate! :) :thumb1: :thumb1:
WIP:: Tamiya 1/48 F4U-1A Corsair

Non-WIP::Eduard 1/48 Fokker DVII, Revell 1/32 Arado AR196 and 1/32 BF109G10 Erla,
User avatar
m0gb0y74
Staff Sergeant
Staff Sergeant
Posts: 165
Joined: Thu Feb 06, 2014 10:04 pm
Location: Dumfries, Scotland
Contact:

Re: Italeri 1/48 F3 Tornado

Post by m0gb0y74 »

I swear this kit is fighting me at every step :crazy:

Recently after a couple of bad experiences with Future when using it as a gloss cote to ready a model for decalling, I switched to Humbrol Clear and I've had a great experience with it - until now that is! I brushed some on the canopy and left it to dry. It seemed to have pulled together slightly as it dried and I had 'tide' lines. I dropped the canopy in a jar filled with Mr Muscle degreaser overnight and then used a tooth brush and removed the lot. I tried again and it seemed to go on smoother. After about 3 hours I put another coat on, and the next day it still hadn't cured completely. Every time I touched it it left finger prints all over it. Back to the Mr Muscle and toothbrush it went!

Finally, I decided to give future another go as I've not had issues with canopies, and thank god it's worked. :banana:

Three days and a load of hair torn out later I can set to masking it.
User avatar
m0gb0y74
Staff Sergeant
Staff Sergeant
Posts: 165
Joined: Thu Feb 06, 2014 10:04 pm
Location: Dumfries, Scotland
Contact:

Re: Italeri 1/48 F3 Tornado

Post by m0gb0y74 »

I've gotten the canopy masked off. I tried using a tip I had seen somewhere by using an app on my phone that allows me to turn on the camera flash and manage its brightness and then putting the canopy over the top when trimming the tape. It really helped as I could see the framing very clearly. The only problem came when I came to look at the canopy away from the light - I was blind :)

Image

The seats are in the cockpit tub and I've fitted the nose. The nose did need a little bit of filing/sanding to get the fit right. The fit wasn't too bad as there was a locating 'lug' on one side of the nose cone that fits into a receiving hole on the body.

Image

Before gluing the nose I did dry fit the undercarriage to make sure I didn't have a tail sitter. I am a bit concerned abiut the kit parts as the angled-bar on the rear under carriage has a narrow point that already was showing strain after just removing the part from the sprue with clippers. I have had a look at SAC white metal replacements but they don't make any Italeri ones - only Hasegawa and HobbyBoss, so I'll have to do a bit of research to see if one of these sets will do.

She is now looking really nice. I was never a major fan of the shape of the Tornado but I am being drawn to her charms ;)

Image

Image
User avatar
m0gb0y74
Staff Sergeant
Staff Sergeant
Posts: 165
Joined: Thu Feb 06, 2014 10:04 pm
Location: Dumfries, Scotland
Contact:

Re: Italeri 1/48 F3 Tornado

Post by m0gb0y74 »

This build should win the award for the comedy of errors :lol: :lol: :lol:

After gluing the wing pylons together the other day, I've came across a picture of the real thing.

Image

As you can see the missile pylons are at a downward angle rather than 90 degrees to the upright. And guess what I did? Yep, I glued them at 90 degrees to the upright :wall:

Image

In my defence the instructions are not that clear. For the drop-tank they give you a nice little picture to show you the angle of the vanes, but not for the missile pylons.

Image

Needless to say I had to take them back apart and re-glue them at a downward angle.

Image
User avatar
m0gb0y74
Staff Sergeant
Staff Sergeant
Posts: 165
Joined: Thu Feb 06, 2014 10:04 pm
Location: Dumfries, Scotland
Contact:

Re: Italeri 1/48 F3 Tornado

Post by m0gb0y74 »

More on the pylons. :(

I was looking at pictures of a tornado when I notices that the angle of the sidewinder mounts was about 45 degrees downwards. I belatedly remembered I had some plans so I had a look, and low and behold they are at about 45 degrees. I think I will leave mine as is rather than taking them off again and trying to reposition them as they seem to be fixed rock solid,

Image
User avatar
m0gb0y74
Staff Sergeant
Staff Sergeant
Posts: 165
Joined: Thu Feb 06, 2014 10:04 pm
Location: Dumfries, Scotland
Contact:

Re: Italeri 1/48 F3 Tornado

Post by m0gb0y74 »

Chaff dispensers

The instructions are not that clear on positioning the chaff dispensers on the rear underside. What makes it harder is that the drawing bears no resemblance to the model.

Image

And neither does the painting guide

Image

Using the scale plans that I have and a picture of the real thing I think I now have them positioned as reasonably correctly as I can.

Image

Image

Image

Image

Image

Note that in the painting guide, plans and the real thing the tear-drop shapes are to the left of the chaff dispensers. The kit has them placed wrong. So I made the best of what I had and positioned the chaff dispensers in a mirror fashion. I'm sure more dedicated modellers would rectify this but I have enough trouble with the basics :lol:
Last edited by m0gb0y74 on Wed Nov 19, 2014 4:39 pm, edited 2 times in total.
User avatar
m0gb0y74
Staff Sergeant
Staff Sergeant
Posts: 165
Joined: Thu Feb 06, 2014 10:04 pm
Location: Dumfries, Scotland
Contact:

Re: Italeri 1/48 F3 Tornado

Post by m0gb0y74 »

Image

Fitted the canopy and painted the interior colour on it. The fit isn't perfect where the front and rear meet but that may have been partly my fault but I am not too sure.

The metal probe has been fitted as has the pitot tubes on either side of the cockpit.

There are a handful of aerials to fit but I am undecided as to whether I should leave them off until I have painted and decalled the model. :scratch::

Any ideas?
User avatar
m0gb0y74
Staff Sergeant
Staff Sergeant
Posts: 165
Joined: Thu Feb 06, 2014 10:04 pm
Location: Dumfries, Scotland
Contact:

Re: Italeri 1/48 F3 Tornado

Post by m0gb0y74 »

I know I have missed the deadline but I intend to finish the thread so that it's complete.

As per usual I left the painting to the last minute and found out I needed to order paints! Anyway I've got them now so I plan to get going over the next couple of weeks.
Post Reply

Return to “Builds”