Will do it in shorter post this time...as I wrote, lesson learned!
First, this kit is...hmm don't know really how to rate it.
Its not good, and its definitely not bad either.

OK, it requires a bit of work but nothing major, as in You loose interest in it.
Its quite crude, it has lots of faults, some very strange, but it also has tons of potential for those who wants to improve it.
I have chosen to really build it out of the box and just try to do the best of what's given to You.
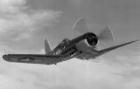
Also this aircraft is still in testing, I believe only three exist and are flying so far.
So my ambition is a nice "model" that represents this (I think) very cool aircraft. So no weathering...nice and clean. (

)
Enough waffle
The HUD is to big, even if You skip the included PE frame for it, its just to big and wont fit under the front canopy.


Made my own to fix it.

This is how the canopy turned out, as I applied the decals I learned that they are thick, very very thick!
I tried both Micro Sol and Mr Softer. It felt like trying to handling small stiff pieces of plasticard.

After about 10-15 rounds of softener they finally succumbed and conformed...
The "wall" on the turtle-deck is a combo of plastic and PE. Its way to high, and prevents the back canopy to sit on the fuse.
I had to file it down a good bit. You can see the grey plastic coming through in the pic.


There are openings front and back in the canopy and in to the fuse, tip: always plug them!
The risk is that paint and dust will be blown in there otherwise...
Made some plasticard patches, painted them black on the inside and sealed it.


The fuse and wings are in one big piece, removed all EP marks to get best fit possible.

The tunnels are quite flimsy and the halves very hard to line up, fortunately You cant see much in there.
Some EPs but they are the type that can be sanded out.


The intakes are one piece. Fit is...naa so and so. This is the result after sanding, test fitting, lots of glue and pushed into place when softened up.
You are left with some sanding and filling to do.


Filled and sanded flush.

Polished and done

Wheel wells are three pieces, all had a good fit!

"Engines" are very simple, intake fans, exhaust fans, exhaust nozzles.

Intake fans painted

Then given a wash and installed.

As I said, cant see much in there...

Cockpit touched up, cleaned and done. Canopy masked.

Glued...I opted to install the IR seeker at the front first, to be able to line everything up since the front canopy is formed to the IR piece.
This took some patience...

The gaps will be taken care of with Vallejo putty later.

Time to put the two lumps together, almost run out of pegs!!

Must be the two biggest pieces I have ever glued in one go, worked my way around with the glue so I could adjust along the way.

Prepping the other pieces...

Canards, fins and elevators on. Starting to look like a T-50


Underside parts on...

Yupp quite a big lump for 1/72, Airfix T.10 Vamp for ref.

Nose part could have been a smart solution, but the fit was poor. Also took of the front bit (don't think its a pitot tube actually) since I will only break it of anyway...


After some melted styrene filler and sanding I was happy.


I had an idea of an in flight bird...one hatch had a nice fit.

But the other did not, it wasn't even moulded in the right shape...


Nose gear is pretty nice and detailed.

Small stuff primed (Badger STYNYLREZ, love it)

Different Vallejo Metal on different pieces.

Then painted

Main gear

Ok, phew, will post the rest (painting) tomorrow!