UPDATE
As i said in my Sci-Fi sig entry, ive been without internet access for over a week, but that didnt stop me grabbing some bench time.
What can i say about deciding to try the Photo-etch, hmm. Frak me this stuffs fiddly! But, in at the deep end/balls deep. etc. etc. 
All that follows is in no particular. lets just say following two sets of instructions at the same time is a pain. the revell are straight forward but the Griffon ones just seem random in the order in which to do things which is completely independent from the revell. So some familiarity with both sets is essential. It pays to take the time to study everything.
After joining the two hull halves, you get an immediate sense of accomplishment because you get an instant feel for the scale of the finished thing, i started on the mid deck etch where the conning tower sits

some really nice detail added forward of the conning tower and around where the 88mm deck gun will sit. I also at this stage decided to remove the portion of deck where the torpedo loading equipment will be fitted.

hatch covers and hinges installed to the rear of the conning tower deck.

had to remove some of the internal support structure to accommodate the PE torpedo loading hatch.

im not gluing the deck down just yet just incase ive missed anything, which to be honest is very likely.


Conning tower halves and upper deck plate joined. Starting to install the PE to the upper deck side walls.


the griffon instructions call for some added detail to the torpedo plotting control which sits on the conning tower.

fiddly!

i cut the kit component into 3 parts in preparation to replace the centre piece with 0.5mm styrene rod onto which i'll rebuild it with the PE parts.

finished piece setting up, i noticed it was a bit squinty after taking this pick, so ammended that before it set up.

while that was setting up, i revisited the hull in order to tend to the seam line running the full length of the hull. it wasnt too bad and was an easy job.


Attack periscope detailing, first time trying to roll PE into shape. In this instance into a cone shape around the mount.

attack periscope in front of the control room periscope, held on my helping hands so they dont get damaged.


Deck gun next. the original kit part for the 8.8cm SK C/35 deck gun. pretty poor looking but we can try and fix that.

quick blurb on the gun taken from the "Warship Pictorial No 27" published by Classic Warships Publishing, now out of print.
"88mm Deck gun.
This was the secondary weapon on a Type VII U-boat, the primary being the torpedo. Although it was the same calibre as the famous German Army weapon, this naval mount was completely different. This gun was a development of the weapon used by the German Navy during the First World War. The fixed ammunition weight was 21 to 22.5 lbs. per round and could fire 16 rounds per minute with a well trained crew. Its main function was to be used against small craft, or finishing off vessels not sunk with a torpedo, saving that weapon for a more valuable target. Range was 13,000 yards, or about 7.4 miles. Both high explosive (HE @ 21 lbs) and armour piercing (AP @ 22.5 lbs) ammunition was available. It was an effective and reliable weapon."
aluminium barrel from griffon, original barrel cut off and drilled out for good contact with the replacement barrel. Gun mount parts also shown.

here i jumped to the 20mm anti aircraft gun that mounts on the winter garden behind the control deck on the conning tower.
another quick blurb from the "Warship Pictorial No 27".
"Anti-aircraft Weapon
20mm MG C30 on a LC30/27 mounting was the initial anti-aircraft weapon fitted on the Type VII U-boats. Rate of fire was 280rpm, with a range of 5.250 yards, or 3 miles. The magazine held 20 or 40 rounds of either HE or AP ammunition, both with tracer. The 20mm was the most widely used German gun in the Navy and was reliable."
original kit parts for the C30.

PE and aluminium barrel with mount shown in place on the winter garden deck.

ive noticed when i get "in the zone" with PE i just charge ahead, so here is the completed guns with all the added PE sitting ready to mount later on.

i took a break at this point to get on with other stuff. So when i sat down next it probably wasnt a good idea to start back with various tinny/fiddly railings.
i had to cut the molded on railings around the conning tower to be replaced by PE ones.


these are the railings around the wintergarden which you form around the supplied template seen above.

long story short i put these aside till i feel more confident.
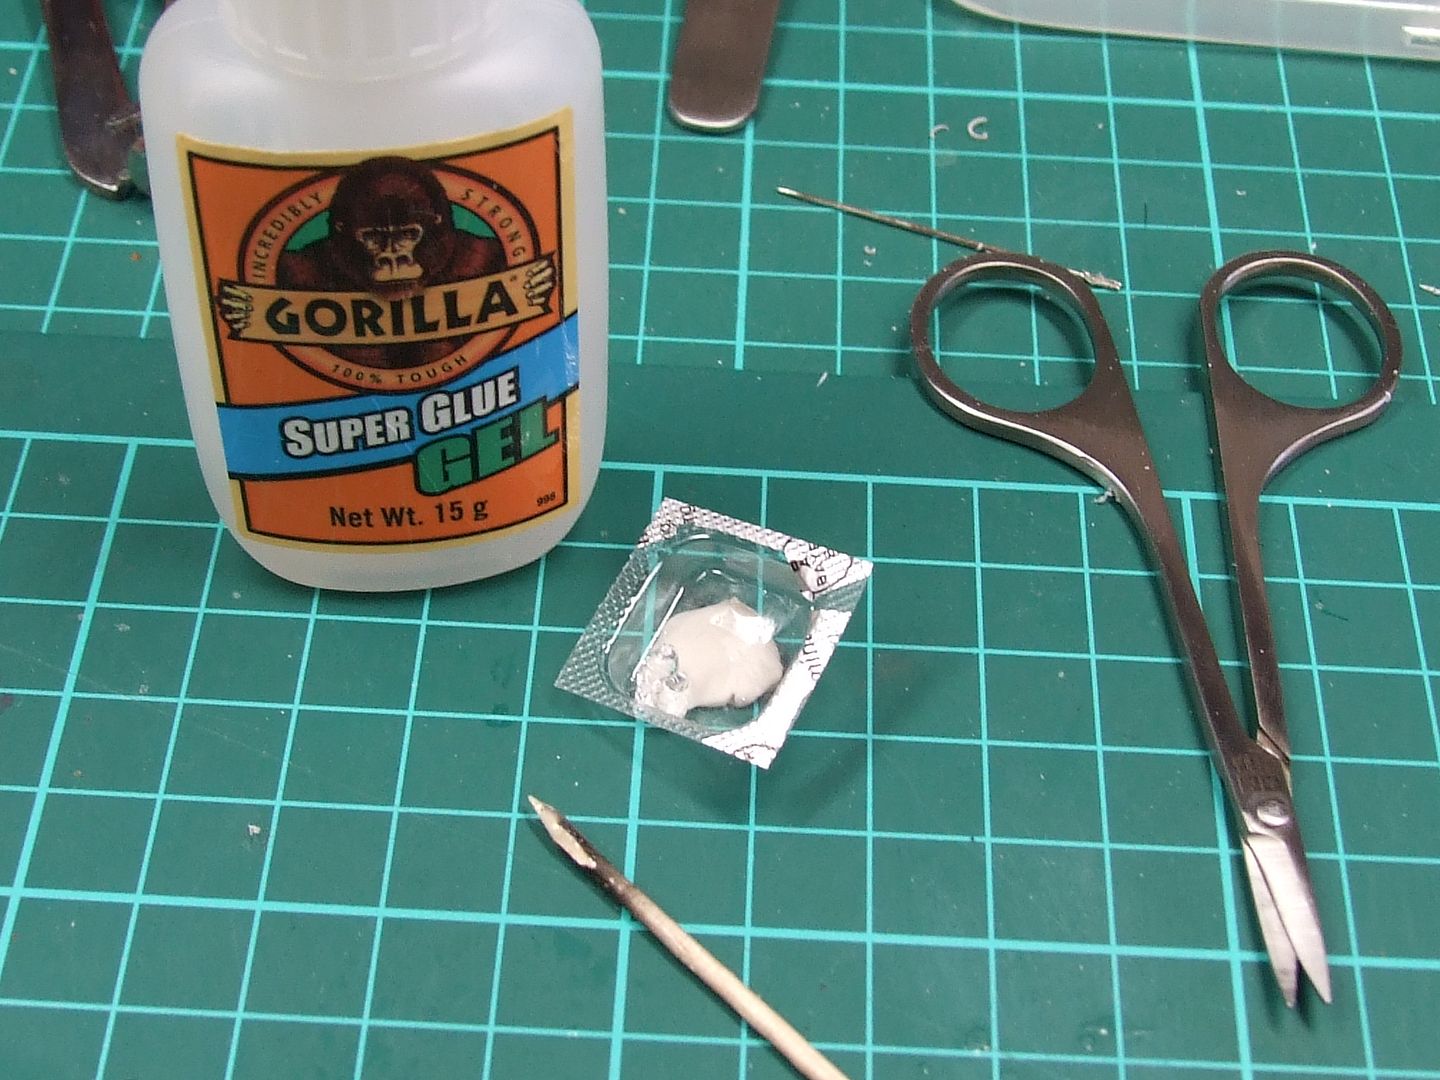
favourite glue at this point.
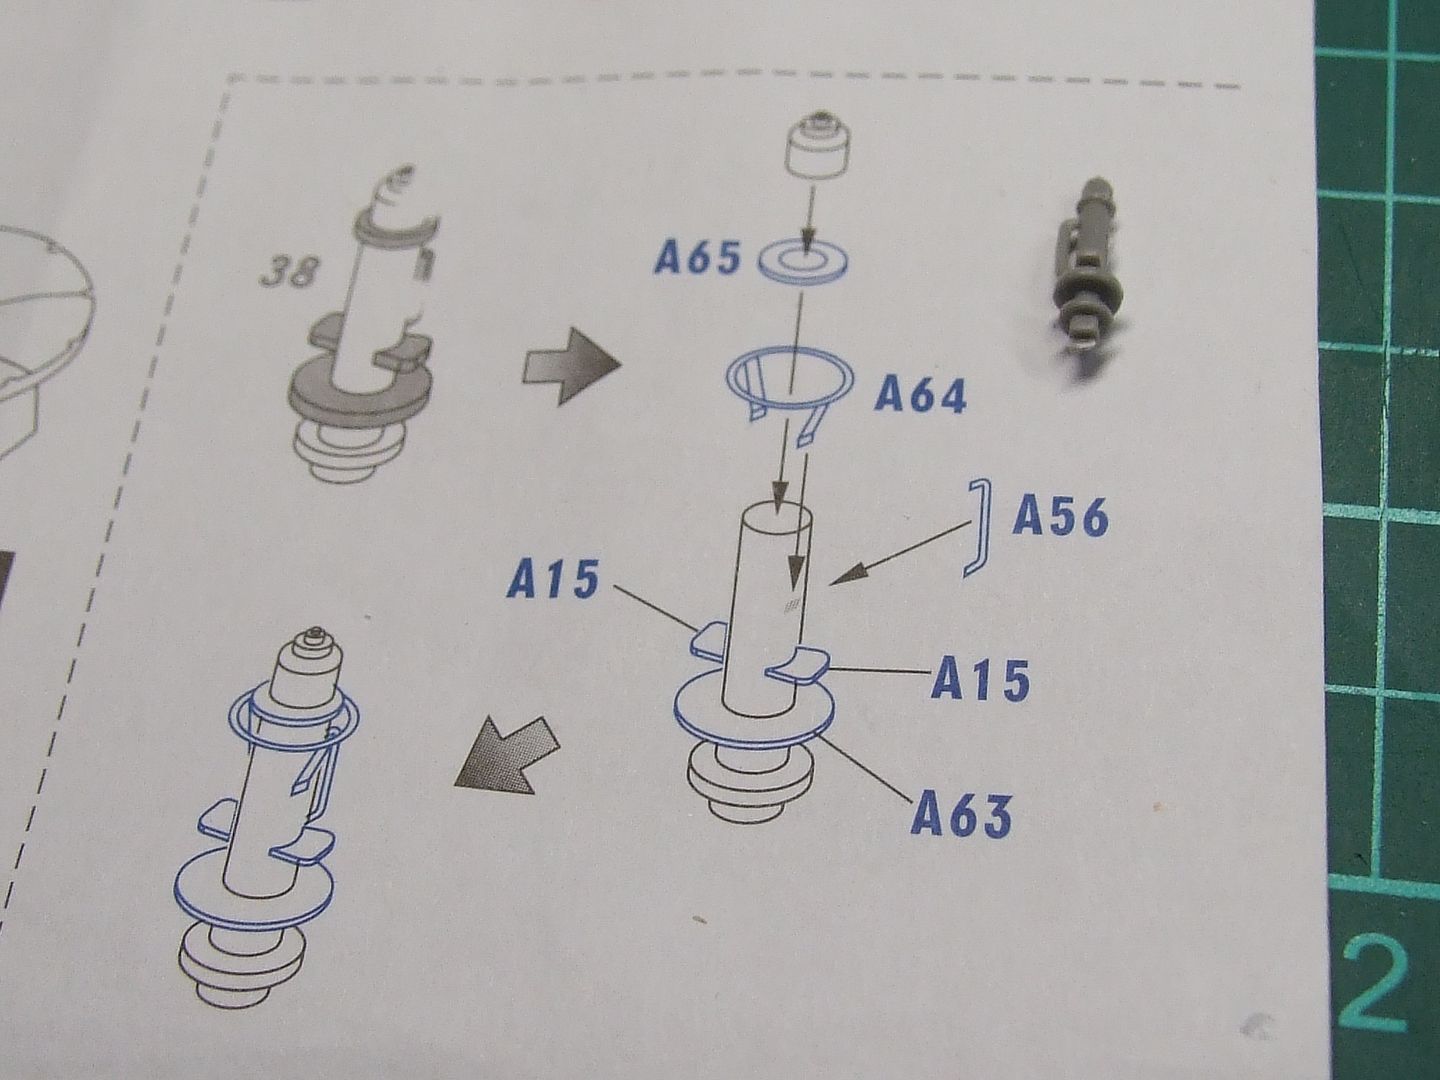
so i went from the scarey railings to the fiddly retractable bollards, found it easier to glue the .5mm styrene rod onto the PE while it was still attached to the fret.

and while they were curing/setting i tackled these pole thingys. they attach on to the deck in various places. the instructions are vague at the start on where they go, untill you get further in.

from bent wire to straight rods. Tip: cut your length then roll under a straight edge, works a treat.


.
more later when my camera recharges.
thanks for looking.
Jase


 .
.