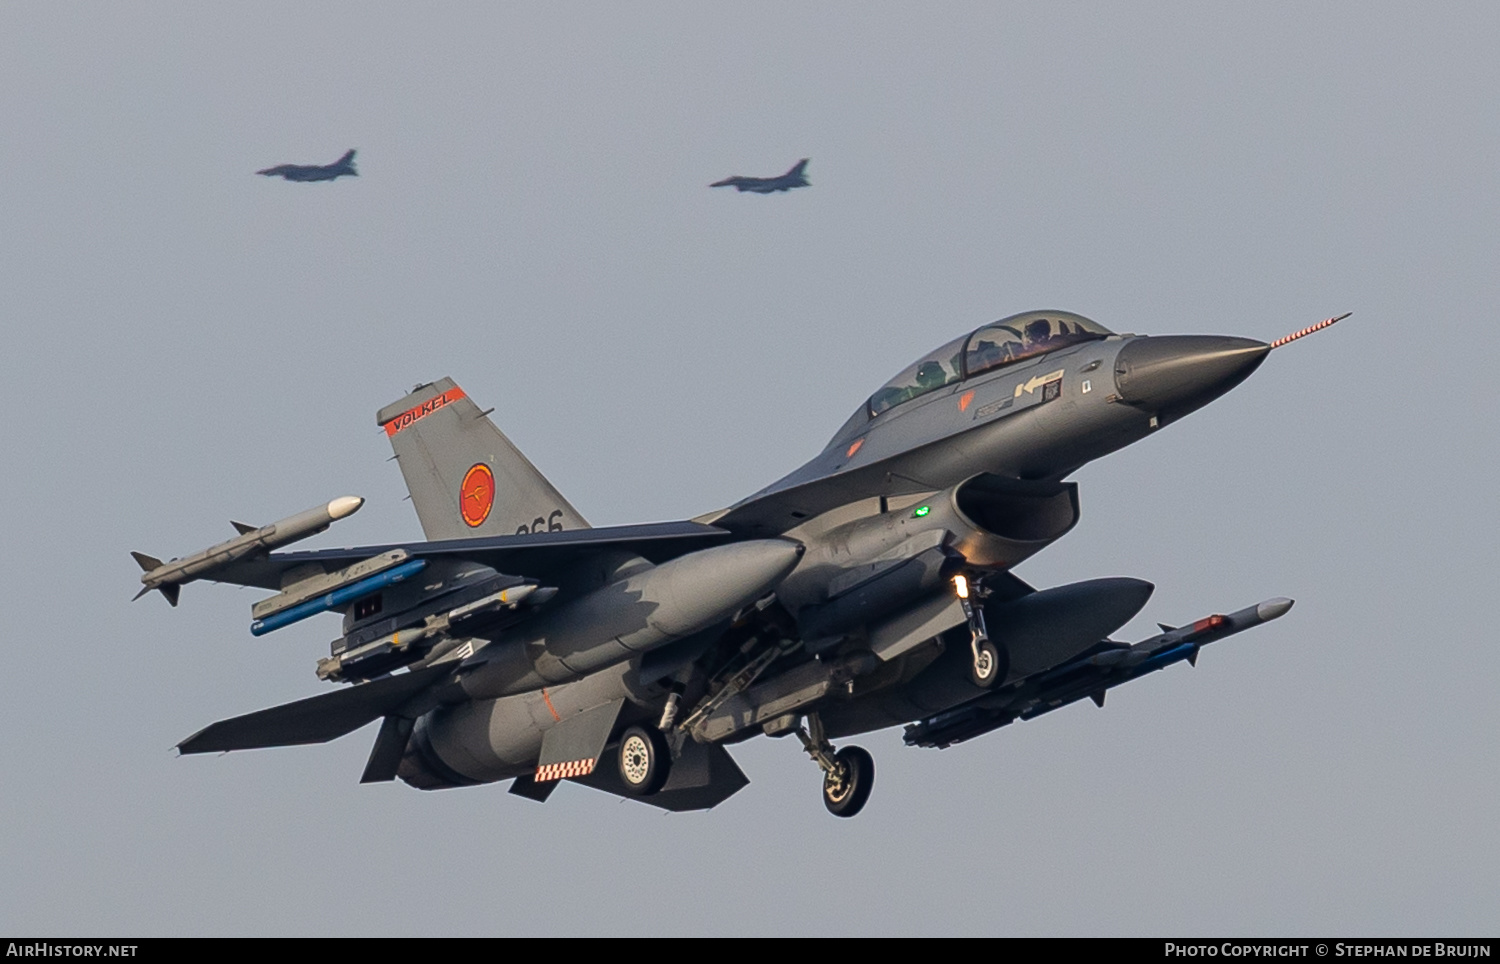
Here is a picture of Airhistory.net in the version and with the load out as i will be building her.
Besides the kit i collected a lot of aftermarket stuff that i will be using in this build, here's a little list of most of it.
- Revell (03844) F-16D Tigermeet 2014
- AWC-Model Seamless air intake
- Eduard Brassin Sniper ATP pod
- Eduard Brassin gbu-39/bru61
- Master brass pitot tube
- Astro decals "Orange Jumper" decal set
- Daco Vinnly stifnet plates
- I designed some decals myself for the Volkel tailband, "Brabantse" checkerd markings on the lower fuselage fins and some other small stuff.
- self 3D geprinted ejection seats (drawings from Cults3D)
- self 3D geprinted exhaust nozzles (drawings from Cults3D)
- self 3D geprinted wheels (drawings from Cults3D)
As a primary reference i will be using Daco's "Uncovering the F-16".

I started the build with the cockpit, all parts where cut from the sprues and cleaned up.


Next i primed everything with a coat of Mr. Surfacer 1500.

Next up was painting the cockpit and seats, i sprayed everything in a base color of Mr Hobby H306. After wich i painted all the details with a brush. I mainly followed my reference pictures for the right colors. With everything painted i sprayed a coat of gloss varnis, applied the kit supplied decals followed by a wash to bring out the detail a bit more.


During the cockpit drying times i have been working on the AWC-Models air intake. For this to fit i had to remove some of the kits plastic, after wich i could start glueing some stuff in place.
First i removed some parts from the fuselage to get the intake to fit.


Spraying the intake nice and smooth without getting drips looked a bit hard to me. After searching the internet on how to do this best i run into an intresting technic and tried it out. First i taped off the bottom side of the intake with masking tape. After wich i poured some thinned latex wall paint in the intake. After letting it dry for a short moment i removed the tape from the underside so the intake would drain leaving a thin even coat of paint on the inside of the intake.

After painting the rest of the parts everything was glued togheter.


The AWC set also contains the parts for the wheelbays, so work continued on those, first i glued the side panels in place.

After wich i could glue the intake in place.

Last up was glueing the replacing AWC fuselage part in place.

The overall fit was pretty good, only some small seams that needed filling.
In the mean time i also preformed some work on the wings. Most parked F-16's have there leading edge flaps raised a little bit and the aft flaps in a dropped position. So i cut them lose and fitted them in a different angle.


Thats it for now, let me know what you guys think of my work so far.