Valentine Mk VI Canadian Built (1:35, MiniArt)

Post Reply
User avatar
pikos
Corporal
Corporal
Posts: 87
Joined: Thu Oct 03, 2013 9:32 pm
Location: Thessaloniki Greece
Greece

Valentine Mk VI Canadian Built (1:35, MiniArt)

Post by pikos »

Valentine Mk VI Canadian Built - 1:35 (MiniArt)

Image


Here is the build of a Canadian Tank, the Valentine Mk VI. This build will represent a training unit in Borden Camp, Ontario Canada in 1942. Borden Camp is a training facility of the Canadian Forces and thus this build is dedicated to Major - General F.F. Worthington, the father of the Royal Canadian Armoured Corps. Worthington is buried in Worthington Park which is located in Borden Camp.


Image


1,420 Valentines were built in Canada. Of them, only 30 remained in the Canadian Army and most of the rest were sent to Soviet Union. All the 30 Valentines of the Canadian Army were used for training and this build is the T15975, one of the 30 Valentines that stayed in the country.


Here are the contents of the kit just before the start of the build. It's wonderful in my eyes, the transformation of 605 plastic parts that lie down on my desk to something totally different, totally yours
Image[/URL[URL=http://s1349.photobucket.com/user/psees ... e.jpg.html]Image
On the bench:
Tamiya Matilda Mk.III/IV 1/35 (diorama)
Airfix Messerschmitt Bf109E-4 1/48
Tamiya Porsche 959 1/24
User avatar
JayCub
Command Sergeant Major
Posts: 907
Joined: Mon Oct 21, 2013 11:58 pm
Location: Wicklow Ireland

Re: Valentine Mk VI Canadian Built (1:35, MiniArt)

Post by JayCub »

Nice intro and great photography, im looking forward to this build.. looks like your ready to go :mrgreen:
User avatar
Rodney
First Sergeant
First Sergeant
Posts: 480
Joined: Thu Oct 31, 2013 4:22 pm
Location: Newfoundland, Canada

Re: Valentine Mk VI Canadian Built (1:35, MiniArt)

Post by Rodney »

That's a lot off little parts :o Cant wait to see it all come together
User avatar
HWGuderian23
Chief Warrant Officer 2
Posts: 1652
Joined: Tue Jun 18, 2013 4:47 pm
Location: Zweibrücken, Germany
Germany

Re: Valentine Mk VI Canadian Built (1:35, MiniArt)

Post by HWGuderian23 »

Wow! Seems to be complicated. Good luck with the kit :cheers2:
spruecutter
Sergeant Major
Sergeant Major
Posts: 664
Joined: Tue Jun 18, 2013 12:06 am
Location: Deeside, UK

Re: Valentine Mk VI Canadian Built (1:35, MiniArt)

Post by spruecutter »

Glad to be building this with you :thumb2:
User avatar
pikos
Corporal
Corporal
Posts: 87
Joined: Thu Oct 03, 2013 9:32 pm
Location: Thessaloniki Greece
Greece

Re: Valentine Mk VI Canadian Built (1:35, MiniArt)

Post by pikos »

I.

The build starts with the lower hull and the wheels. Contrary to most modellers, I prefer to glue the wheels and trucks on the model prior to painting. It's a decision based on habit, as I never tried the other way. Maybe next time...
Image


This kit provides the trucks piece by piece. According to the MiniArt guide, 98 pieces should be glued to make one truck. I had to use 102 for the one and 101 (really don't know why) for the other. That's to represent the effect of gravity, the trucks are supposed to be heavy and I wanted not to make them as a straight line. The process is shown here:


Image[/URL[URL=http://s1349.photobucket.com/user/psees ... 8.jpg.html]Image


That's the result:


ImageImage


Note that the interior of the tank is built (driver's seat etc). I decided to make the tank with closed hatches but hadn't decide it by the time I built it. So, see it now and then be silent forever.
On the bench:
Tamiya Matilda Mk.III/IV 1/35 (diorama)
Airfix Messerschmitt Bf109E-4 1/48
Tamiya Porsche 959 1/24
User avatar
pikos
Corporal
Corporal
Posts: 87
Joined: Thu Oct 03, 2013 9:32 pm
Location: Thessaloniki Greece
Greece

Re: Valentine Mk VI Canadian Built (1:35, MiniArt)

Post by pikos »

JayCub wrote:Nice intro and great photography, im looking forward to this build.. looks like your ready to go :mrgreen:
Thanks a lot. The question is, when the tank will be ready to go ;)

Rodney wrote:That's a lot off little parts :o Cant wait to see it all come together
"Little" is...little to describe some of them :crazy:

HWGuderian23 wrote:Wow! Seems to be complicated. Good luck with the kit :cheers2:
Thanks. It is complicated for my level. Wait till I start working the PE parts. Nightmare....
spruecutter wrote:Glad to be building this with you :thumb2:
Same here! (I am delaying on purpose to copy your moves my friend, be on guard!)
On the bench:
Tamiya Matilda Mk.III/IV 1/35 (diorama)
Airfix Messerschmitt Bf109E-4 1/48
Tamiya Porsche 959 1/24
spruecutter
Sergeant Major
Sergeant Major
Posts: 664
Joined: Tue Jun 18, 2013 12:06 am
Location: Deeside, UK

Re: Valentine Mk VI Canadian Built (1:35, MiniArt)

Post by spruecutter »

pikos wrote:
spruecutter wrote:Glad to be building this with you :thumb2:
Same here! (I am delaying on purpose to copy your moves my friend, be on guard!)
Ah! but now you are ahead of me :D
User avatar
pikos
Corporal
Corporal
Posts: 87
Joined: Thu Oct 03, 2013 9:32 pm
Location: Thessaloniki Greece
Greece

Re: Valentine Mk VI Canadian Built (1:35, MiniArt)

Post by pikos »

II.


Next I worked with the upper hull. The kit provided photo-eched parts which was a "first time" for me. I admit that these parts bring more realism to the tank but also made my days difficult. I am not happy with the results I achieved, I must improve if I want to use them in another build.


Image


The rest of the upper hull was easy to build. Very nice pieces with a lot of detail.


Image


Image


Image


[/URL[URL=http://s1349.photobucket.com/user/psees ... 7.jpg.html]Image


[/URL[URL=http://s1349.photobucket.com/user/psees ... a.jpg.html]Image


Glued with blue tack, the tank looked like this


Image


Image


Image


Image


Image


But, as always, there were fitting isues. Which were dealt with dissolved putty and an old brush.


Image


Here you can see the result


Image


Image


Image


And that completes the "building" chapter. The painting process will begin next, I will try to show you as better as I can the steps. But before I leave you for now I'd like to show you something. As shown in the photo of the kit, the model comes with 5 figures. I wouldn't use them on this build since they are russians but nevertheless, built one of them to see him with the tank. The results are disappointing. The figure is huge compared to the tank and is obvious that these two don't match. I tried to use the figure with another 1/35 tank I work now, a russian KV-1.
By the way, the dimensions of the two tanks are: Valentine L5,41/ W2,62/H2,27 KV-1 L5,80/W4,20/H2,32.
The conclusions are yours to make...

Image


Image

Image


Image

[/URL[URL=http://s1349.photobucket.com/user/psees ... f.jpg.html]Image


See you soon.
Last edited by pikos on Sun Dec 22, 2013 8:45 pm, edited 1 time in total.
On the bench:
Tamiya Matilda Mk.III/IV 1/35 (diorama)
Airfix Messerschmitt Bf109E-4 1/48
Tamiya Porsche 959 1/24
User avatar
JayCub
Command Sergeant Major
Posts: 907
Joined: Mon Oct 21, 2013 11:58 pm
Location: Wicklow Ireland

Re: Valentine Mk VI Canadian Built (1:35, MiniArt)

Post by JayCub »

considering your new to PE it's a wonderful job and it does slow you down a bit but the end result is worthy of your talents, so roll on the paint work as i fancy getting my hands on a valentine now.

Tom
User avatar
schweinhund227
Chief Warrant Officer 4
Posts: 2627
Joined: Fri May 24, 2013 9:51 pm
Location: Ontario,Canada
Contact:
Canada

Re: Valentine Mk VI Canadian Built (1:35, MiniArt)

Post by schweinhund227 »

my gun goes Pew pew....

LOL


Nice kit thou ! what a puny little tank !

Excellent comparison

thanks for sharing your progress on this.
spruecutter
Sergeant Major
Sergeant Major
Posts: 664
Joined: Tue Jun 18, 2013 12:06 am
Location: Deeside, UK

Re: Valentine Mk VI Canadian Built (1:35, MiniArt)

Post by spruecutter »

Looks great built up :thumb2: Well done with the PE parts too.
User avatar
conradschmid99
Sergeant First Class
Posts: 311
Joined: Wed Oct 30, 2013 7:19 pm
Location: Pasadena, CA

Re: Valentine Mk VI Canadian Built (1:35, MiniArt)

Post by conradschmid99 »

looking good
the valentine is such a small tank! :eeek:
"Interdum feror cupidine partium magnarum Europae vincendarum"
"Sometimes I get this urge to conquer large parts of Europe."
-unknown
User avatar
Rob
Chief Warrant Officer 2
Posts: 1892
Joined: Thu Aug 29, 2013 5:02 pm
Location: Kent, UK

Re: Valentine Mk VI Canadian Built (1:35, MiniArt)

Post by Rob »

Great built, looking forward to the paint job. The comparison with the figure and KV1 was eye opening!
User avatar
pikos
Corporal
Corporal
Posts: 87
Joined: Thu Oct 03, 2013 9:32 pm
Location: Thessaloniki Greece
Greece

Re: Valentine Mk VI Canadian Built (1:35, MiniArt)

Post by pikos »

III.


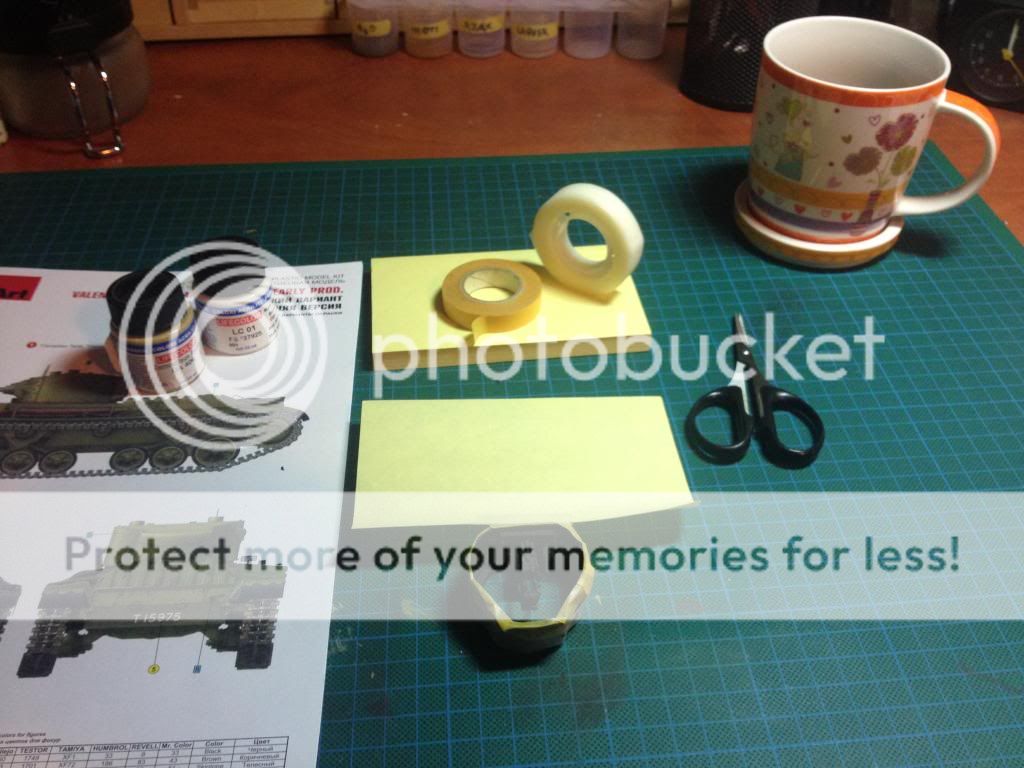
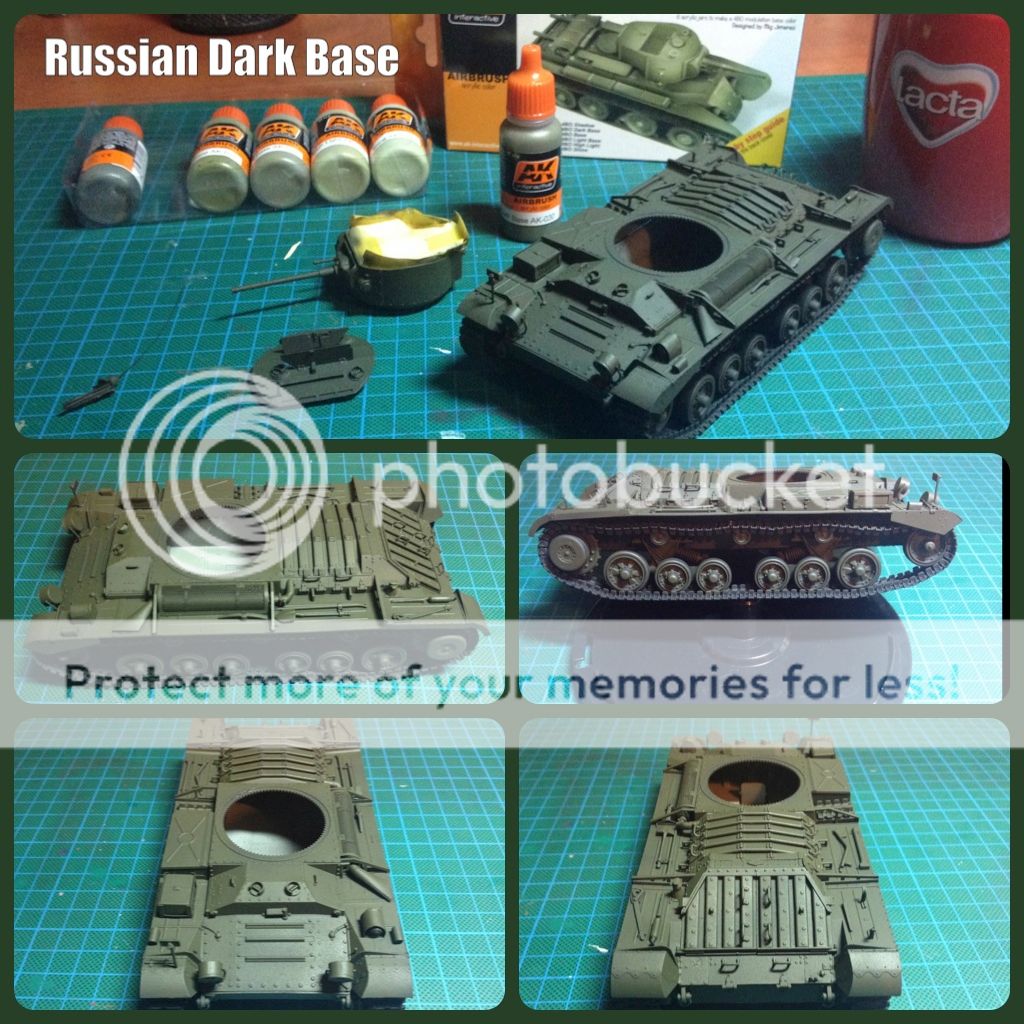
Painting process began with priming. As you will see, the whole project is painted and weathered with AK products. So, I primed the tank with an AK black primer.


Image


Image


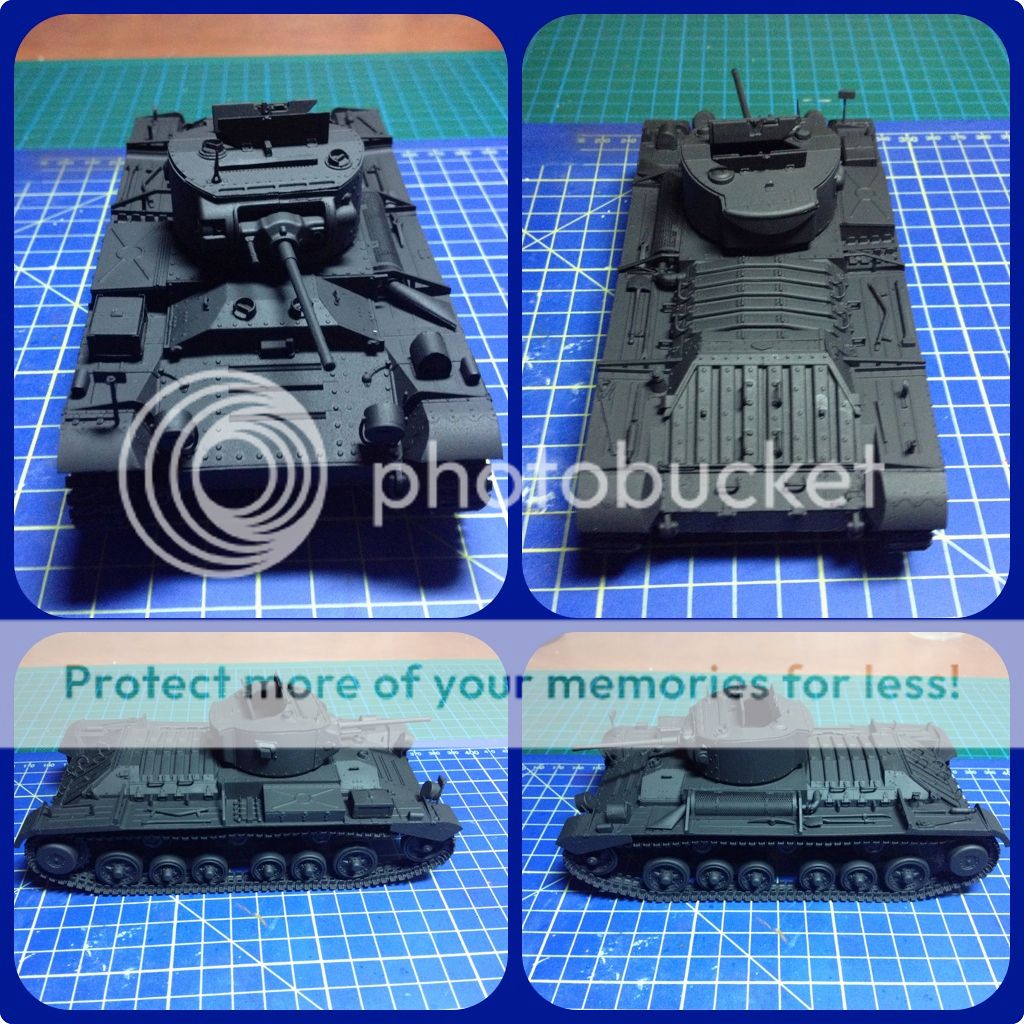
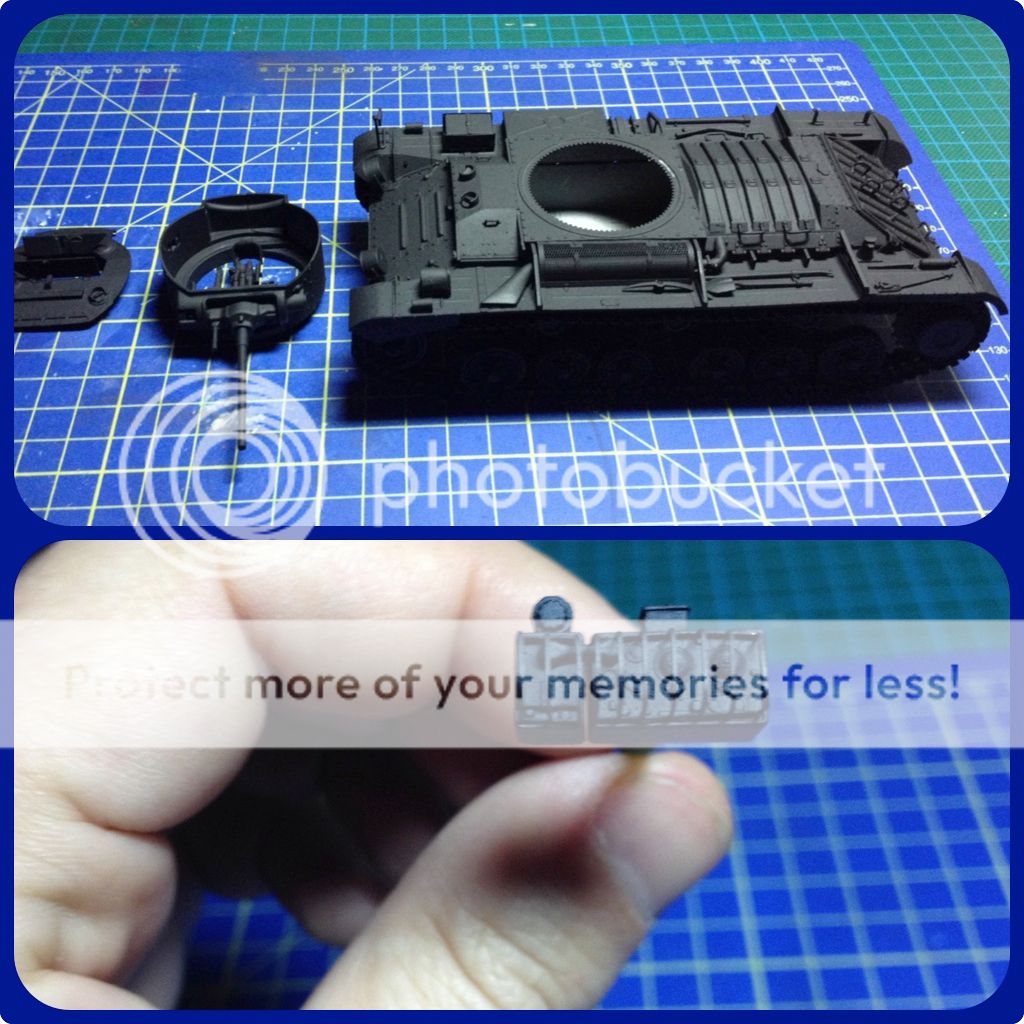
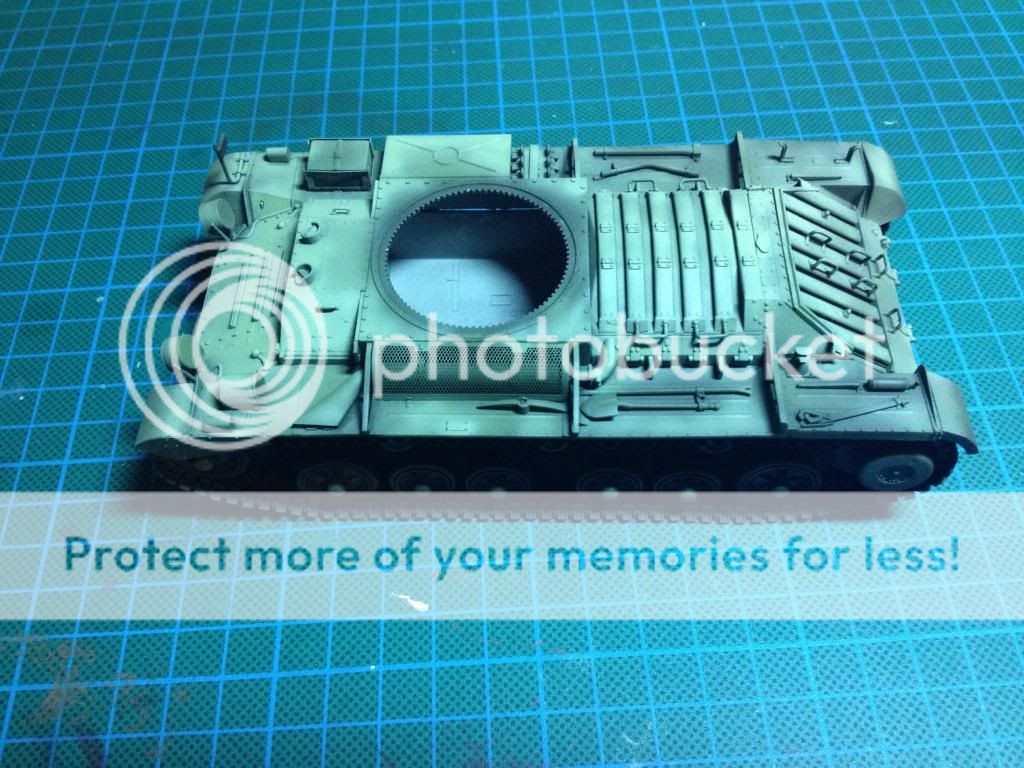
After drying, I started working the inside of the turret. There's the machine gun and the radio to paint but before that I had to take care of the outer side of the turret masking it.


Image


Image


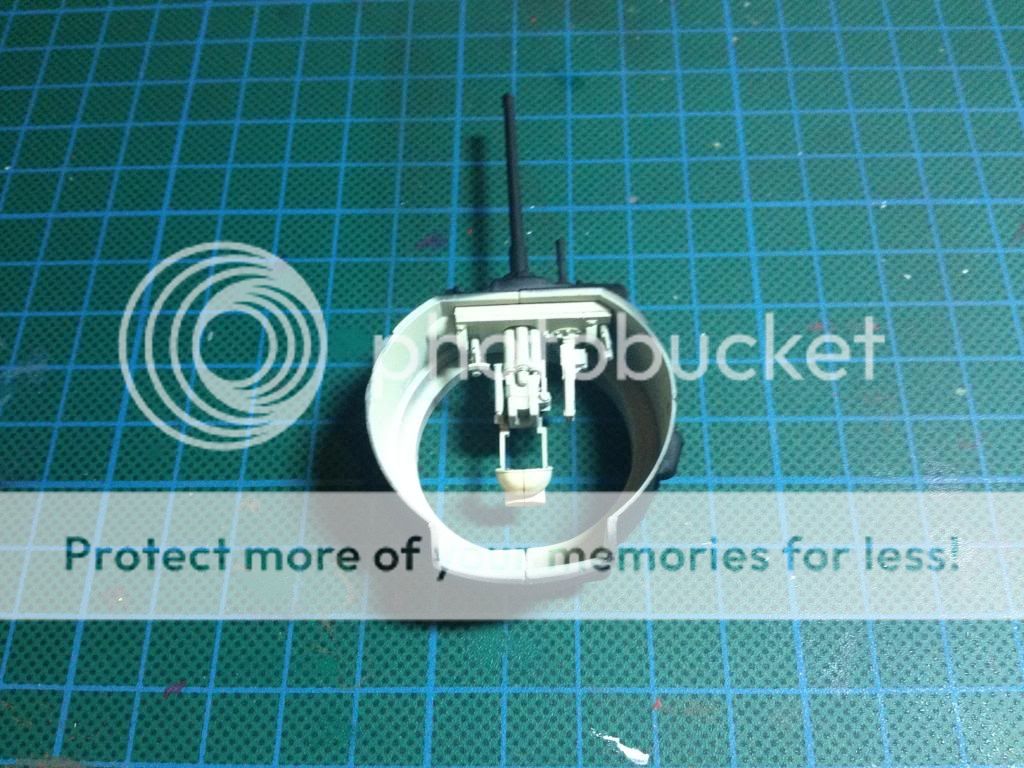
The inside was painted but forgot to take a photo of it done, so I will show it to you when the whole project finishes.


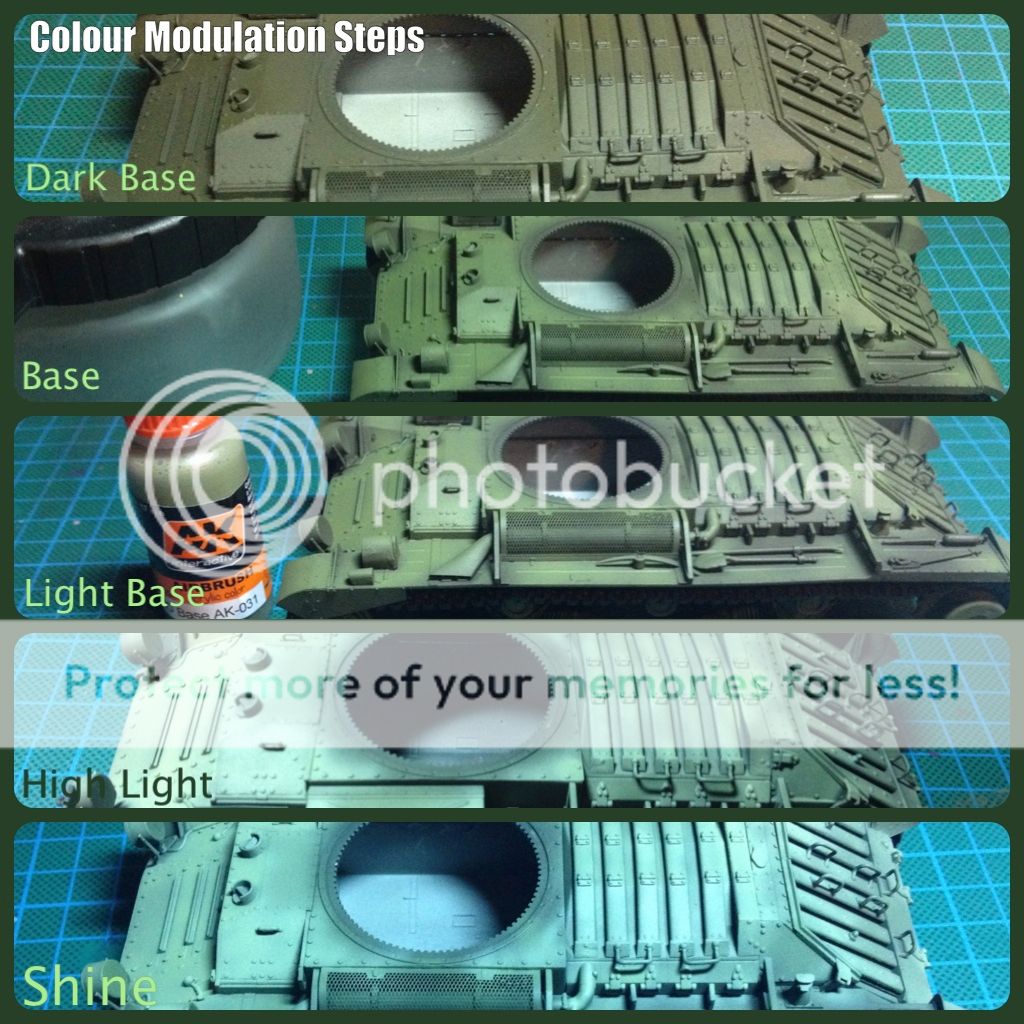
I decided to try the method of colour modulation. It's something I have never tried before but many modellers use it and is very pleasing to the eye once it's done correctly. Colour Modulation is a method of applying colour to the model trying to represent the effect of light and it's volumes from certain angles. As Mig JImenez has described it, is the transition from one colour to another by means of colour shifts. To achieve modulation you have to move from dark colours to lighter ones, choosing where light shines certain parts of the model and where is shade. I chose to use Russian Green for the Valentine and as said before, used the AK paints.

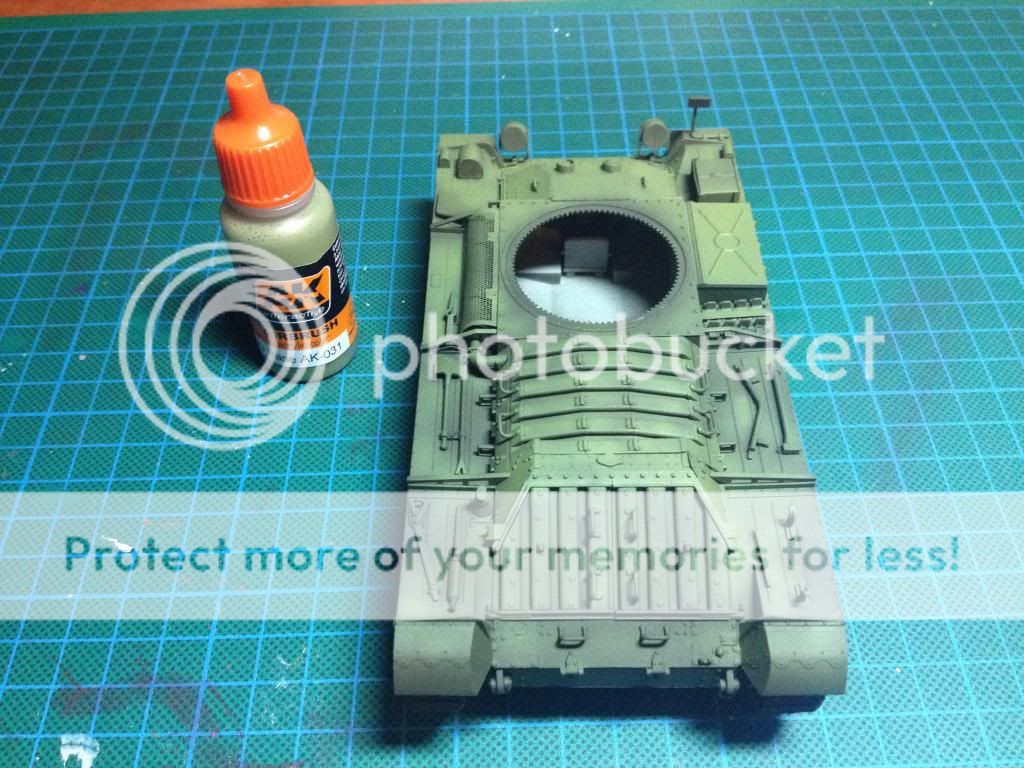
So at first, I sprayed the whole model with dark base


Image


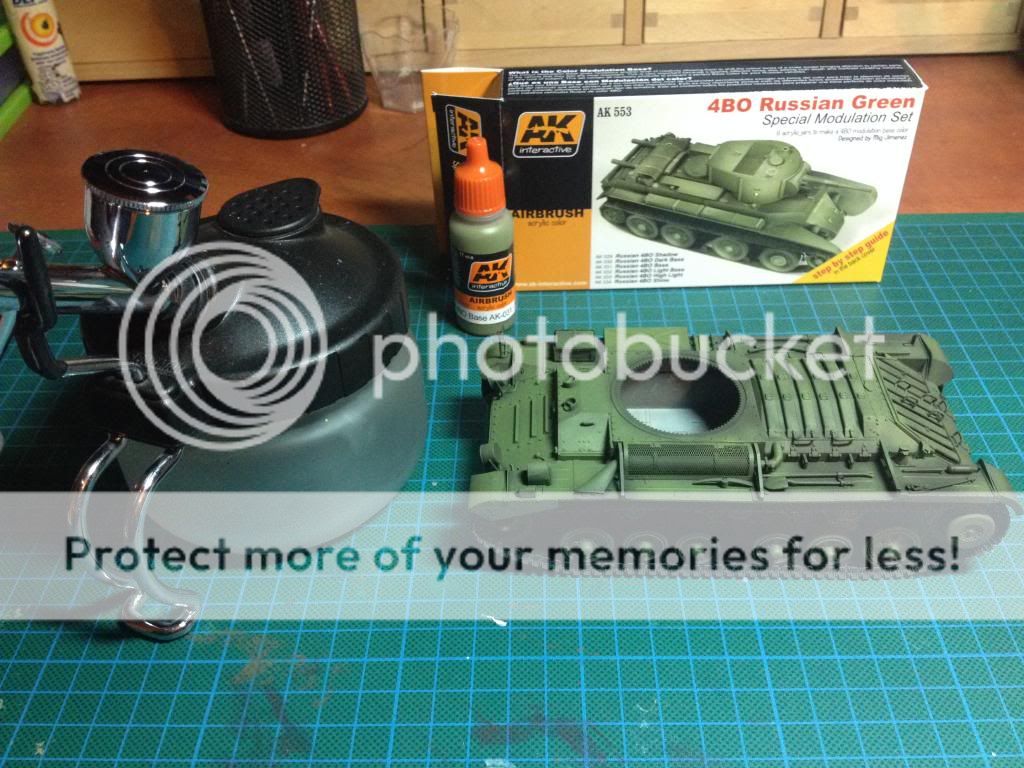
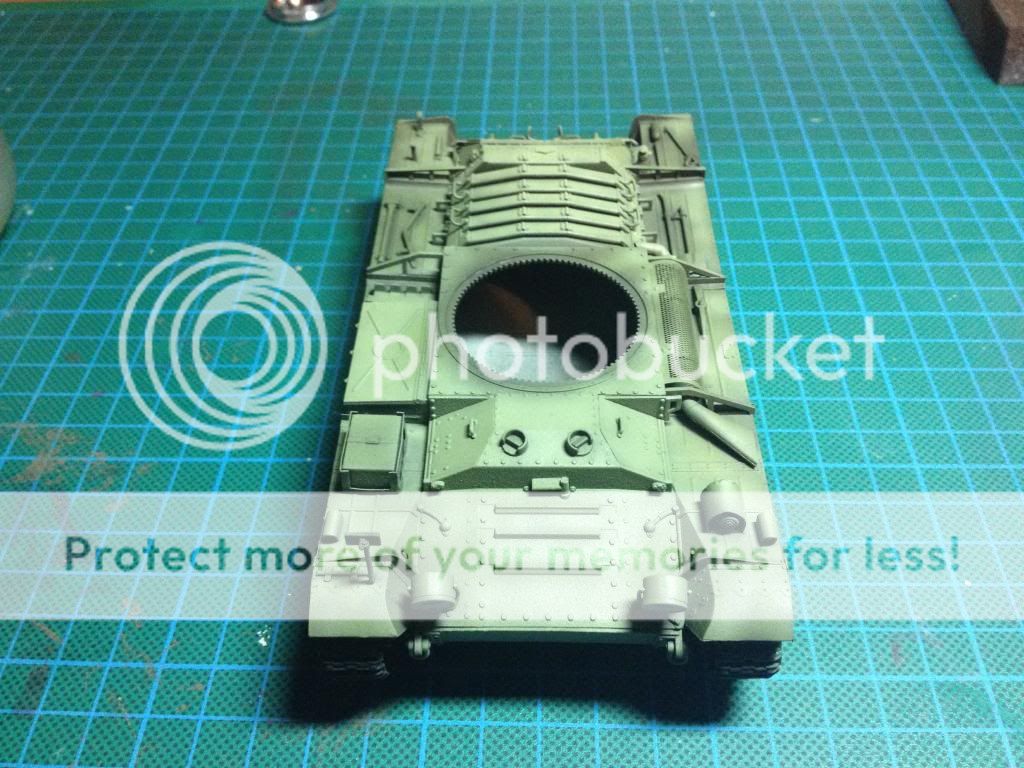
Then, I sprayed with a lighter one, the base. I left some parts darker trying to represent shade.


Image


Image


Image


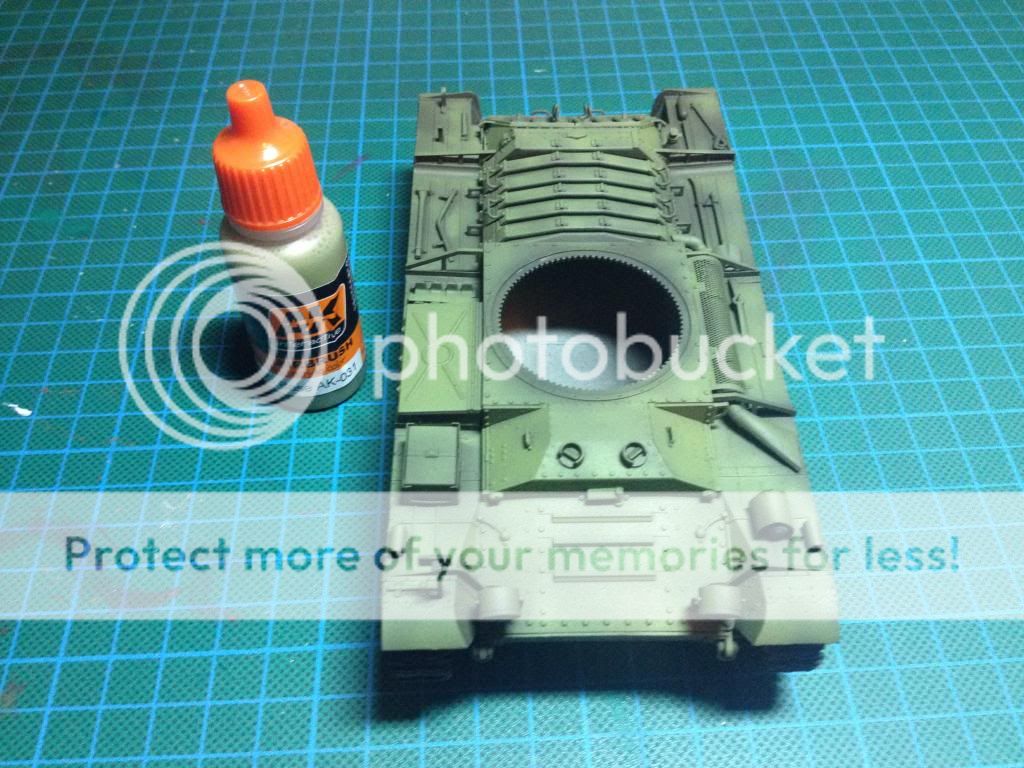
After that comes a lighter one, the light base. Again, the goal is to leave some parts shaded and highlight other ones.


Image


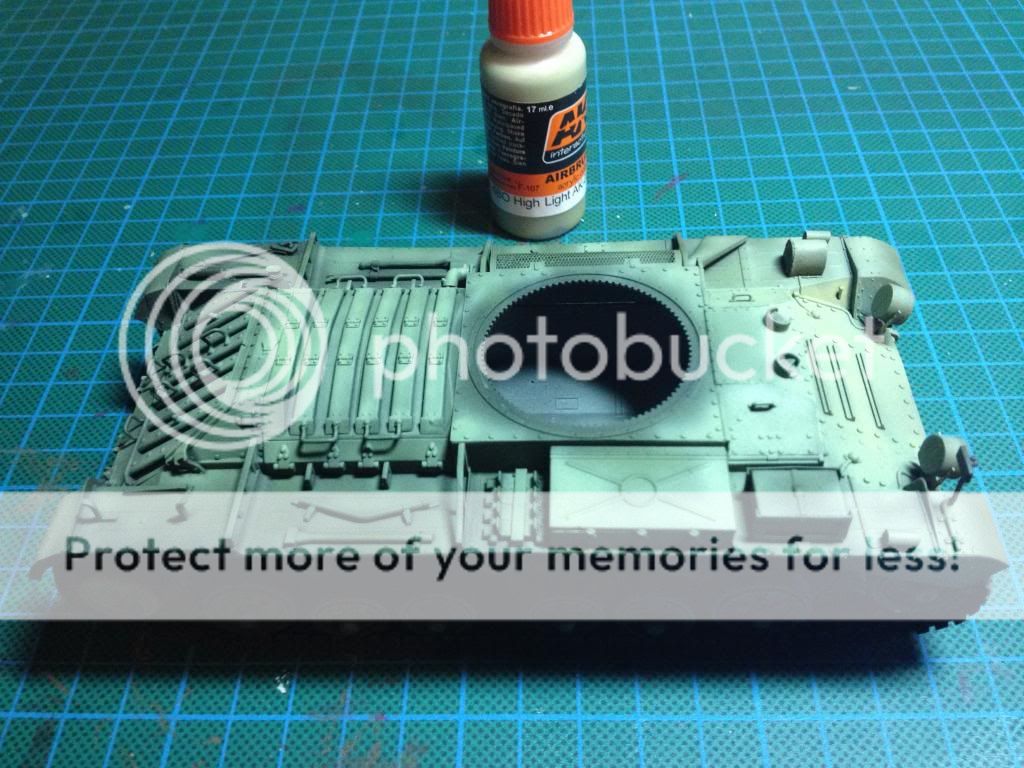
Next one was the one called high light. I tried to give the impression that the front of the model is in light and the back in shade. So, I sprayed the front parts and the ones that are elevated. From here on, the results started to worry me. There was big contrast between the colours and seemed very unrealistic. According to Mig Jimenez (and his books 'New F.A.Q.2') that's not to worry you since these contrasts will be eliminated with the weathering. Anyway, at that point I was concerned with the outcome but continued sticking to the "plan".
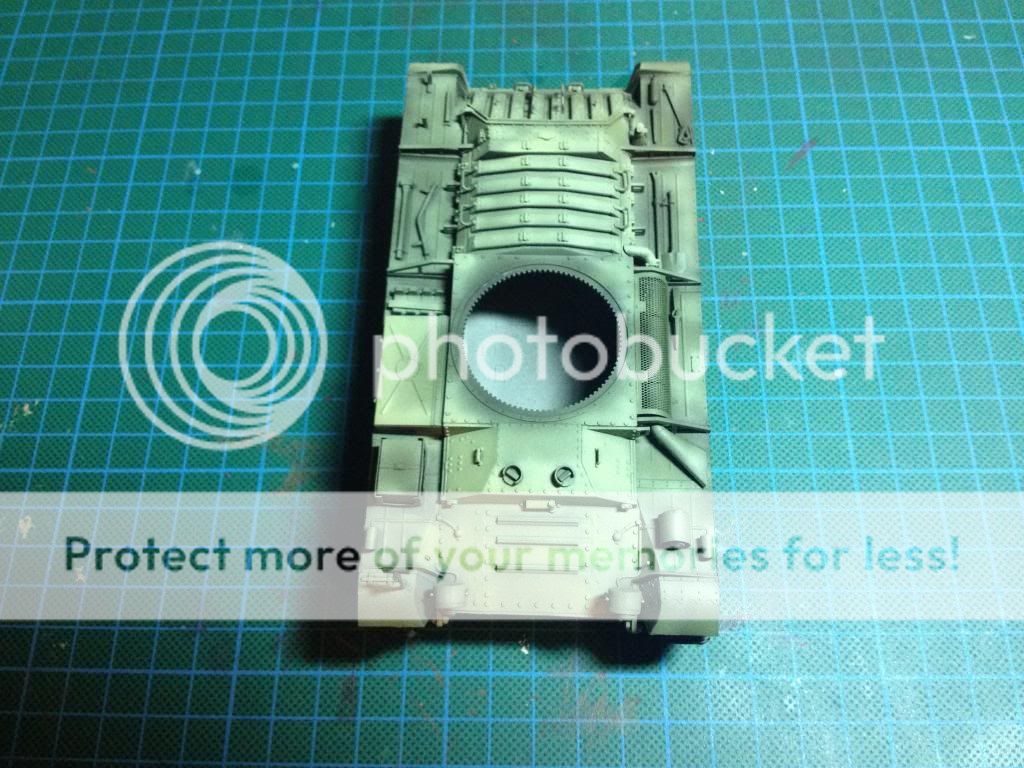


Image


Image


Last one was shine.


Image


As I already mentioned, colour modulation was (and is) new to me. It's attractive on the books but achieving it is another story. I must admit that I am sure that I will try it again, I am intrigued by it. But, what about now, this one project we talk and read about? What are the results on this particular model? Well, as for me, I am not very pleased. I don't mean to play modest, I honestly say what I see. Right here you must consider that the quality of the photos I upload isn't the best and many colour variation are lost to you. Anyway, I prepared a "comparison" photo to help you see the steps of this process.


Image


That completed the base colour stage. After that I will show you the weathering (where I will again try new -to me- techniques). Thank you for your time. Hope to 'see' you soon but, in any case, have a great time and MERY CHRISTMAS to all of you.
On the bench:
Tamiya Matilda Mk.III/IV 1/35 (diorama)
Airfix Messerschmitt Bf109E-4 1/48
Tamiya Porsche 959 1/24
User avatar
conradschmid99
Sergeant First Class
Posts: 311
Joined: Wed Oct 30, 2013 7:19 pm
Location: Pasadena, CA

Re: Valentine Mk VI Canadian Built (1:35, MiniArt)

Post by conradschmid99 »

:eeek: wow
The modulation looks great
"Interdum feror cupidine partium magnarum Europae vincendarum"
"Sometimes I get this urge to conquer large parts of Europe."
-unknown
User avatar
pikos
Corporal
Corporal
Posts: 87
Joined: Thu Oct 03, 2013 9:32 pm
Location: Thessaloniki Greece
Greece

Re: Valentine Mk VI Canadian Built (1:35, MiniArt)

Post by pikos »

IV.


The most interesting and fun part is of course weathering. It consists of many parts and some may be skipped, but the two first are fundamental and are always applied. I am talking about filters and washes. I used the AK products for these two tasks and here is the outcome


Image


Image


Image


Image


[/URL[URL=http://s1349.photobucket.com/user/psees ... d.jpg.html]Image


After that, weathering is very "matter of choice". It depends on the modeller to decide what will be applied, what's the desired character that will be produced. Of course, the element of reality should be taken into account, meaning that you should weather a model according to it's history, usage and enviromental specifics. As I wrote on my introduction post, this Valentine is a training unit, based on Canada. That means that it wasn't engaged in war. Nonetheless, I decided to represent a tank pretty much used, not very damaged but one that has participated in many exercises. I see no point in showing you every little step of weathering but I thing is better and more understandable to see the whole thing. I divided it to three parts.


IV.a

Here is the weathering that includes chipping, streaking grime, rust streaks, dusting, track wash and engine oil - fuel stains


Image


Image


Image


[/URL[URL=http://s1349.photobucket.com/user/psees ... 0.jpg.html]Image


[/URL[URL=http://s1349.photobucket.com/user/psees ... 9.jpg.html]Image


[/URL[URL=http://s1349.photobucket.com/user/psees ... 8.jpg.html]Image


[/URL[URL=http://s1349.photobucket.com/user/psees ... 5.jpg.html]Image


The two parts remaining to be done and shown are mud and a base. Thanks for your time and I hope you enjoy it.
On the bench:
Tamiya Matilda Mk.III/IV 1/35 (diorama)
Airfix Messerschmitt Bf109E-4 1/48
Tamiya Porsche 959 1/24
User avatar
Paul
Site Admin
Site Admin
Posts: 12622
Joined: Thu May 23, 2013 4:47 pm
Location: Merseyside, England, UK
Contact:
England

Re: Valentine Mk VI Canadian Built (1:35, MiniArt)

Post by Paul »

Damn that's some fine work there, excellent weathering skills :cheers2:
User avatar
Radzy
Command Sergeant Major
Posts: 750
Joined: Sun Jun 16, 2013 9:57 pm
Location: Warsaw, Poland

Re: Valentine Mk VI Canadian Built (1:35, MiniArt)

Post by Radzy »

Wow!
Great effects on modulation and weathering! That is really amazing stuff!

Congratulations mate on achieved effects!

Cheers,
Radek
WIP:
Tamiya 1:72 F4U-1 Corsair Birdcage
----------------------
My Portfolio
My YouTube Channel
User avatar
pikos
Corporal
Corporal
Posts: 87
Joined: Thu Oct 03, 2013 9:32 pm
Location: Thessaloniki Greece
Greece

Re: Valentine Mk VI Canadian Built (1:35, MiniArt)

Post by pikos »

thank you guys, means a lot, really :bow::
On the bench:
Tamiya Matilda Mk.III/IV 1/35 (diorama)
Airfix Messerschmitt Bf109E-4 1/48
Tamiya Porsche 959 1/24
User avatar
chief5437
Major
Major
Posts: 4810
Joined: Fri May 31, 2013 1:25 pm
Location: England
England

Re: Valentine Mk VI Canadian Built (1:35, MiniArt)

Post by chief5437 »

Great results. Shows the process nicely, thanks dude! :th:
Chief
User avatar
Rob
Chief Warrant Officer 2
Posts: 1892
Joined: Thu Aug 29, 2013 5:02 pm
Location: Kent, UK

Re: Valentine Mk VI Canadian Built (1:35, MiniArt)

Post by Rob »

First class my man, first class! :th:
User avatar
pikos
Corporal
Corporal
Posts: 87
Joined: Thu Oct 03, 2013 9:32 pm
Location: Thessaloniki Greece
Greece

Re: Valentine Mk VI Canadian Built (1:35, MiniArt)

Post by pikos »

IV.b


Here is the part that has to do with mud. To produce mud I used some AK products and plaster. I mixed them together and then added gloss varnish. I played with the amounts, more fresh mud requires more gloss, drier mud is less dark and needs more plaster and goes on. After the mixture was ready, I used a big brush to collect some of it and airbrushed with just air so that the mixture would be splashed on the tank.


Image


Didn't take any photos of the process due to lack of time and the difficulty of being two handed. So, be patient, photos will come at the end.


IV.c


Last, a small base. I used a cheap photo frame, removed the glass and filled the hole in the middle with cardborad.


Image


Image


Image


Image


Then put some putty on it to produce soil. After the putty dried, I spread glue and poured sand and little rocks I collected from the garden. Cheap and easy, nothing beats the natural thing.


Image


Image


Image


After priming the whole base, painted the ground with dark, muddy colours and finally added two winter bushes which bought for the purpose.


Image


Image


Image


Image


The only thing left was a small sign. A little work on the computer and here it is.


Image


Image
On the bench:
Tamiya Matilda Mk.III/IV 1/35 (diorama)
Airfix Messerschmitt Bf109E-4 1/48
Tamiya Porsche 959 1/24
User avatar
pikos
Corporal
Corporal
Posts: 87
Joined: Thu Oct 03, 2013 9:32 pm
Location: Thessaloniki Greece
Greece

Re: Valentine Mk VI Canadian Built (1:35, MiniArt)

Post by pikos »

Reveal


Image


Image


Image


Image


Image


Image


Image


Image


Image


That completes this work. I hope you like the result as I hope you enjoyed the whole process. I am not -by any mean- an expert, I didn't show step by step this construction to guide anyone. I think there are many modellers here more capable and worth studying their work than mine. But I hope this post improves me and maybe moves someone unexperienced to give it a shot. Thanks for your time.
On the bench:
Tamiya Matilda Mk.III/IV 1/35 (diorama)
Airfix Messerschmitt Bf109E-4 1/48
Tamiya Porsche 959 1/24
User avatar
alextheblue
Chief Warrant Officer 5
Posts: 2679
Joined: Mon Jul 15, 2013 11:30 am
Location: Slough, United Kingdom
Contact:
Scotland

Re: Valentine Mk VI Canadian Built (1:35, MiniArt)

Post by alextheblue »

:th: :th: :clap: :clap:

Like that a LOT!!! :cheers2:

I know it's not to everyone's taste, but I'm a big fan of colour modulation and you have got it just spot on, very nice job! As you mentioned, the trick is with the weathering and the way you combine all the different techniques is superb!!

Everything from the colour, to the chipping, right down to the base looks fantastic!! :th: :th:
"Courage is feeling fear and acting anyway."

www.alextheblue.com
Post Reply

Return to “Builds”