SkyPainter303's Academy Minicraft Ventura II

All your in progress builds, post regular pictures and build updates

Moderator: T3hGuppy

Post Reply
SkyPainter303
First Sergeant
First Sergeant
Posts: 611
Joined: Mon Aug 31, 2015 5:02 pm
Location: Rock Hill, South Carolina USA
Contact:
United States of America

SkyPainter303's Academy Minicraft Ventura II

Post by SkyPainter303 »

I am going to attempt a speed build to replace my B-25 in this GB.

I wasn't able to find much about the RAF Ventura in my go-to source of Squadron Signal In-Action books. Wikipedia shows that the Ventura II was a R-2800-31 powered variant for the RAF, 487 built, some transferred to the USAAC and USN.

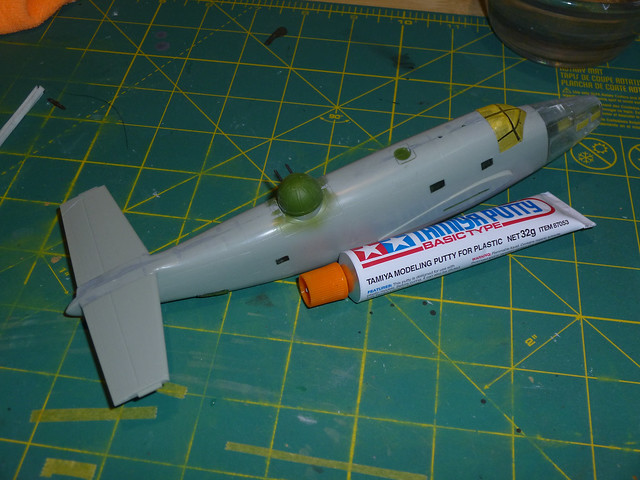
This kit appears to have parts to build various models of Ventura. Since this is an RAF version, the instructions say to use what is supposed to be the Boulton Paul turret.

Image
#1048 (06) by Michael Keogh, on Flickr


Here, you can see that the Ventura I was equipped with this turret, but what this diagram doesn't show is the Ventura II.

Image

Image
P1010630 by Michael Keogh, on Flickr

Image
P1010631 by Michael Keogh, on Flickr

Image Image Image Image

Image
P1010636 by Michael Keogh, on Flickr

Image
P1010637 by Michael Keogh, on Flickr

Image
P1010638 by Michael Keogh, on Flickr

Image
P1010639 by Michael Keogh, on Flickr
SkyPainter303
First Sergeant
First Sergeant
Posts: 611
Joined: Mon Aug 31, 2015 5:02 pm
Location: Rock Hill, South Carolina USA
Contact:
United States of America

Re: SkyPainter303's Academy Minicraft Ventura II

Post by SkyPainter303 »

Here are the cockpit parts in gray Stynylrez
Image
P1010640 by Michael Keogh, on Flickr


Masked turret.
Image
P1010642 by Michael Keogh, on Flickr


Interior green on the turret.
Image
P1010643 by Michael Keogh, on Flickr
Bissyboat
Sergeant Major of the Army
Posts: 1254
Joined: Sun Jan 05, 2014 9:49 pm
Location: Norway

Re: SkyPainter303's Academy Minicraft Ventura II

Post by Bissyboat »

Nice kit. Looking forward to see more developments. :th:
Where`s my dinghy?
SkyPainter303
First Sergeant
First Sergeant
Posts: 611
Joined: Mon Aug 31, 2015 5:02 pm
Location: Rock Hill, South Carolina USA
Contact:
United States of America

Re: SkyPainter303's Academy Minicraft Ventura II

Post by SkyPainter303 »

So far, so good. I've got the simple kit cockpit together. It consists of a floor, seats, bulkhead, and decal for the instrument panel. Because this is a 1/72 kit with small windows, one isn't going to be able to see inside anyway.

Image
P1010644 by Michael Keogh, on Flickr


I'm not even going to bother with the ejector pin marks.

Image
P1010645 by Michael Keogh, on Flickr


I masked the belly turret and sprayed with Model Master Acryl Interior Green 4736

Image
P1010650 by Michael Keogh, on Flickr


I also primed and painted the fuselage halve interiors and bomb bay doors. Then I glued in the windows using Testors Clear Parts Cement.

Image
P1010649 by Michael Keogh, on Flickr

Image
P1010648 by Michael Keogh, on Flickr
SkyPainter303
First Sergeant
First Sergeant
Posts: 611
Joined: Mon Aug 31, 2015 5:02 pm
Location: Rock Hill, South Carolina USA
Contact:
United States of America

Re: SkyPainter303's Academy Minicraft Ventura II

Post by SkyPainter303 »

I've masked the windows in the clear nose pieces and attached them to the rest of the fuselage parts. The cockpit has also been glued on. I've also glued on the bomb bay doors in the closed position. Fit of the pieces is pretty good. As basic as this kit it, it benefits from better engineering than the Revells and Monograms I usually build.

Image
P1010651 by Michael Keogh, on Flickr

Image
P1010652 by Michael Keogh, on Flickr
SkyPainter303
First Sergeant
First Sergeant
Posts: 611
Joined: Mon Aug 31, 2015 5:02 pm
Location: Rock Hill, South Carolina USA
Contact:
United States of America

Re: SkyPainter303's Academy Minicraft Ventura II

Post by SkyPainter303 »

The fuselage halves are now glued together. There is some seam work to be done and I also noticed that the panel lines do no line up from side to side.

Image
P1010653 by Michael Keogh, on Flickr
Bissyboat
Sergeant Major of the Army
Posts: 1254
Joined: Sun Jan 05, 2014 9:49 pm
Location: Norway

Re: SkyPainter303's Academy Minicraft Ventura II

Post by Bissyboat »

Good progress on your Ventura mate. :th:
Where`s my dinghy?
SkyPainter303
First Sergeant
First Sergeant
Posts: 611
Joined: Mon Aug 31, 2015 5:02 pm
Location: Rock Hill, South Carolina USA
Contact:
United States of America

Re: SkyPainter303's Academy Minicraft Ventura II

Post by SkyPainter303 »

Yup, progress is good.

I masked the canopy and the nose cap. I did notice some discrepancies in the glass; some of the windows are shaped wrong or aren't there at all. Rather than try and re-scribe some window frames, I just masked what is there.

Image
P1010655 by Michael Keogh, on Flickr


The main canopy is glued on as is the horizontal stabilizers. The tail end where the stabilizers are mounted a little deformed in shape so I had to align the stabilizers as best I could.

Image
P1010656 by Michael Keogh, on Flickr

Image
P1010660 by Michael Keogh, on Flickr


The belly turret glass is glued on too.

Image
P1010661 by Michael Keogh, on Flickr
SkyPainter303
First Sergeant
First Sergeant
Posts: 611
Joined: Mon Aug 31, 2015 5:02 pm
Location: Rock Hill, South Carolina USA
Contact:
United States of America

Re: SkyPainter303's Academy Minicraft Ventura II

Post by SkyPainter303 »

I primed, painted and assembled the engines today. There is one glaring problem - the engines are not the same! The cylinder heads are different. Also, I believe they are molded upside down. The instructions show what I think to be the magnetos pointing upward, but the engines have a notch with puts them pointing downward. It is not a simply of matter of rotating the cylinders 180 degrees. When I do that, I lose the offset between the front and rear rows.

Anyhow, I sprayed the cylinders with Model Master Aluminum Metalizer non-buffing. The fronts are in MM dark gray. To highlight the fins and pushrods, I flowed on some Testors CreateFX black enamel stain. When the stain is dry, I'll spray on a matt coat.

Image
P1010663 by Michael Keogh, on Flickr


I primed the propellers with gray Stynylrez and sprayed the tips in MM Flat White. Next, I'll spray yellow, mask the tips, then spray the rest black.

Image
P1010662 by Michael Keogh, on Flickr
SkyPainter303
First Sergeant
First Sergeant
Posts: 611
Joined: Mon Aug 31, 2015 5:02 pm
Location: Rock Hill, South Carolina USA
Contact:
United States of America

Re: SkyPainter303's Academy Minicraft Ventura II

Post by SkyPainter303 »

The wings are on and I've started blending seams with Tamiya White Putty.

Image
P1010667 by Michael Keogh, on Flickr

Image
P1010668 by Michael Keogh, on Flickr


Because there is zero detail in the wheel wells, I plan on leaving the gear doors closed.
Bissyboat
Sergeant Major of the Army
Posts: 1254
Joined: Sun Jan 05, 2014 9:49 pm
Location: Norway

Re: SkyPainter303's Academy Minicraft Ventura II

Post by Bissyboat »

Very good and nice job masking the glazing. :th:
Where`s my dinghy?
SkyPainter303
First Sergeant
First Sergeant
Posts: 611
Joined: Mon Aug 31, 2015 5:02 pm
Location: Rock Hill, South Carolina USA
Contact:
United States of America

Re: SkyPainter303's Academy Minicraft Ventura II

Post by SkyPainter303 »

Here is an incremental update. I attached the gear doors in the closed position. I also smoothed on some more putty to blend the step at the wing joins.

Image
P1010669 by Michael Keogh, on Flickr
SkyPainter303
First Sergeant
First Sergeant
Posts: 611
Joined: Mon Aug 31, 2015 5:02 pm
Location: Rock Hill, South Carolina USA
Contact:
United States of America

Re: SkyPainter303's Academy Minicraft Ventura II

Post by SkyPainter303 »

Bissyboat wrote: Mon Feb 13, 2017 1:59 pm Very good and nice job masking the glazing. :th:
Thank you for the encouragement, but I'm going to miss the deadline by a day or two because work is getting in the way. I've got the overnight shift tonight changing out store displays. All the pieces are on and the model is ready for a primer coat.
Bissyboat
Sergeant Major of the Army
Posts: 1254
Joined: Sun Jan 05, 2014 9:49 pm
Location: Norway

Re: SkyPainter303's Academy Minicraft Ventura II

Post by Bissyboat »

SkyPainter303 wrote: Mon Feb 13, 2017 9:41 pm
Bissyboat wrote: Mon Feb 13, 2017 1:59 pm Very good and nice job masking the glazing. :th:
Thank you for the encouragement, but I'm going to miss the deadline by a day or two because work is getting in the way. I've got the overnight shift tonight changing out store displays. All the pieces are on and the model is ready for a primer coat.
Yes. I also had that horrible experience of running too late, to finish the group build, in the past. Work and other commitments will always come first. Doesn´t ISM provide a group build + thread? Would be convenient to have one, so you can finalize the build without worrying about deadlines. :scratch:: :thumb1:
Where`s my dinghy?
SkyPainter303
First Sergeant
First Sergeant
Posts: 611
Joined: Mon Aug 31, 2015 5:02 pm
Location: Rock Hill, South Carolina USA
Contact:
United States of America

Re: SkyPainter303's Academy Minicraft Ventura II

Post by SkyPainter303 »

Today, between work assignments, i picked up a new air hose and was able to spray some gray Stynylrez primer.

Image
P1010671 by Michael Keogh, on Flickr
SkyPainter303
First Sergeant
First Sergeant
Posts: 611
Joined: Mon Aug 31, 2015 5:02 pm
Location: Rock Hill, South Carolina USA
Contact:
United States of America

Re: SkyPainter303's Academy Minicraft Ventura II

Post by SkyPainter303 »

I am now at the painting stage. I've complete my crude pre-shading and have sprayed the underside with Model Master Acryl RAF Sky Type "S" ANA 610

Image
P1010672 by Michael Keogh, on Flickr

Image
P1010673 by Michael Keogh, on Flickr
SkyPainter303
First Sergeant
First Sergeant
Posts: 611
Joined: Mon Aug 31, 2015 5:02 pm
Location: Rock Hill, South Carolina USA
Contact:
United States of America

Re: SkyPainter303's Academy Minicraft Ventura II

Post by SkyPainter303 »

This build has slowed down to a crawl. Two full-time jobs means most of my free time is spent sleeping or running errands.

Here, I have masked off the sky color using 2mm Tamiya Masking Tape for Curves. I wish the LHS sold 1mm tape because the 2mm still requires relief cuts for tight curves.

Image
P1010674 by Michael Keogh, on Flickr
Bissyboat
Sergeant Major of the Army
Posts: 1254
Joined: Sun Jan 05, 2014 9:49 pm
Location: Norway

Re: SkyPainter303's Academy Minicraft Ventura II

Post by Bissyboat »

Looking good. How´s the bendy Tamiya tape? I got one, but I haven´t put it to the test yet. :th:
Where`s my dinghy?
SkyPainter303
First Sergeant
First Sergeant
Posts: 611
Joined: Mon Aug 31, 2015 5:02 pm
Location: Rock Hill, South Carolina USA
Contact:
United States of America

Re: SkyPainter303's Academy Minicraft Ventura II

Post by SkyPainter303 »

Bissyboat wrote: Thu Feb 16, 2017 2:41 pm Looking good. How´s the bendy Tamiya tape? I got one, but I haven´t put it to the test yet. :th:
Those curves I did really need a narrower tape, maybe 1mm. The Tamiya stuff is the same type of tape custom car painters use to mask flames and other graphics. Anything wider than 2mm is a waste, the thinner the better.
Bissyboat
Sergeant Major of the Army
Posts: 1254
Joined: Sun Jan 05, 2014 9:49 pm
Location: Norway

Re: SkyPainter303's Academy Minicraft Ventura II

Post by Bissyboat »

SkyPainter303 wrote: Thu Feb 16, 2017 6:25 pm
Bissyboat wrote: Thu Feb 16, 2017 2:41 pm Looking good. How´s the bendy Tamiya tape? I got one, but I haven´t put it to the test yet. :th:
Those curves I did really need a narrower tape, maybe 1mm. The Tamiya stuff is the same type of tape custom car painters use to mask flames and other graphics. Anything wider than 2mm is a waste, the thinner the better.
Thanks for the helpful advice mate. I will hold onto it for the appropriate project. :thumb2:
Where`s my dinghy?
SkyPainter303
First Sergeant
First Sergeant
Posts: 611
Joined: Mon Aug 31, 2015 5:02 pm
Location: Rock Hill, South Carolina USA
Contact:
United States of America

Re: SkyPainter303's Academy Minicraft Ventura II

Post by SkyPainter303 »

I remasked the curves using tape I split down the middle with my hobby knife. It worked better.
SkyPainter303
First Sergeant
First Sergeant
Posts: 611
Joined: Mon Aug 31, 2015 5:02 pm
Location: Rock Hill, South Carolina USA
Contact:
United States of America

Re: SkyPainter303's Academy Minicraft Ventura II

Post by SkyPainter303 »

I'm still plugging away. I masked off the Sky and sprayed the top with Model Master Dark Earth ANA617 Acryl. The instructions called for Dark Earth FS30118, but I preferred the ANA617.

Image
P1010675 by Michael Keogh, on Flickr

Image
P1010676 by Michael Keogh, on Flickr
SkyPainter303
First Sergeant
First Sergeant
Posts: 611
Joined: Mon Aug 31, 2015 5:02 pm
Location: Rock Hill, South Carolina USA
Contact:
United States of America

Re: SkyPainter303's Academy Minicraft Ventura II

Post by SkyPainter303 »

I got the green and earth camo painted. I used white tacky and Tamiya tape to lay out the design. When I finished painting, I let it dry then peeled back the mask. It came out OK except for some areas where the paint peeled off. Next up it some touch up.

The color I used is MM Acryl RAF Dark Green

Image
P1010677 by Michael Keogh, on Flickr

Image
P1010678 by Michael Keogh, on Flickr

Image
P1010679 by Michael Keogh, on Flickr

Image
P1010680 by Michael Keogh, on Flickr
SkyPainter303
First Sergeant
First Sergeant
Posts: 611
Joined: Mon Aug 31, 2015 5:02 pm
Location: Rock Hill, South Carolina USA
Contact:
United States of America

Re: SkyPainter303's Academy Minicraft Ventura II

Post by SkyPainter303 »

I'm getting down to the details now. I painted the exhaust shields Vallejo Gun Metal and made an attempt at exhaust stains.

Image
P1010683 by Michael Keogh, on Flickr

Image
P1010684 by Michael Keogh, on Flickr


Next up are the de-icing boots. I've masked all of them except the ones on the lower fins. Because that area is so tight, I hand painted those.

Image
P1010685 by Michael Keogh, on Flickr

Image
P1010686 by Michael Keogh, on Flickr
Bissyboat
Sergeant Major of the Army
Posts: 1254
Joined: Sun Jan 05, 2014 9:49 pm
Location: Norway

Re: SkyPainter303's Academy Minicraft Ventura II

Post by Bissyboat »

Beautiful paint work on the camo. :th:
Where`s my dinghy?
SkyPainter303
First Sergeant
First Sergeant
Posts: 611
Joined: Mon Aug 31, 2015 5:02 pm
Location: Rock Hill, South Carolina USA
Contact:
United States of America

Re: SkyPainter303's Academy Minicraft Ventura II

Post by SkyPainter303 »

Bissyboat wrote: Sun Feb 19, 2017 8:53 pm Beautiful paint work on the camo. :th:
I may have ruined the camo.

I had a ham-fisted attempt at post-shading. I definitely need a better airbrush than my cheap Iwata NEO; perhaps an Apex?

I didn't like the post-shading so I tried to repair it. It may be acceptable now.

Image
P1010687 by Michael Keogh, on Flickr

Image
P1010688 by Michael Keogh, on Flickr
Bissyboat
Sergeant Major of the Army
Posts: 1254
Joined: Sun Jan 05, 2014 9:49 pm
Location: Norway

Re: SkyPainter303's Academy Minicraft Ventura II

Post by Bissyboat »

SkyPainter303 wrote: Mon Feb 20, 2017 4:22 am
Bissyboat wrote: Sun Feb 19, 2017 8:53 pm Beautiful paint work on the camo. :th:
I may have ruined the camo.

I had a ham-fisted attempt at post-shading. I definitely need a better airbrush than my cheap Iwata NEO; perhaps an Apex?

I didn't like the post-shading so I tried to repair it. It may be acceptable now.

Image
P1010687 by Michael Keogh, on Flickr

Image
P1010688 by Michael Keogh, on Flickr
If your´re not happy with the preshading you can pick up the details by doing a pin wash on the panel lines. :thumb2:
Where`s my dinghy?
Post Reply

Return to “Builds”