Page 1 of 1
SkyPainter303's 1/72 Italeri AS-332 Super Puma
Posted: Mon Oct 09, 2017 1:31 am
by SkyPainter303
My local hobby shop had this older kit in stock and since it fit the Feline Fever theme, I brought it home.
 P1040273
 by
Michael Keogh, on Flickr
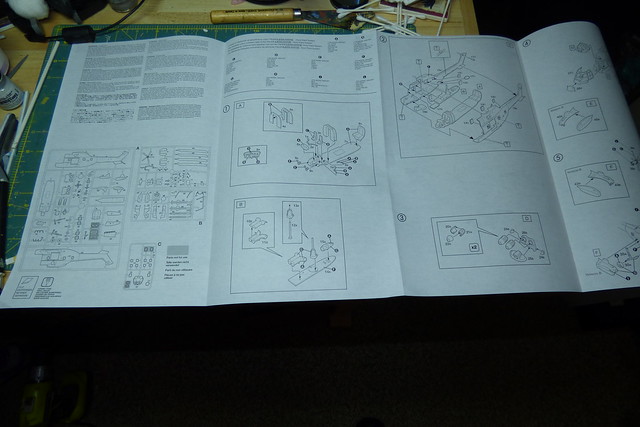
The instructions are printed on one large fold-out page.
 P1040275
 by
Michael Keogh, on Flickr
 P1040276
 by
Michael Keogh, on Flickr
 P1040277
 by
Michael Keogh, on Flickr
 P1040278
 by
Michael Keogh, on Flickr
 P1040279
 by
Michael Keogh, on Flickr
 P1040280
 by
Michael Keogh, on Flickr
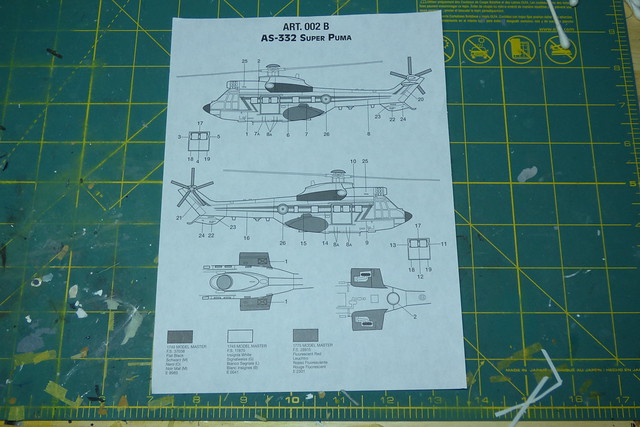
The kit has decals for three examples. I believe I'll build the basic, early Super Puma from the Spanish Army.
 P1040274
 by
Michael Keogh, on Flickr
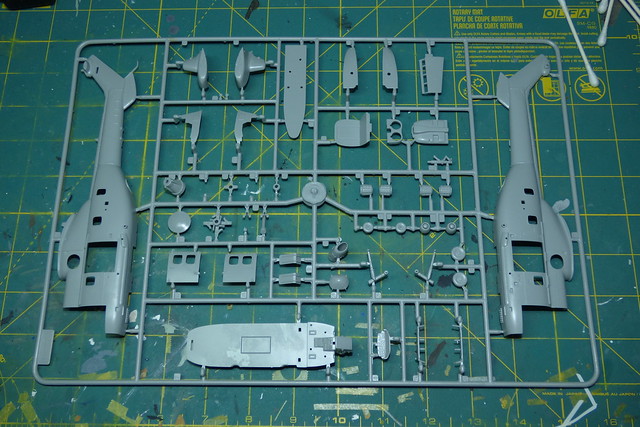
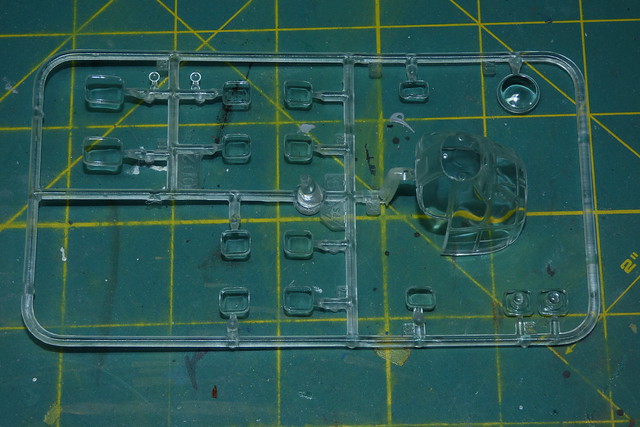
The kit sprues (other than the clear ones) were not bagged.
 P1040281
 by
Michael Keogh, on Flickr
 P1040282
 by
Michael Keogh, on Flickr
 P1040283
 by
Michael Keogh, on Flickr
Re: SkyPainter303's 1/72 Italeri AS-332 Super Puma
Posted: Mon Oct 09, 2017 1:40 am
by SkyPainter303
I found this info about the Super Puma from
http://www.aviastar.org/helicopters_eng ... erpuma.php
A cabin big enough to accommodate 24 passengers on standard seats is clearly big enough to earn- smaller numbers in much greater comfort. Aerospatiale has exploited the possibility in a big way, and claims to have created the market for VIP helicopters by combining the versatility of rotary-wing flight with the all the comforts of a business jet.
The Prestige range of VIP interiors offers luxuriously upholstered seating in a single nine-seat cabin, or separate compartments with four seats forward and another eight aft, along with such amenities as a bar, individual video screens and telephones.
Super Pumas and Cougars are used to transport no fewer than 25 heads of state, and more than 50 VIP versions are in service. Apart from the 8m long cabin, the type's attractions include low noise and vibration levels and large windows along with high performance and long range.
Other roles have included supporting the United Nations peace-keeping force in Mozambique. The Super Puma is well suited to operations in Africa, where it is able to take off with full tanks even in temperatures of 30°C.
The design of this derivative of the SA.330 Puma commenced in 1974 and the definitive prototype was preceded by a modified Puma, the AS.331, which flew in September 1977 with an uprated transmission driven by two Turbomeca Makila turboshafts. The first AS.332 flew on 13 September 1978 and introduced a number of further changes to improve payload, performance and survivability, and to reduce maintenance.
These changes included a new energy-absorbing landing gear with increased wheel base and track, a lengthened nose section, more efficient fiberglass main and tail rotors, greater fuel capacity, and revised fin and tail plane contours to improve handling. Subsequently in 1980 a fourth prototype introduced a cabin stretch of 0.76m with two additional windows and accommodation for up to three more passengers.
There are currently five main versions of the Super Puma, based on short and long fuselage variants. The AS.332B is the standard military version, which to date has been supplied to Abu Dhabi, Argentina, Chile and Spain, whilst the AS.332F is a naval variant armed with two Exocet missiles for antishipping duties. The civil equivalent of these two short fuselage variants is the AS.332C. The two stretched variants are the AS.332M military transport and the AS.332L civil version. The latter has become popular with offshore support operators, particularly in the North Sea where six major operators had the type in service at the beginning of 1984. This included 34 aircraft with Bristow Helicopters, redesignated Tigers to signify equipment differences from the standard AS.332L.
Orders for 150 Super Pumas had been received by late 1983, including license-built aircraft being assembled by Nurtanio of Indonesia.
Technical data for AS.332B "Super Puma"
Crew: 2-3, engine: 2 x Turbomeca "Makila" 1A1 turboshaft, rated at 1380kW, main rotor diameter: 16.50m, fuselage length: 15.53m, height: 4.92m, take-off weight: 9000kg, max internal payload: 2722kg, max external payload: 4500kg, cruising speed: 262km/h, hovering ceiling, OGE: 2300m, hovering ceiling, IGE: 3100m, range: 618km
This is the helo (ET 504) represented in this kit.

Re: SkyPainter303's 1/72 Italeri AS-332 Super Puma
Posted: Mon Oct 09, 2017 2:59 am
by SkyPainter303
This Italeri kit seems pretty simple. I assembled and primed the interior cockpit and the turbine section. Most of these parts aren't going to be too visible so I plan on brush painting them.
 P1010948
 by
Michael Keogh, on Flickr
 P1010950
 by
Michael Keogh, on Flickr
Re: SkyPainter303's 1/72 Italeri AS-332 Super Puma
Posted: Sat Oct 14, 2017 2:05 am
by SkyPainter303
I painted the interior with Model Master Acryl and Ammo paints. The Light Ghost Gray is Ammo, the Zinc Chromate, Olive Drab, Silver, and Gun Metal are MM Acryl.
 P1010956
 by
Michael Keogh, on Flickr
After a gloss coat, did a simple, black enamel wash followed by a matte coat. Once these parts are closed up in the fuselage, much isn't going to be visible anyway.
 P1010958
 by
Michael Keogh, on Flickr
The Liquitex Gloss varnish I used is quite shiny. Even though, it says not to thin with water, I did use Testors Universal Acrylic Thinner. It worked pretty well. The matte varnish gave a hazed look in spots. I am not sure how to remedy that.
 P1010959
 by
Michael Keogh, on Flickr
Re: SkyPainter303's 1/72 Italeri AS-332 Super Puma
Posted: Wed Oct 18, 2017 9:42 pm
by SkyPainter303
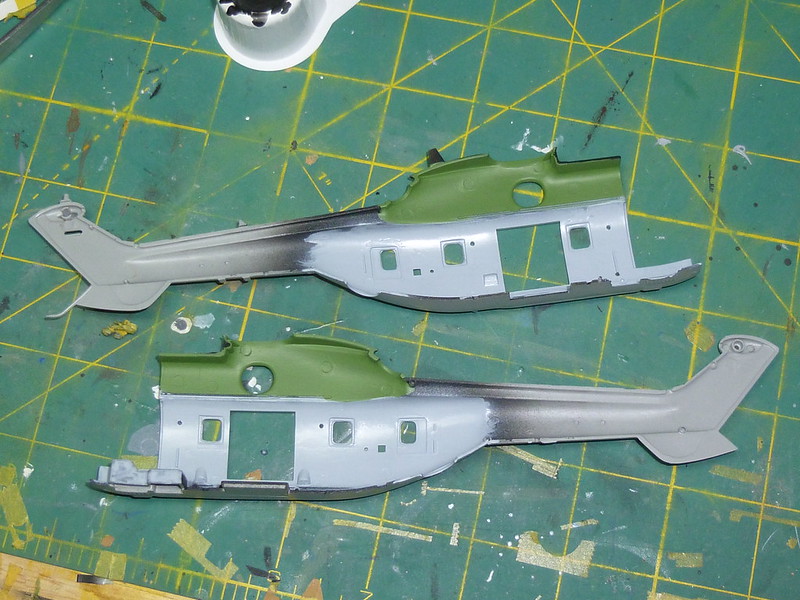
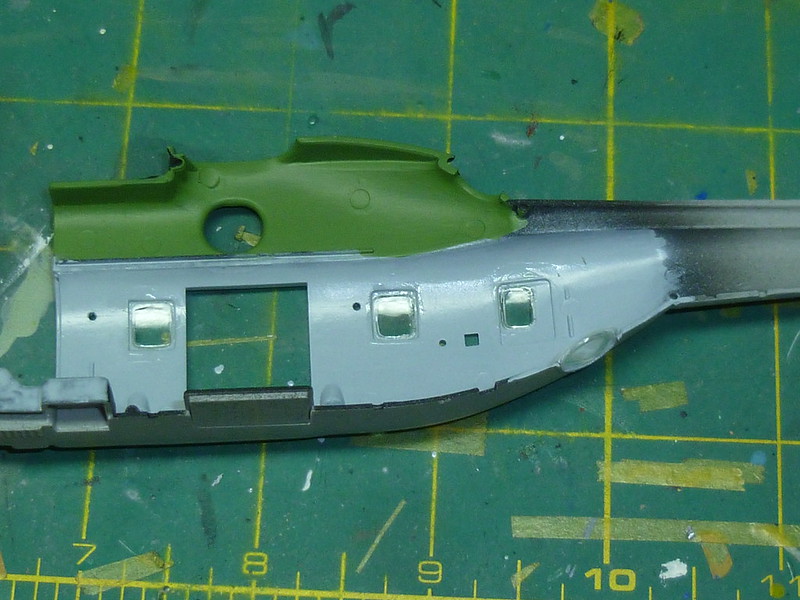
Not much going on with this update other than painting the interior halves (green zinc chromate and Light Ghost Gray).
 P1010961
 by
Michael Keogh, on Flickr
Re: SkyPainter303's 1/72 Italeri AS-332 Super Puma
Posted: Fri Oct 20, 2017 1:48 am
by SkyPainter303
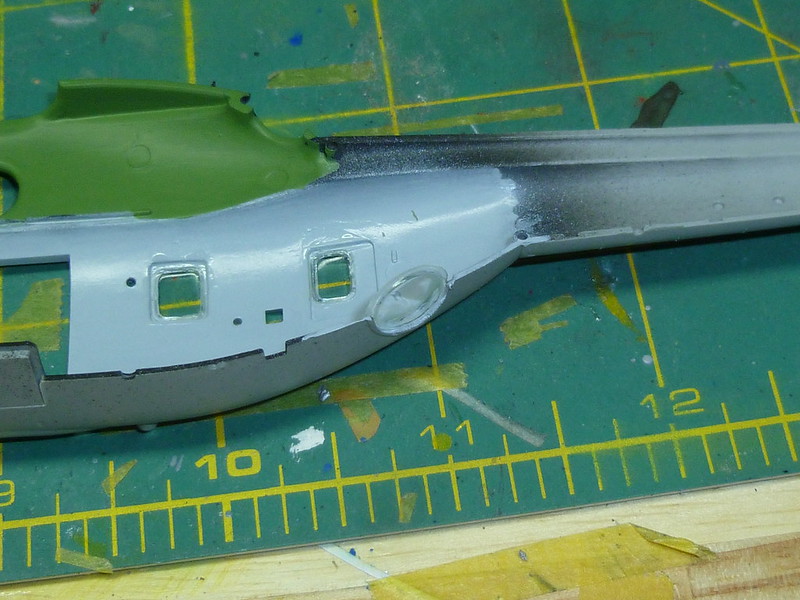
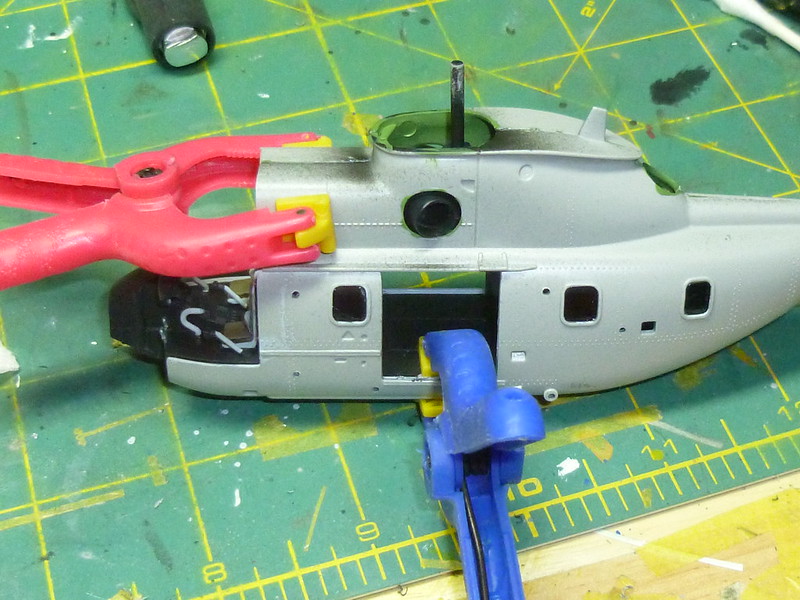
This helicopter build is going together pretty well. I glued in the windows with Testors Clear Parts Cement.
 P1010972
 by
Michael Keogh, on Flickr
Installing the lower bubble window is a little troublesome. More on that later.
 P1010974
 by
Michael Keogh, on Flickr
Previously, I glued in the turbines backward. That had to be remedied.
 P1010975
 by
Michael Keogh, on Flickr
Then I installed the floor including the cockpit and the engine area.
 P1010976
 by
Michael Keogh, on Flickr
 P1010977
 by
Michael Keogh, on Flickr
 P1010978
 by
Michael Keogh, on Flickr
When I flipped the model on its side, I immediately saw a problem. The bottom window showed a great view of gray plastic. To fix that, I brushed on some flat black.
 P1010979
 by
Michael Keogh, on Flickr
 P1010980
 by
Michael Keogh, on Flickr
Then it was time to join the fuselage halves together. The fit was pretty good except for that pesky bottom window. It dried in a crooked position not seating well into the left half.
 P1010982
 by
Michael Keogh, on Flickr
Because of the inner floor, I could not reach in to push the window down into place. I devised a plan using piano wire fished in thru an attached hole beneath the floor. I used the wire to nudge the window into place.
 P1010983
 by
Michael Keogh, on Flickr
This created another problem that I must live with; a nasty scratch on the glass. As reinforcement, I ran a bead of Clear Parts Cement around the outside of the window.
 P1010985
 by
Michael Keogh, on Flickr
Re: SkyPainter303's 1/72 Italeri AS-332 Super Puma
Posted: Fri Oct 20, 2017 1:49 am
by SkyPainter303
A couple of mini clamps hold things together as the glue dries.
 P1010987
 by
Michael Keogh, on Flickr
Re: SkyPainter303's 1/72 Italeri AS-332 Super Puma
Posted: Fri Oct 20, 2017 8:20 pm
by papatika
Great progress! Do you plan to use Liquitex here, too?
Re: SkyPainter303's 1/72 Italeri AS-332 Super Puma
Posted: Sat Oct 21, 2017 12:32 am
by SkyPainter303
papatika wrote: Fri Oct 20, 2017 8:20 pm
Great progress! Do you plan to use Liquitex here, too?
I think I'll either go back to Aqua Gloss or Vallejo. Aren't those products acrylic resins?
Re: SkyPainter303's 1/72 Italeri AS-332 Super Puma
Posted: Sat Oct 21, 2017 12:52 am
by SkyPainter303
Barring any future fiascoes, this build is going alright.
I assembled the engine intakes. It should be noted that the part numbers in the instructions don't match those on the sprues.
 P1010989
 by
Michael Keogh, on Flickr
The there is a gap that will need to be filled.
 P1010994
 by
Michael Keogh, on Flickr
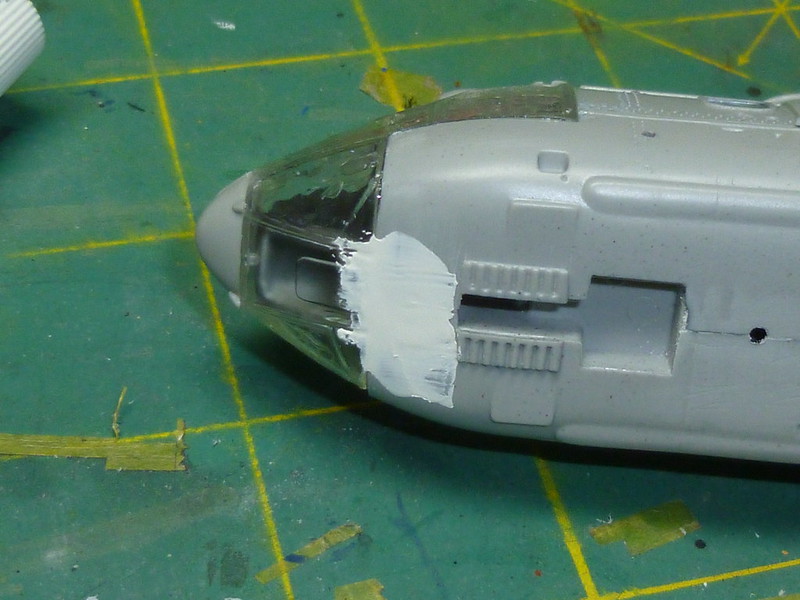
The only real bad part of the fuselage seam was on the top of the helicopter. Here is it filled with Tamiya white putty.
 P1010990
 by
Michael Keogh, on Flickr
I am trying something new-to-me; liquid mask. There are so many frames to the cockpit glass, I didn't feel like cutting all that masking tape. The mask I used was purchased at Hobby Lobby. It is called Incredible White Mask and, like most art supplies, it isn't cheap. For masking paintings, the instructions say to apply it with a nib drawing lines. I used a curved pick to flow the mask into the glass panes.
So far, the clear parts are the worst fitting. There are gaps here and there where it meets the fuselage.
 P1010997
 by
Michael Keogh, on Flickr
 P1010995
 by
Michael Keogh, on Flickr
Once again, I used clear parts cement for the door windows. Because the inside won't be visible, I wasn't concerned with neatness.
 P1010998
 by
Michael Keogh, on Flickr
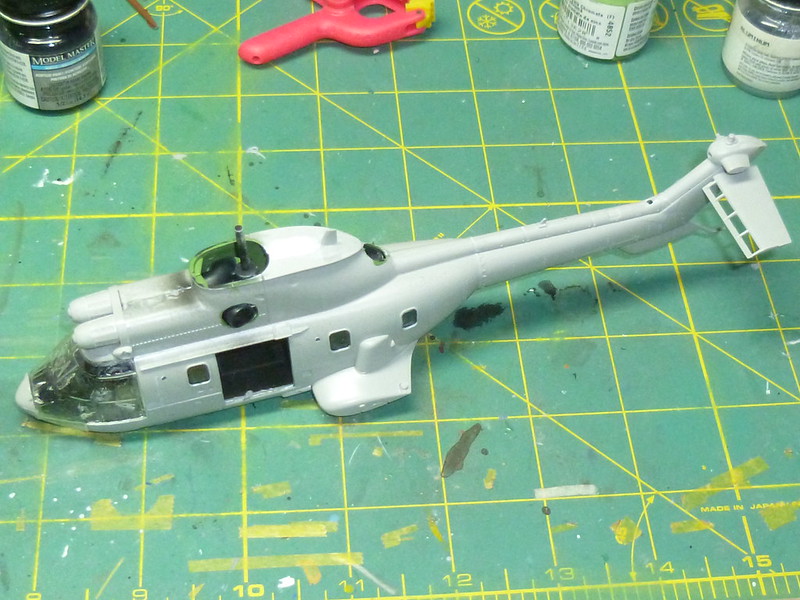
It is time in the build where various parts are added to the exterior of the fuselage. I added the rear stabilizer, the landing gear and wheel pants.
 P1010999
 by
Michael Keogh, on Flickr
 P1020002
 by
Michael Keogh, on Flickr
 P1020001
 by
Michael Keogh, on Flickr
 P1020003
 by
Michael Keogh, on Flickr
Re: SkyPainter303's 1/72 Italeri AS-332 Super Puma
Posted: Sat Oct 21, 2017 8:01 pm
by SkyPainter303
Not much going on with the helo today other than fixing some contours.
 P1020005
 by
Michael Keogh, on Flickr
 P1020006
 by
Michael Keogh, on Flickr
 P1020008
 by
Michael Keogh, on Flickr
Re: SkyPainter303's 1/72 Italeri AS-332 Super Puma
Posted: Thu Oct 26, 2017 12:00 am
by SkyPainter303
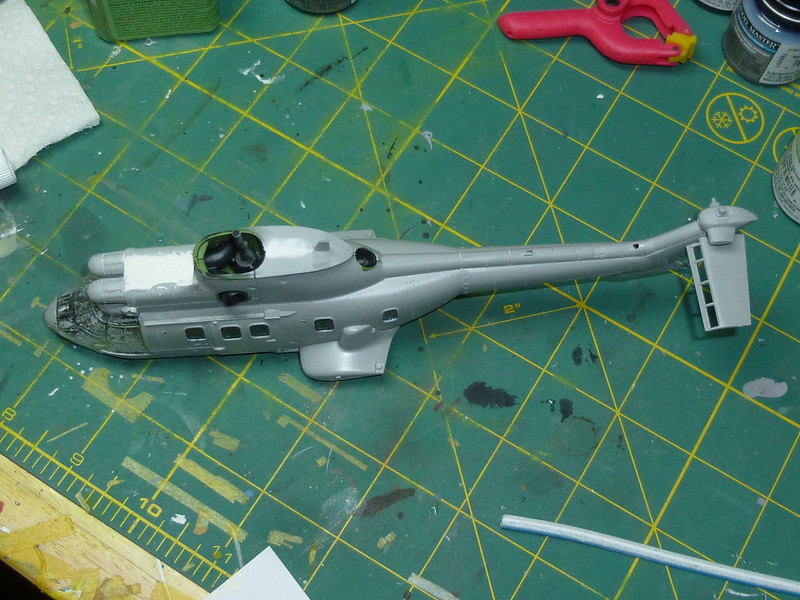
By now, the fuselage is ready for primer.
Here I added the various doodads to the bottom
 P1020009
 by
Michael Keogh, on Flickr
 P1020010
 by
Michael Keogh, on Flickr
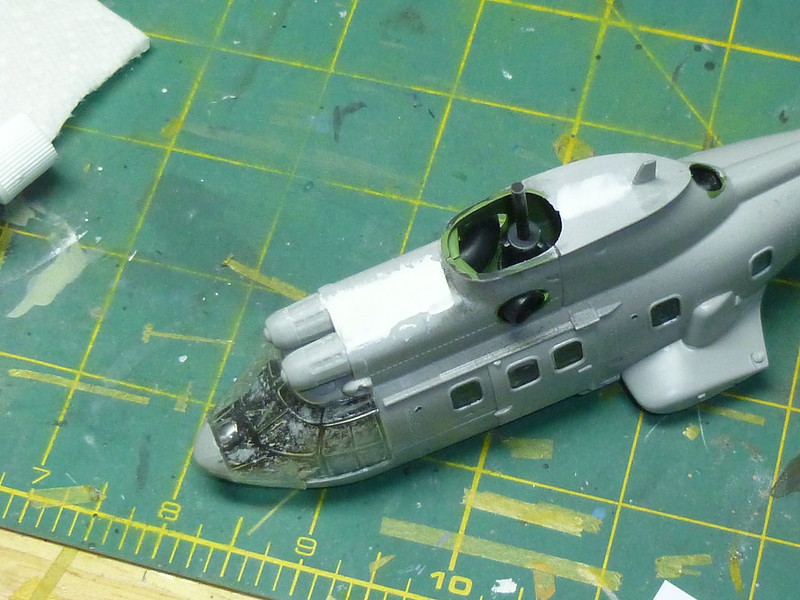
I also added antennas to the nose. I am not optimistic about the liquid mask. There may be lots of necessary cleanup of paint.
 P1020012
 by
Michael Keogh, on Flickr
The last pieces to be added were the steps which needed seam work and some added plates to the sides of the turbine section. The side windows also received a coat of liquid mask.
 P1020013
 by
Michael Keogh, on Flickr
 P1020015
 by
Michael Keogh, on Flickr
After all of the pieces were added, I realized that the holes I opened up in the fuselage early on in the build, were unnecessary. These were filled with putty.
 P1020014
 by
Michael Keogh, on Flickr
 P1020017
 by
Michael Keogh, on Flickr
 P1020018
 by
Michael Keogh, on Flickr
Re: SkyPainter303's 1/72 Italeri AS-332 Super Puma
Posted: Thu Oct 26, 2017 12:24 am
by xSCAR45
Looking good. Nice job overcoming the obstacles of this kit.

Re: SkyPainter303's 1/72 Italeri AS-332 Super Puma
Posted: Fri Oct 27, 2017 7:13 am
by SkyPainter303
Here I am at the fun stage of the build. I primed the fuselage in black Stynylrez and airbrushed the base coat of Olive Drab FS34087 Model Master Acrylic 4728
 P1020019
 by
Michael Keogh, on Flickr
 P1020020
 by
Michael Keogh, on Flickr
The camera flash washed out the olive drab. I won't be doing much experimentation with this finish sticking with the tried and true Aqua Gloss. I will be doing some oil weathering though.
Re: SkyPainter303's 1/72 Italeri AS-332 Super Puma
Posted: Fri Oct 27, 2017 10:05 pm
by Tomcat64
That's come together really well despite what the kit threw up at you. Nice work
Re: SkyPainter303's 1/72 Italeri AS-332 Super Puma
Posted: Sat Oct 28, 2017 11:22 pm
by SkyPainter303
Tomcat64 wrote: Fri Oct 27, 2017 10:05 pm
That's come together really well despite what the kit threw up at you. Nice work
Thank you very much. I hope I don't screw it up.
Before I gloss coat the fuselage in preparation for weathering, I painted the gear and wells flat white.
 P1020033
 by
Michael Keogh, on Flickr
Re: SkyPainter303's 1/72 Italeri AS-332 Super Puma
Posted: Mon Oct 30, 2017 8:14 pm
by SkyPainter303
I gloss coated the helicopter and started to put on the decals. The Italeri decals really suck, so I think I'll see what the aftermarket has. The kit decals are thick and don't react to the Micro Sol and Micro Set.
Re: SkyPainter303's 1/72 Italeri AS-332 Super Puma
Posted: Tue Nov 07, 2017 4:38 am
by SkyPainter303
This build has stopped until I find a set of better decals. In the meantime I've been working on other projects. In the process, I splashed some solvent on my helicopter model and now have a major spot to fix. This is a bummer. If I didn't have bad luck, I wouldn't have any luck at all.
Re: SkyPainter303's 1/72 Italeri AS-332 Super Puma
Posted: Tue Nov 07, 2017 10:36 am
by Quax
bad luck with the solvent, as Tomcat and others including myself will testify it seems to be that time of year. Stick with it though, I thought you were doing a great job!

Paul
Re: SkyPainter303's 1/72 Italeri AS-332 Super Puma
Posted: Tue Nov 07, 2017 11:06 am
by Tomcat64
Another member for the ISM "Splash & Spill" club - hope you get the decals and blemish sorted out relatively painlessly.
Re: SkyPainter303's 1/72 Italeri AS-332 Super Puma
Posted: Wed Nov 08, 2017 5:07 am
by SkyPainter303
I found a set of AS-332 B decals, but they are for a gray painted ship. I don't have a thick coat of OD paint on my model, so I could easily respray. The only other thing is that the prototype of this one has the larger wheel wells. I'd have to pop mine off and glue on the other set.

Re: SkyPainter303's 1/72 Italeri AS-332 Super Puma
Posted: Wed Nov 08, 2017 7:09 pm
by pourquoi61