Mannloon's Tamiya Jagdpanther Late build

User avatar
mannloon
Command Sergeant Major
Posts: 985
Joined: Thu Apr 17, 2014 10:57 pm
Location: Madison, WI USA
Contact:

Mannloon's Tamiya Jagdpanther Late build

Post by mannloon »

Hello ISM. If we haven't been acquainted, my name is Adam and I've only been here since April. I decided to jump in on this pretty late in the game. I just started making armor in earnest this year, so I will do my best but I am still learning.

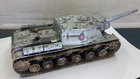
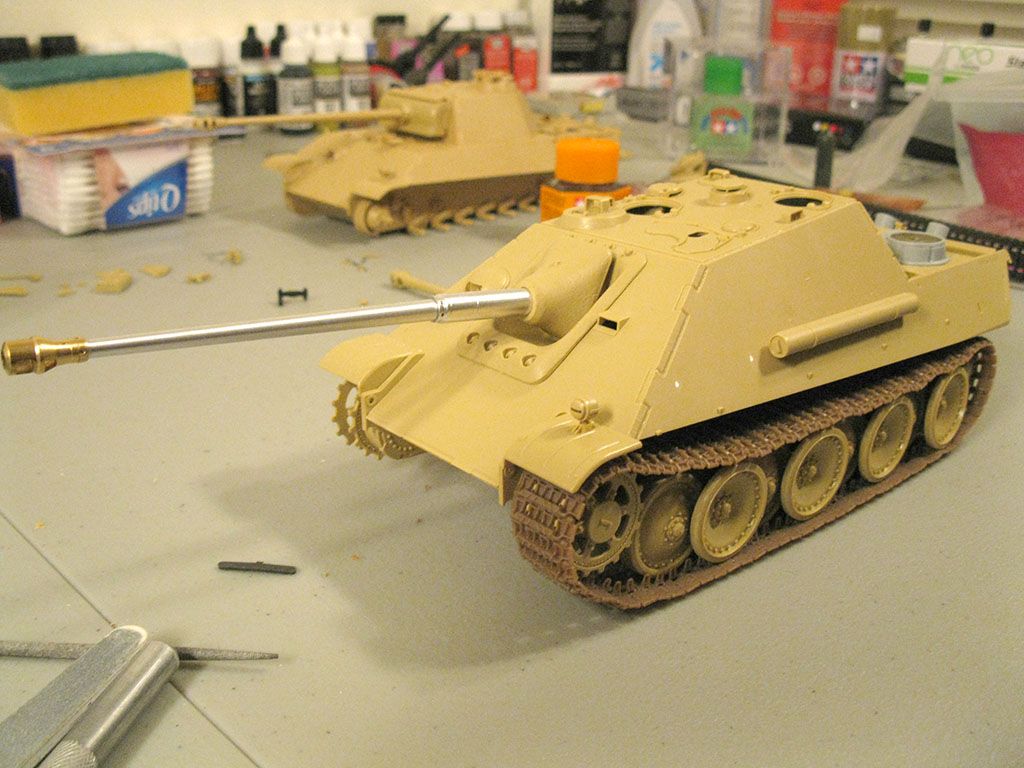
So the "Dangerous Cat" SiG. I chose this SiG over others that started around the same time or just after as my first because the Panther has always been special to me. I became interested in German armor relatively recently. For whatever reason, despite my interest in all things WWII since I was 14 I hadn't explored the topic until my late 20's. I received a book as a gift around then that gave general overviews of all vehicles in WWII and finally started to clear away the fog that covered the complexity of all these amazing AFV's.

After that I started to look for more information, hunting down books and documentaries, you name it. I started to consume any information I could. As I was learning about the different panzer marks, for whatever reason I was just struck by the Panther. I know it's sort of a contaminated design as it was mimicking the T-34, but I thought it was more striking and practical than the Tiger 1. I don't know that I still feel that way, I suffer now from what I would call "Coen's disease", where I seem to obsess about all things Tiger 1. But initially for me it was all about the Panther. Mind you that was now 5 or 6 years ago, but your first love is always your first love.

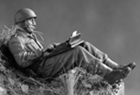
So before I knew what was what, I at least already loved Band of Brothers. And as sad as it is, a lot of my first exposures to something resembling a German tank were the Speilberg replicas. I know...they're pretty awful.
Image

It looked enough like a Jagdpanther that when I saw a real one in a book at least I recognized the thing. So my first memories of distinctive German armor characteristics was this goofy proportioned Jagdpanther replica. I had no idea why it didn't have a turret, or why it looked the way it did. But it made an impression. It was a start. So building my first Jagdpanther model for this SiG will be sort of fitting. It's my favorite variant of the first panzer I was really in to. And one of my first memories of German armor.

Some History
The Germans were trying to mount an 8.8cm gun on a chassis as a self proppeled anti-tank gun since at least 1943. These ad hoc attempts at tank destroyers were interesting but flawed. I would love to build them all, but as legitimate vehicles they were compromised.

The Ferdinand I think is the more famous of the first two attempts. To me it seems like a flaming disaster of a design. Obviously plopping a 8.8 cm Pak 43/2 L/71 on those unused Porsche Chassis and sending them off to Kursk was not the best plan. I don't even think if it had been the Elefant with a bow machine gun at Kursk it would have made too much difference. It was too heavy, and too slow and not a good design. But at least it had a closed fighting compartment, although I imagine it felt like being in your own coffin at Kursk.

The Nashorn was probably a bit more practical. Fitting the Pak 43/1 to the very good Panzer IV Chassis seems more natural. however it was too tall, and it had an open fighting compartment. Which unlike the Ferdinand would have felt like you had nowhere to hide I would think.

Finally the Jagdpanther comes on the scene. I would consider it one of the rarer vehicles. the 415 that were produced is not very many. The Ferdinand/Elefant for example, only consisted of 90 vehicles which seems very rare. Only a little more than 4 times as many Jagdpanthers were made. Seems strange to me as it is such a popular vehicle.

Specifications and variant differences
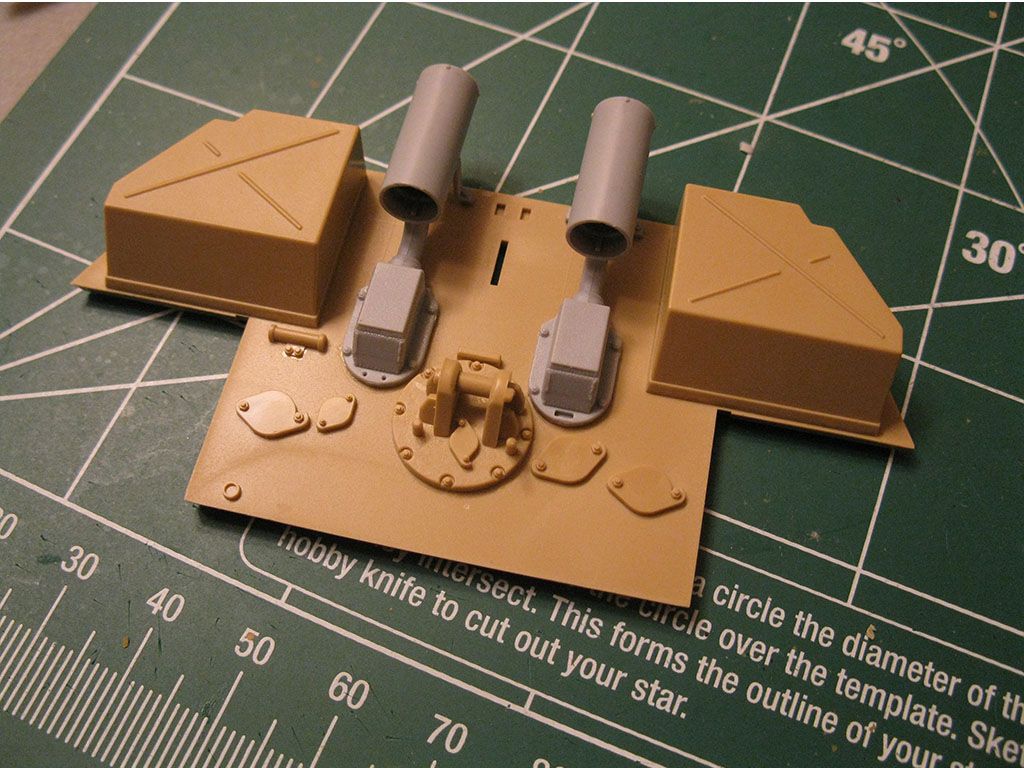
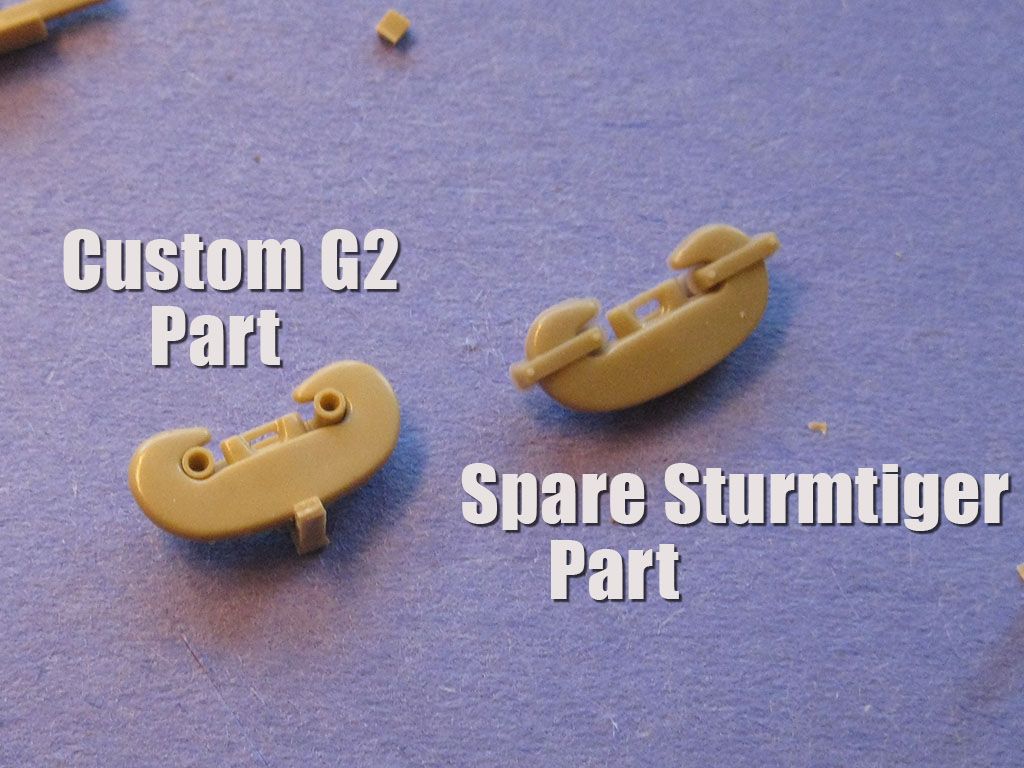
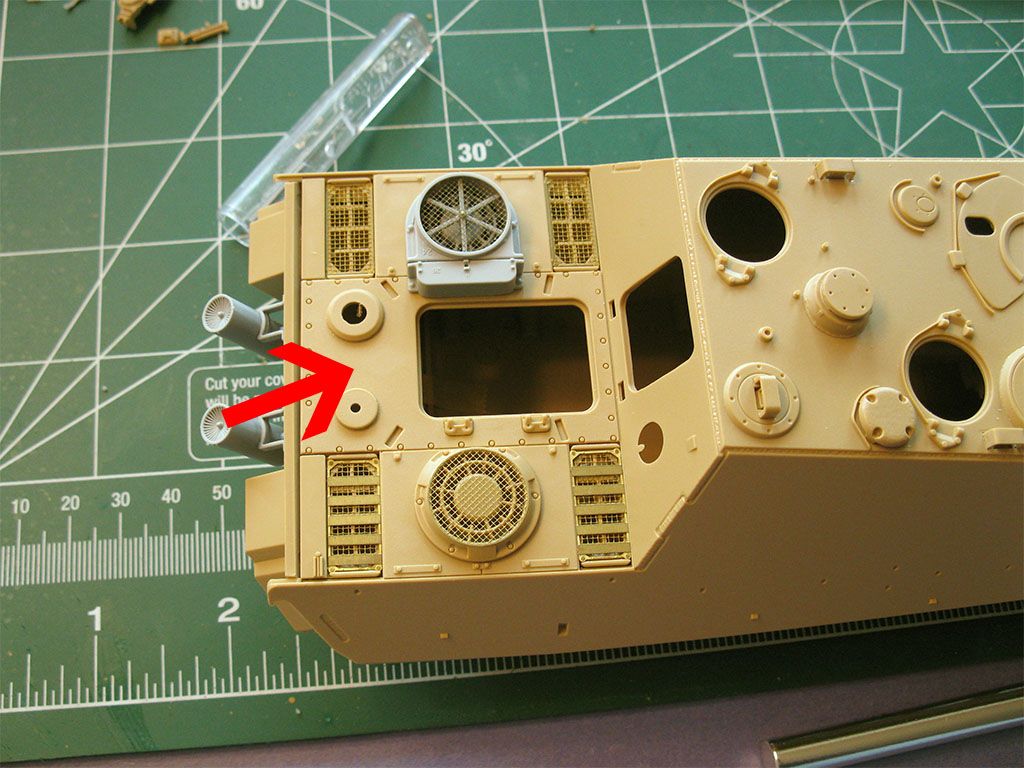
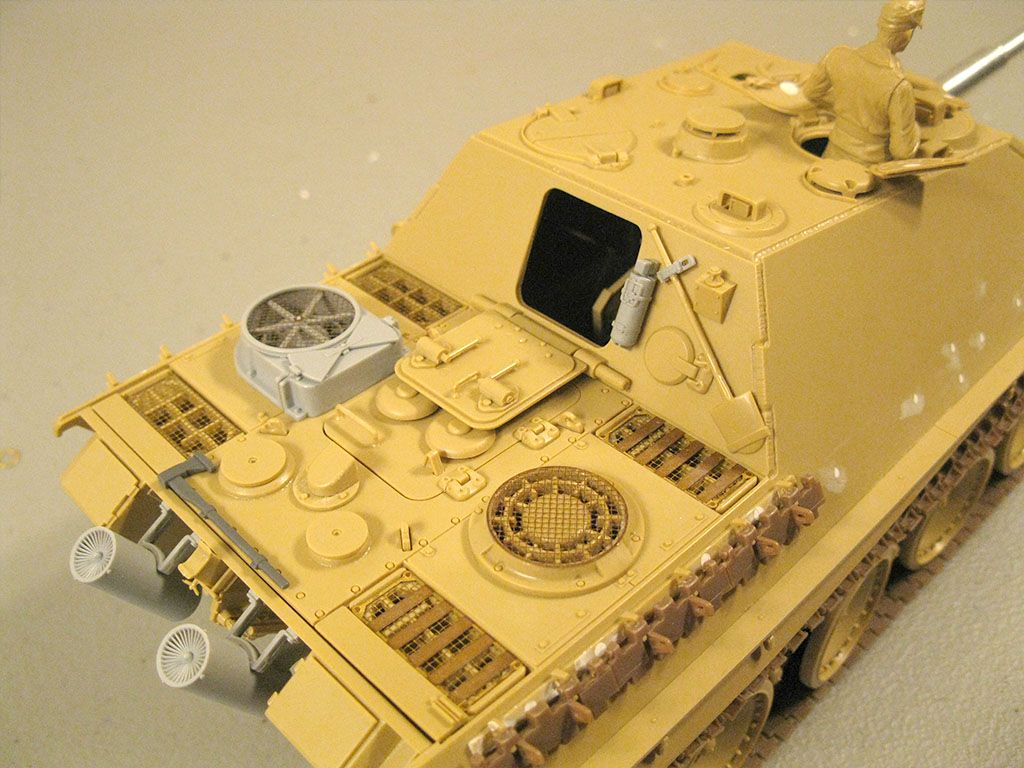
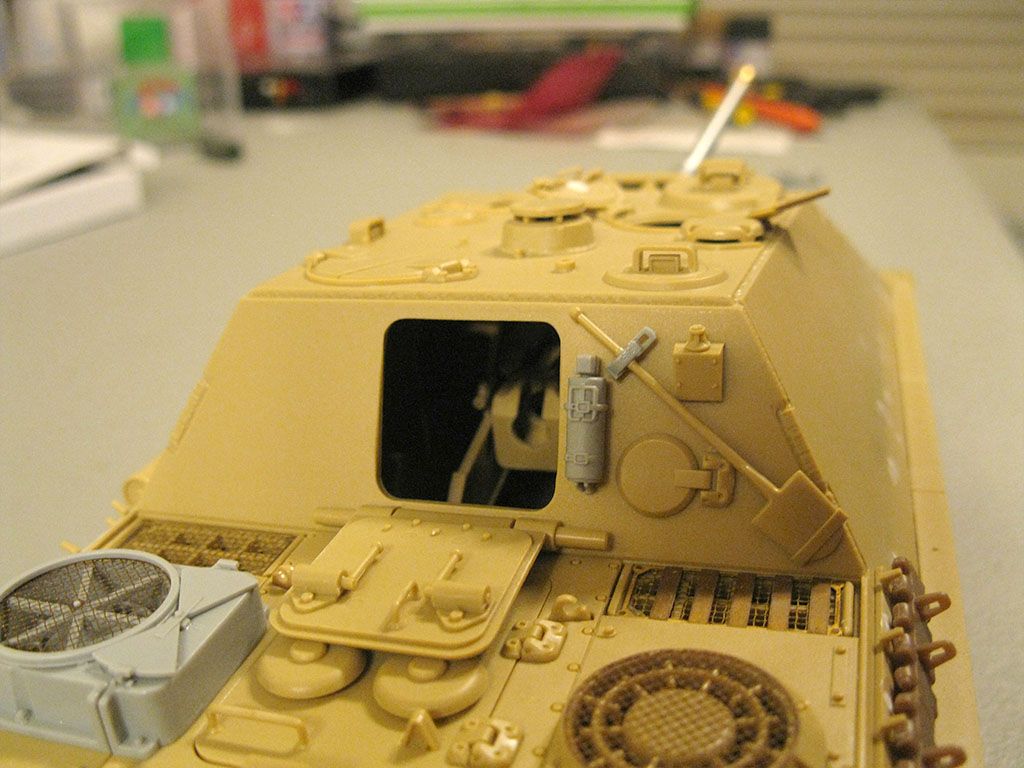
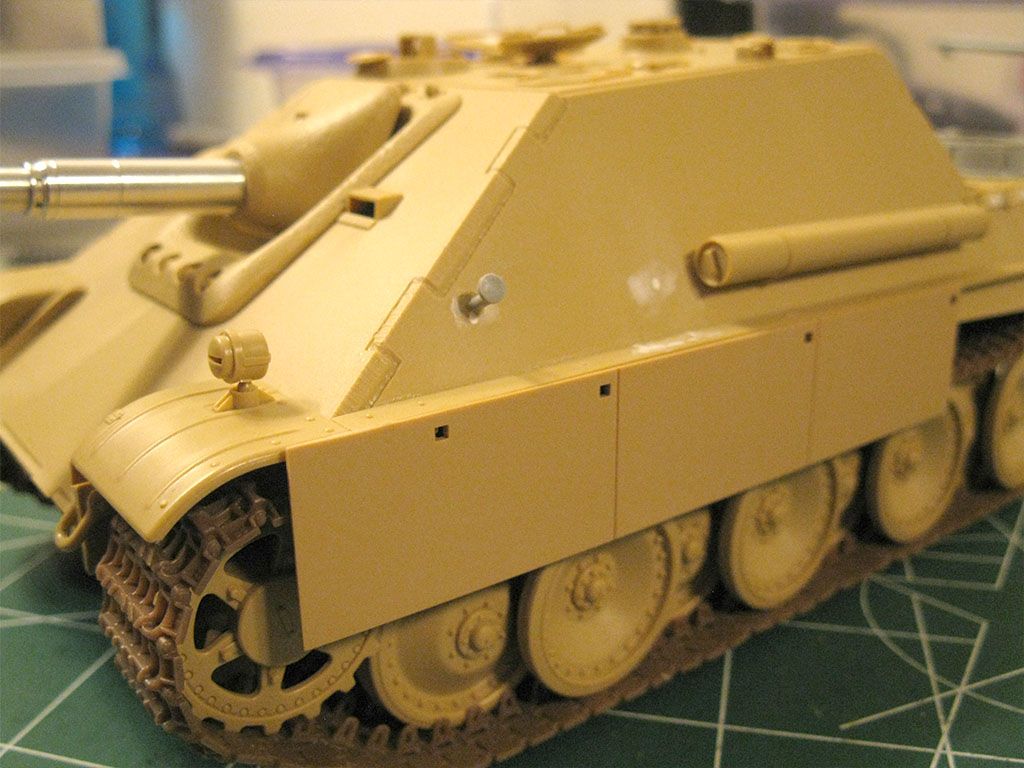
The Jagdpanther had either a 8.8 cm Pak 43/3 or 43/4 L/71 on the very good Panther Chassis. Initially called "8.8 cm Pak 43/3 auf Panzerjager Panther", it was renamed JagdPanther and began production in January of 1944. There were technically 2 variants, the G1 and G2. but my impression is there are 3. The G1 early and G1 late, and G2. The early G1's made in 1944 were factory applied with Zimmerit, have a smaller internally bolted mantlet, two vision slots for the driver and a Panther A engine deck. The late G1's have the larger G2 mantlet, and I believe can have either gun, the monobloc or two part barrel. The G2's made in 1945 had no Zimmerit, the larger outer bolted mantlet, one driver vision slot, a Panther G engine deck and the two part gun. They are also distinguishable by the crew heater fan housing on the engine deck, and that all the pioneer tools are on the rear engine deck instead of the side of the tank. The G2's also commonly had flammenvernichter exhaust, but i don't know if that was dependent on which of the 3 factories they were made in or if all G2's had them.

That's the basics anyway, and of course there are exceptions to the rule. Not "all" versions had all modifications. I will be using the generically titled Tamiya "Jagpanther Late" to make a G2. I'm not sure if Tamiya meant late G1, or late Jagdpanther meaning G2. It appears to have a Panther G engine deck, and a single vision slot for the driver, so I'm going to try and make it as G2 as I can.

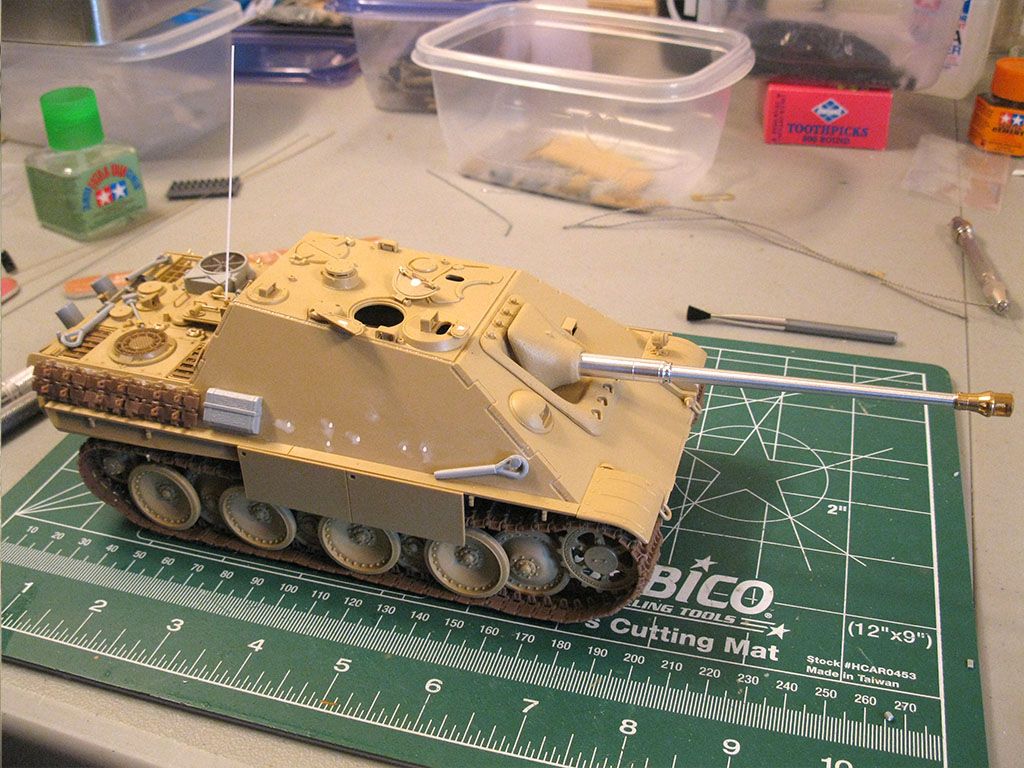
The Jagdpanther saw action primarily on the Eastern front initially, with limited numbers used in the defense of Normandy. Larger numbers were eventually brought to the Western front in the autumn of 44 for use in the Ardennes offensive. I will more than likely go for a traditional 3 color camo scheme that would match either Normandy or the Ardennes.

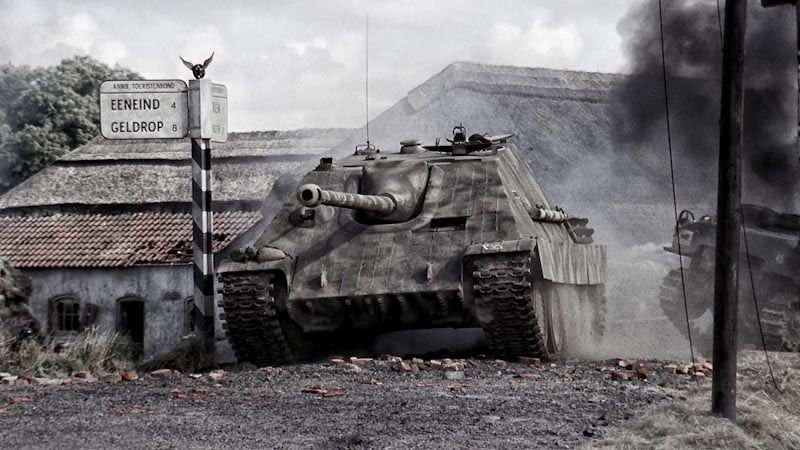
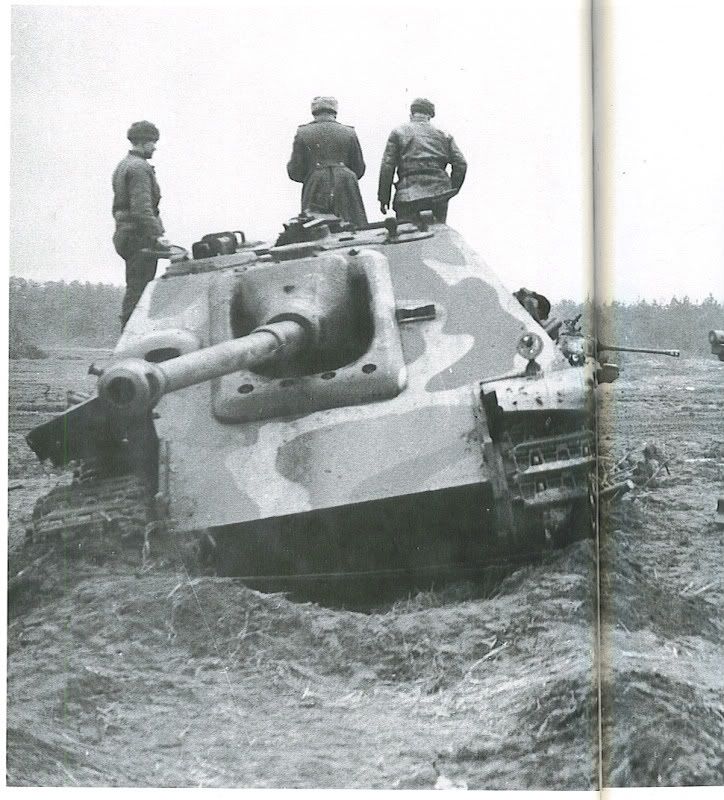
Sometimes I base models on specific vehicles in pictures or that still exist, but for this one I haven't really picked one inspirational piece. This is the only pic I keep going back to. I like that sort of design for the camo.
Image

The Kit

My last unbuilt Tamiya kit. Not sure how I feel about Tamiya anymore. I started with them. I've built or am building 10+ of their German armor kits. After building Dragon I feel Tamiya can be a soft on detail in general. They do fall together and I appreciate that. Unless of course we're talking about the old RC kits, those are undesirable to say the least.
Image

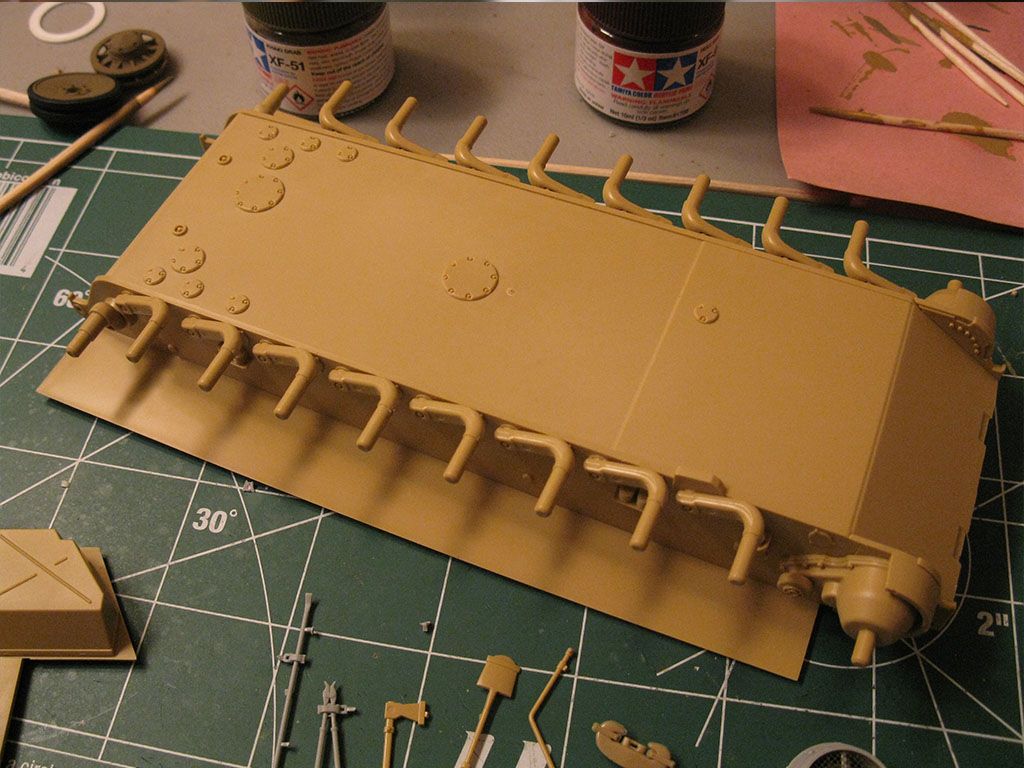
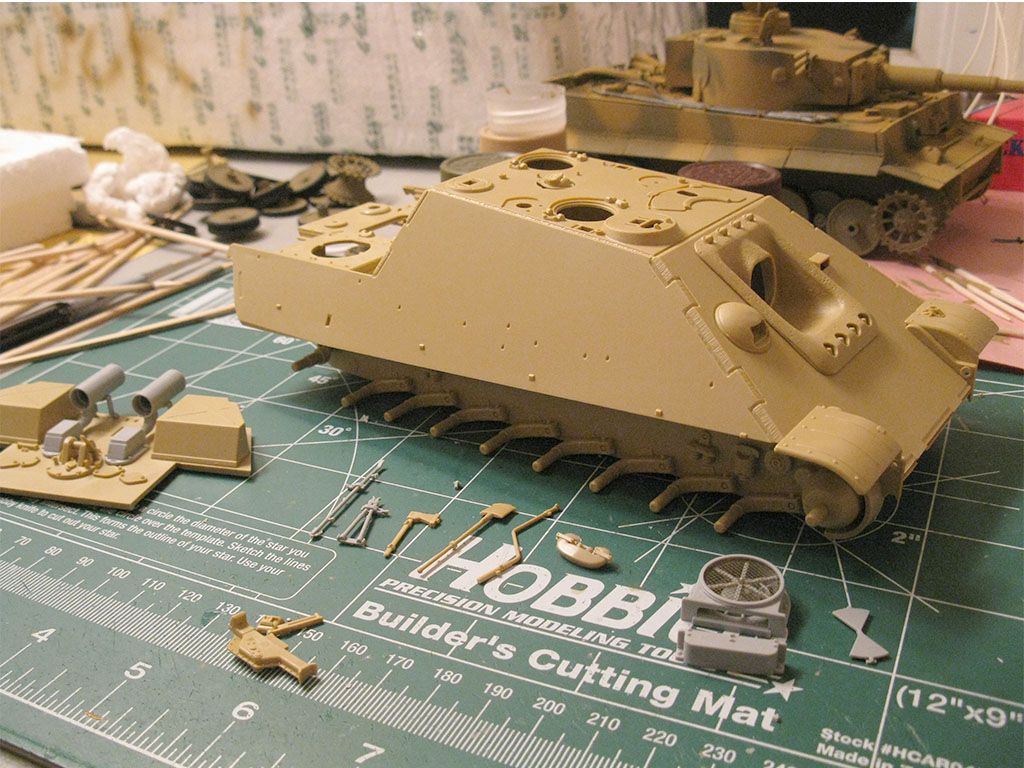
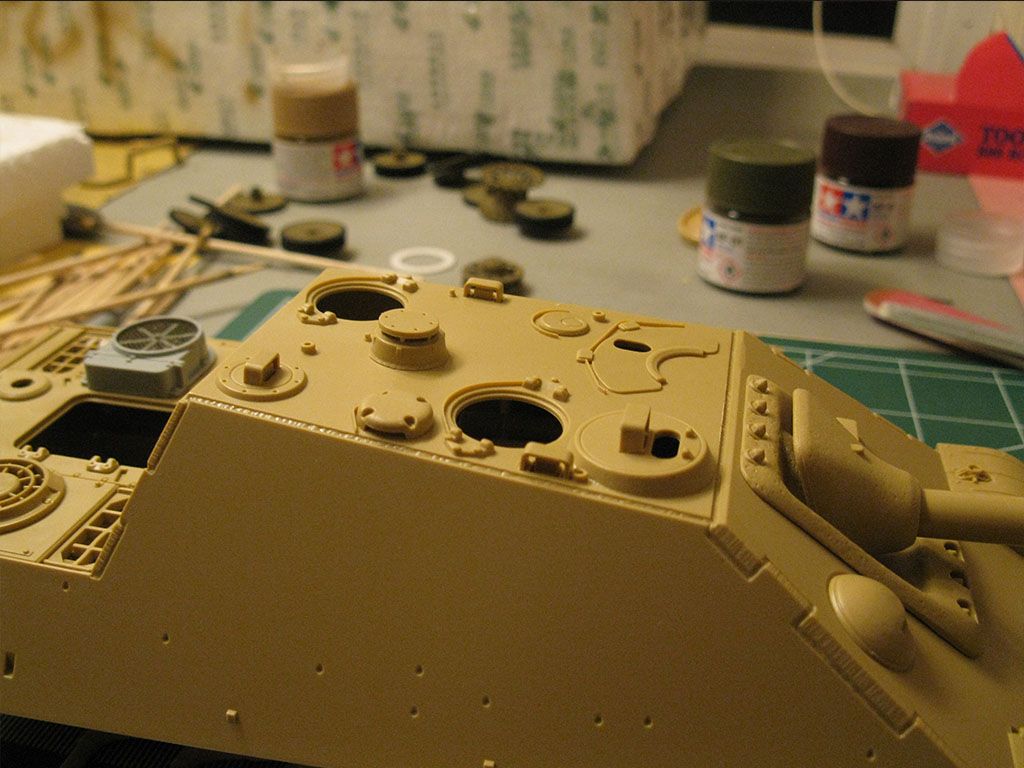
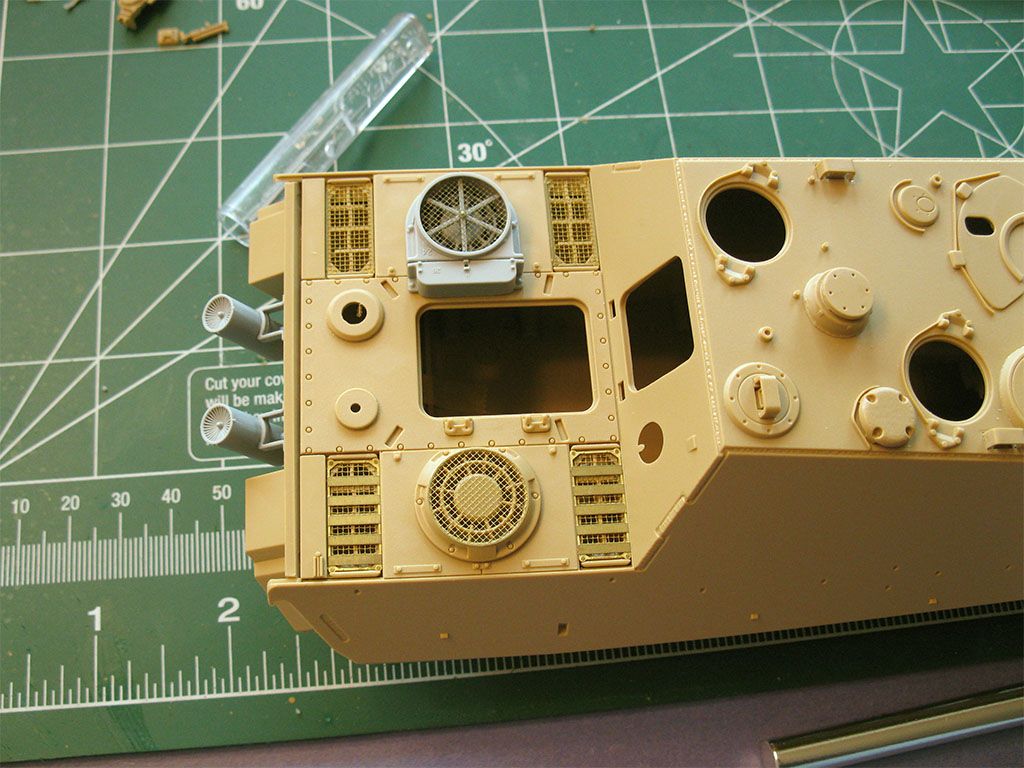
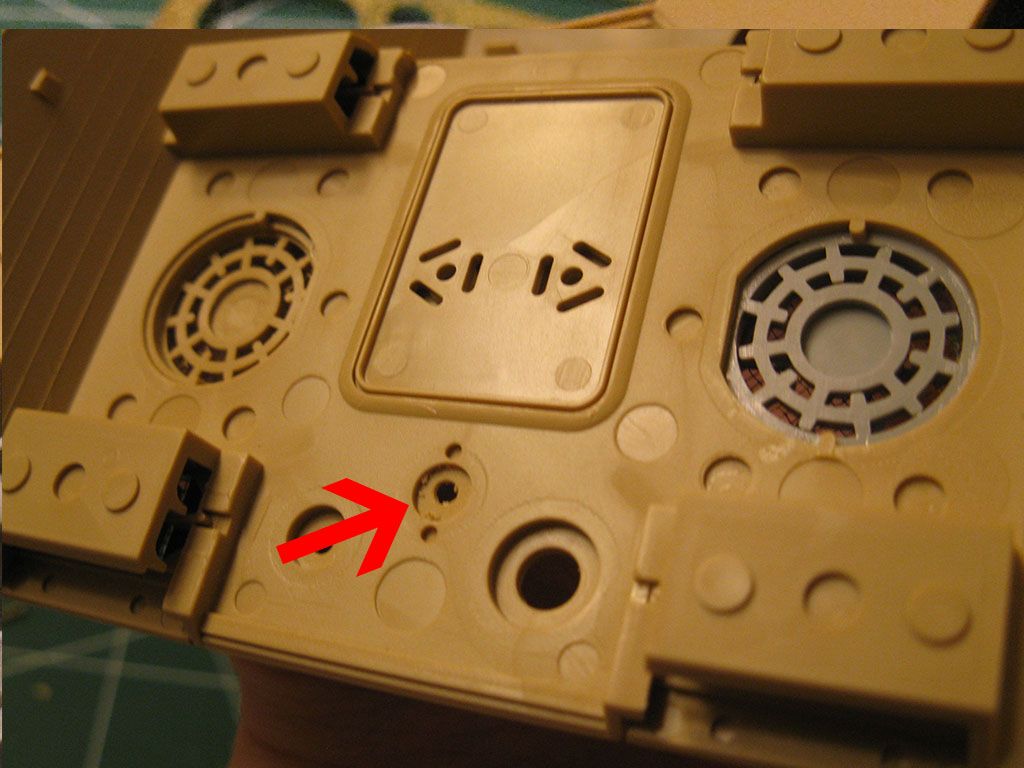
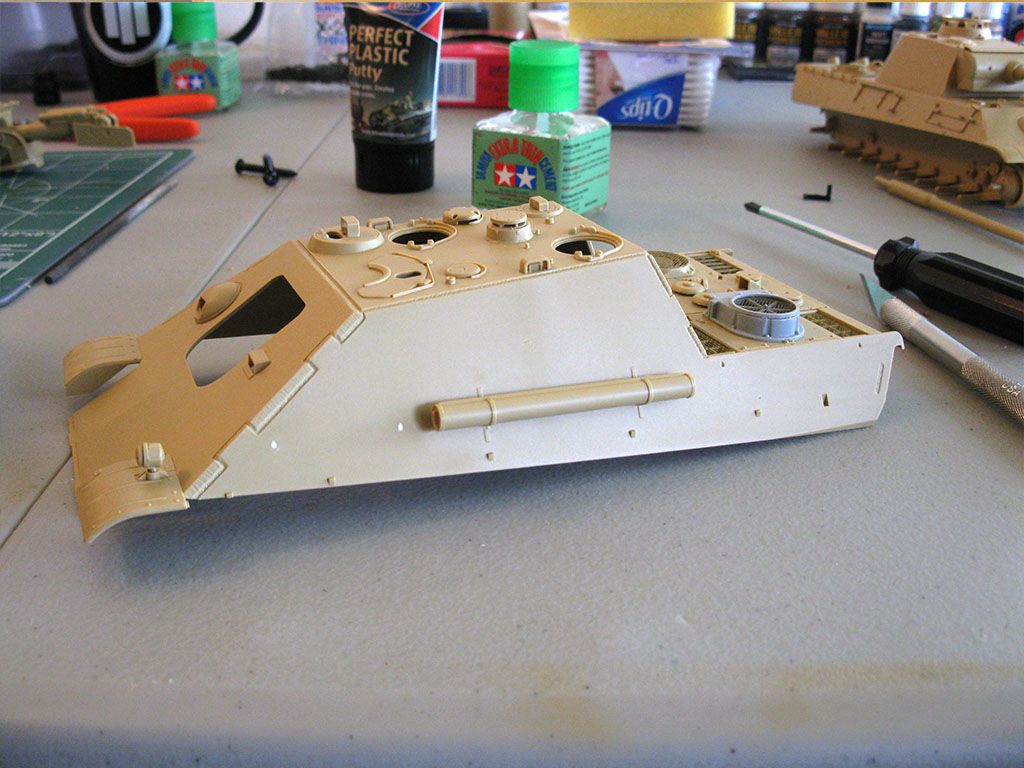
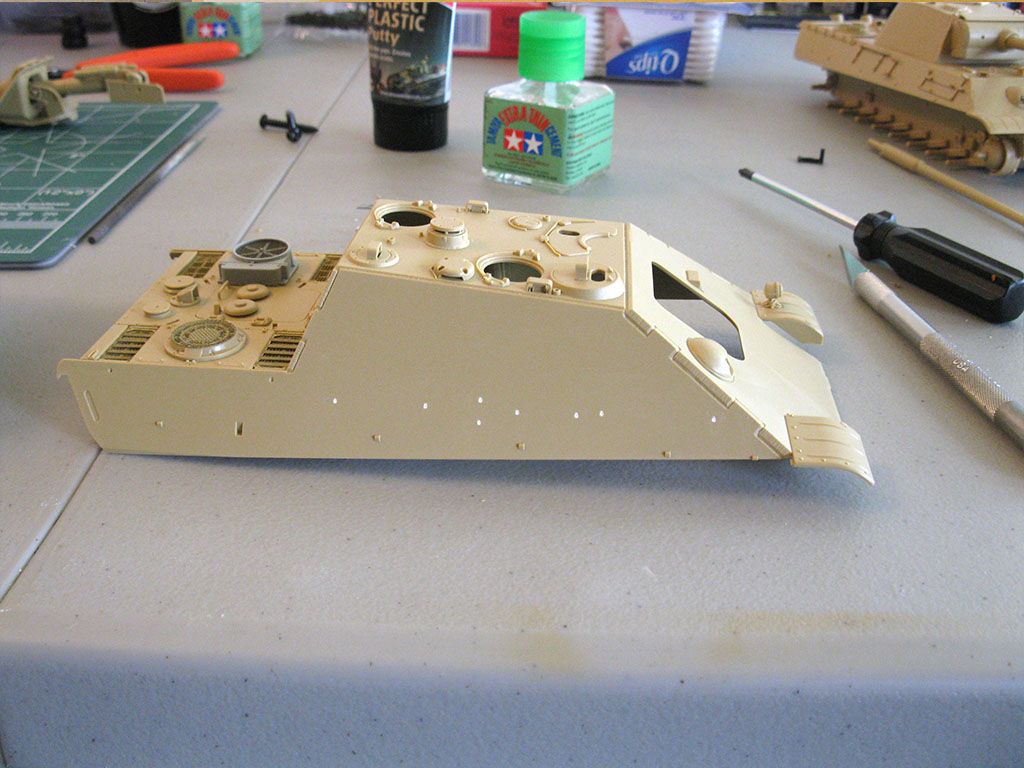
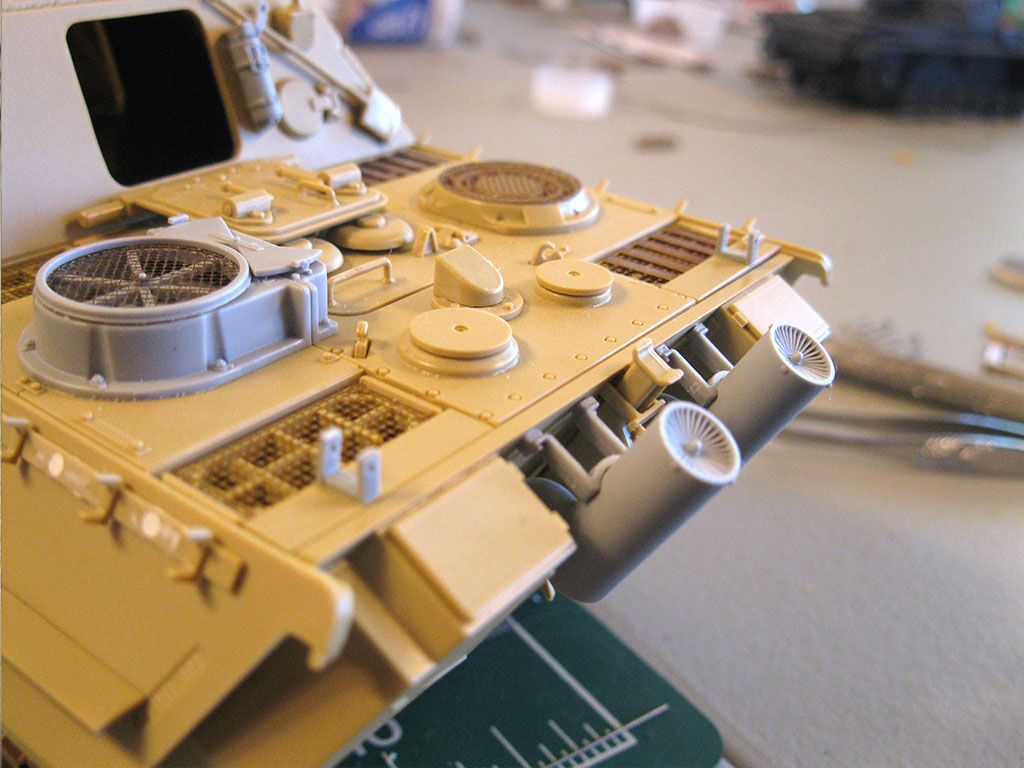
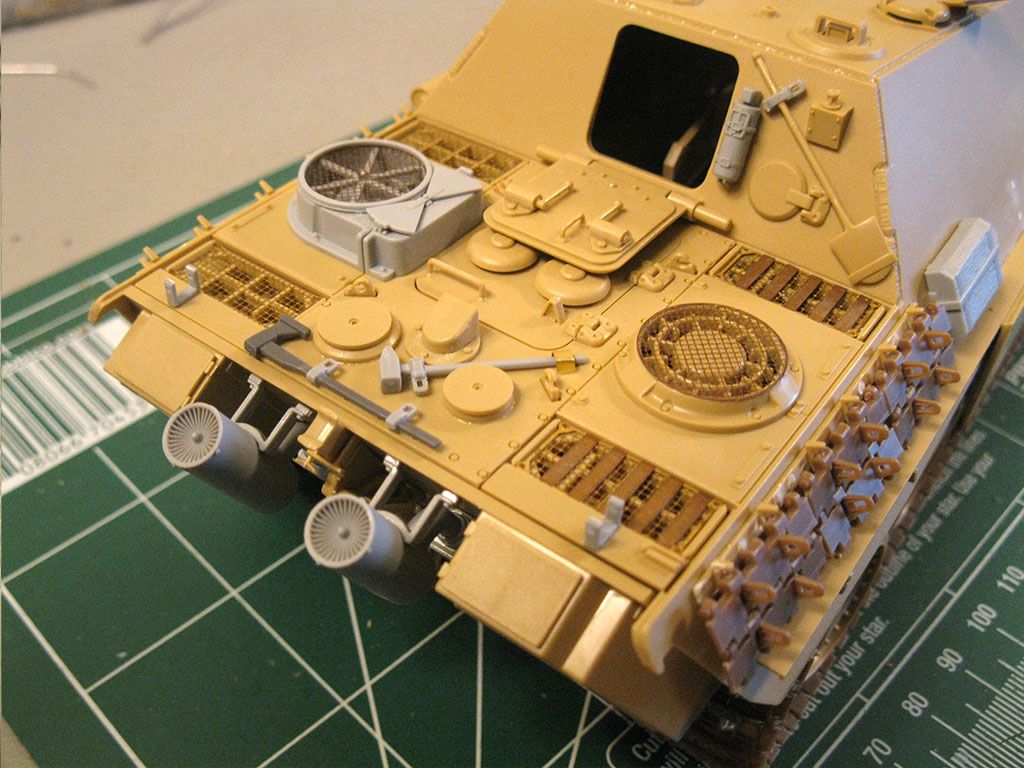
Let's start with the upper hull. The over-all detail is pretty crisp for a kit from 1993/96. No steel texture on the surface, but the welds look pretty ok. I don't have Mr. Surfacer, but maybe I should order some. Or I could try that stipple Tamiya extra thin technique. There are lots of tool attachment points on the hull I will fill as the G2 should have tools on the rear deck. Apart from one issue it seems fine enough for Tamiya.
Image

Image

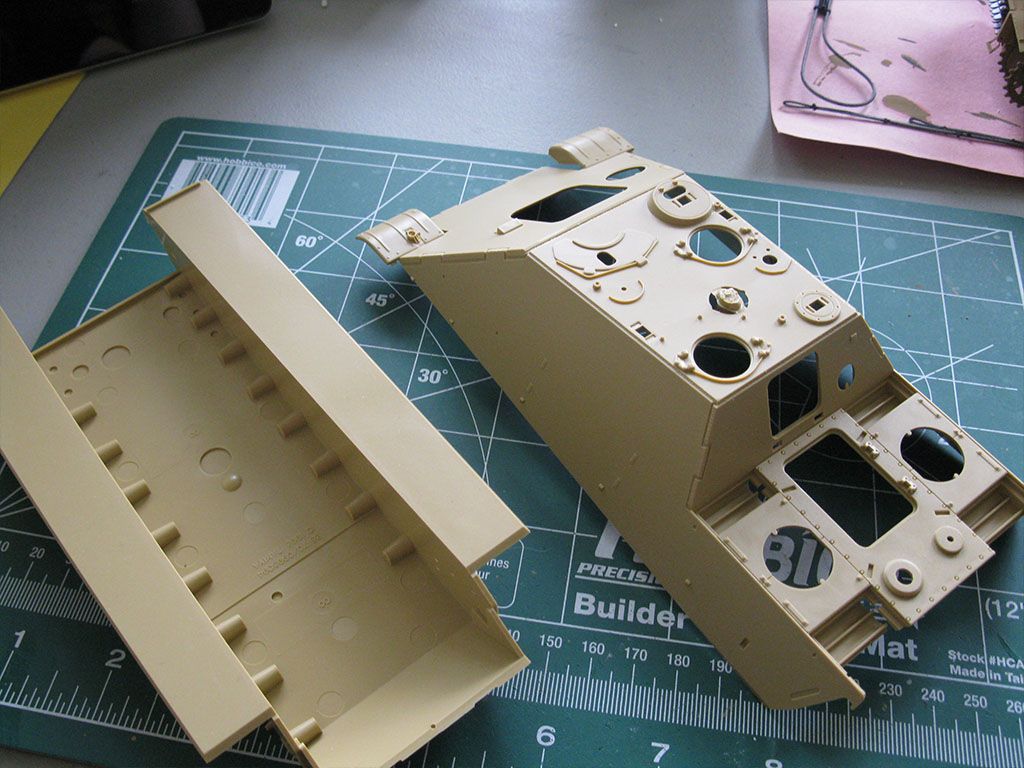
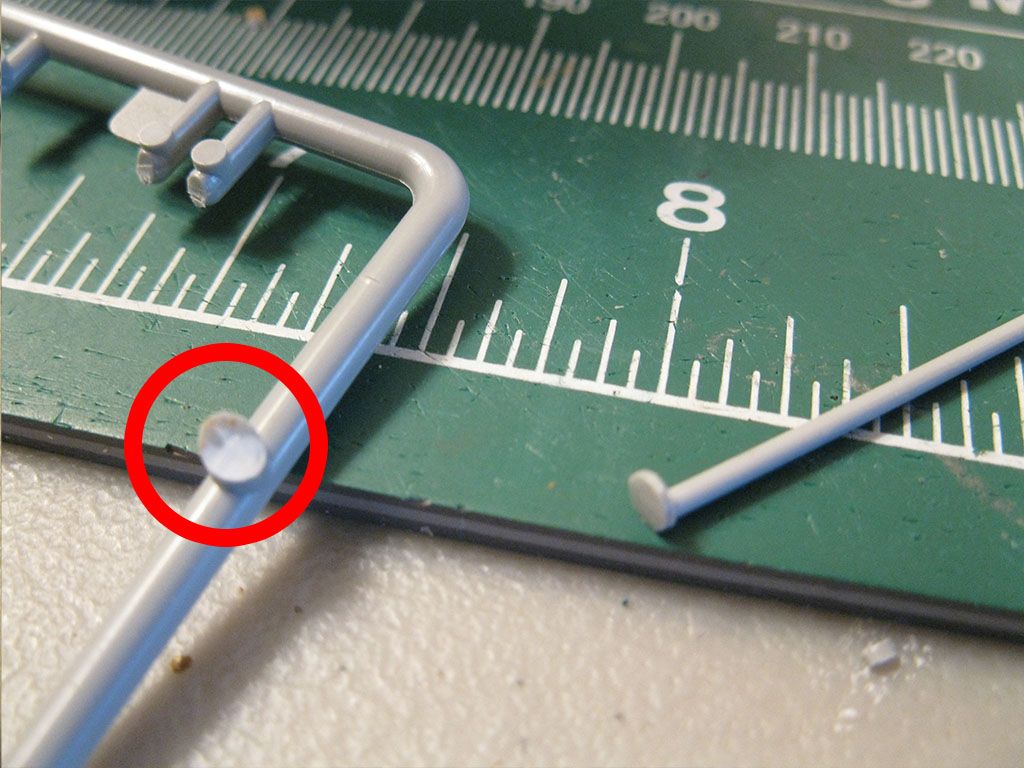
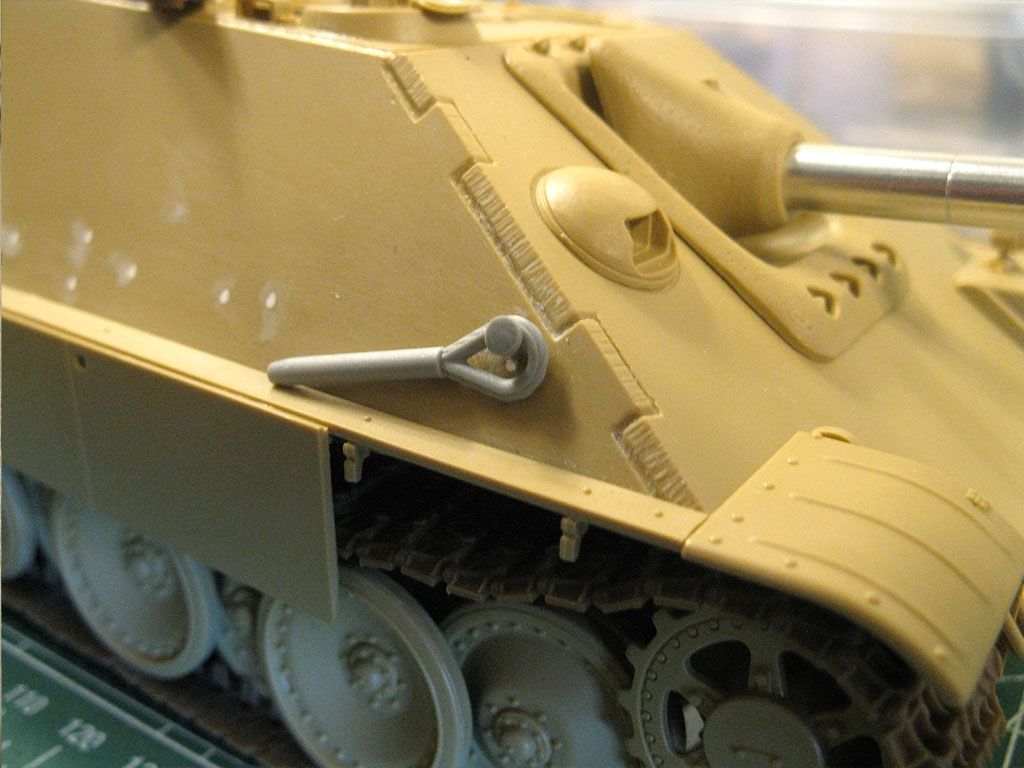
This is the issue. I adjusted the levels of this picture in Photoshop to show the problem. There is a line from where the mantlet goes to the bottom of the glacis plate. I've seen this problem talked about in videos before, I think it comes from temperature change when the plastic is being molded or something. I don't know if it's a huge problem, I'd love for you guys to tell me if it is. I was upset when I ordered the kit and it came that way, but I'm hoping paint will hide it. You can't feel it if you run your finger across it, you can only see it. So let me know if that's something I need to worry about.
Image

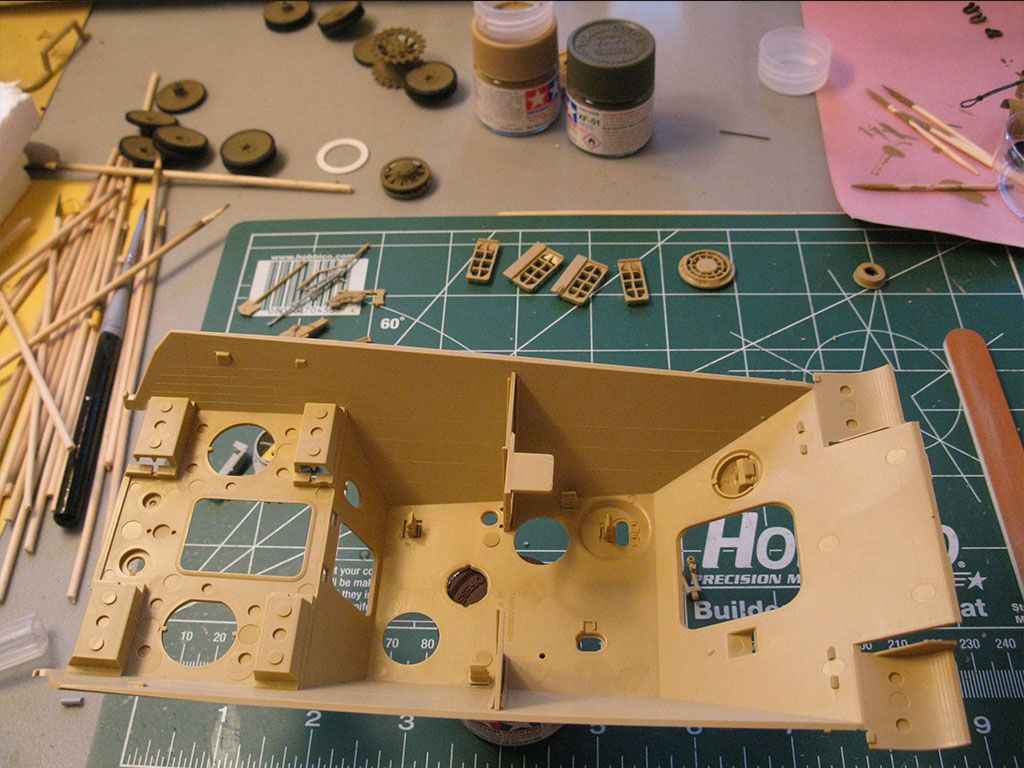
The lower hull tub is basic Tamiya. It's identical to the other Panther G tubs. The bump stops are pretty nice, not as crsip as my Dragon Panther, but pretty good.

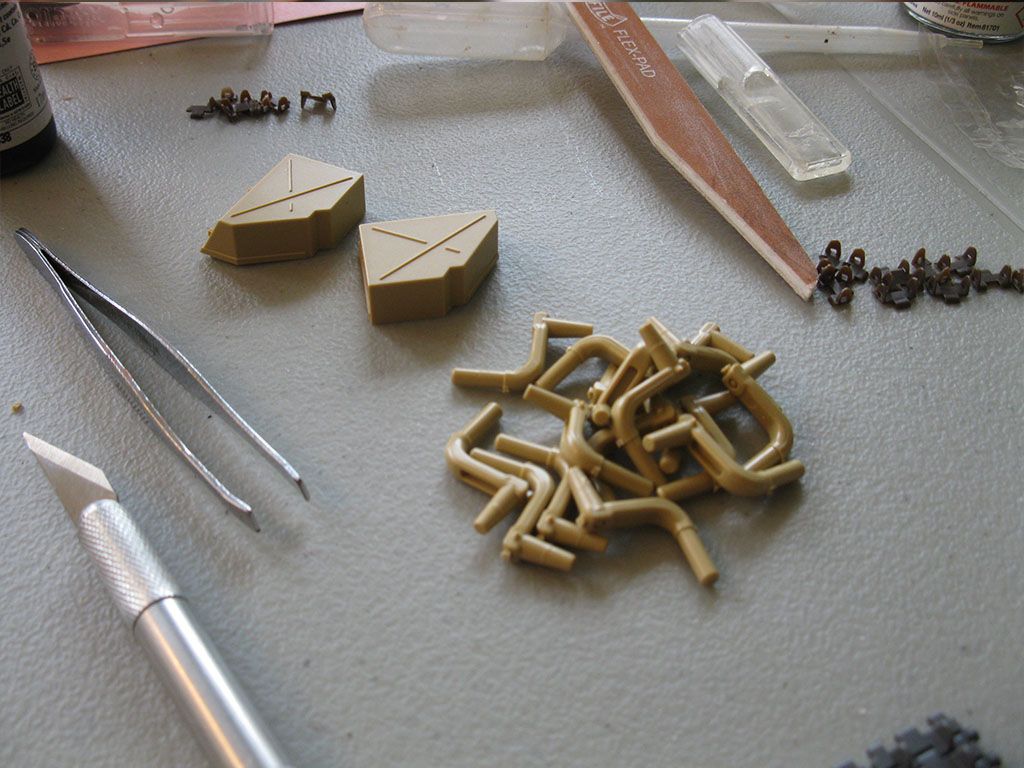
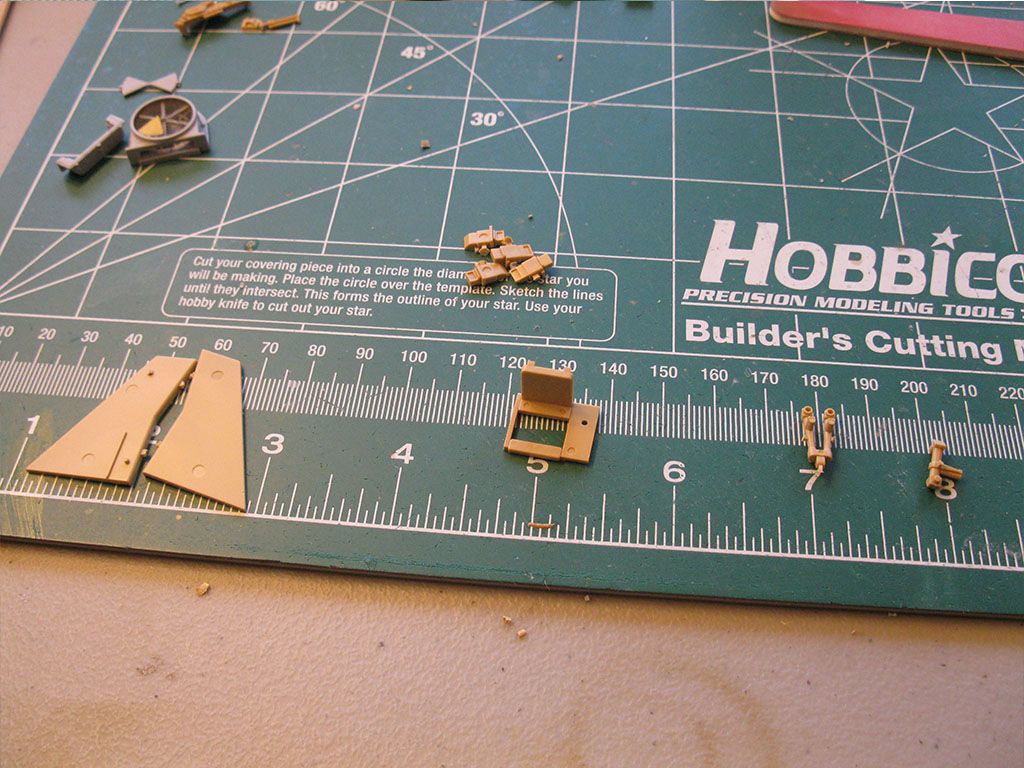
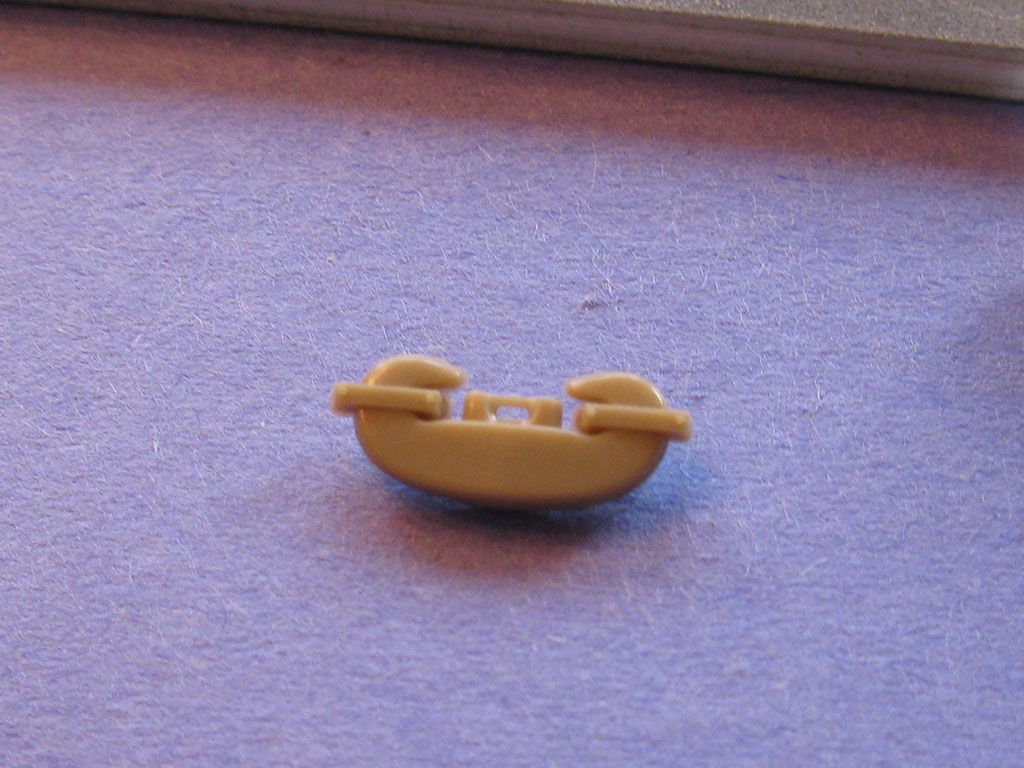
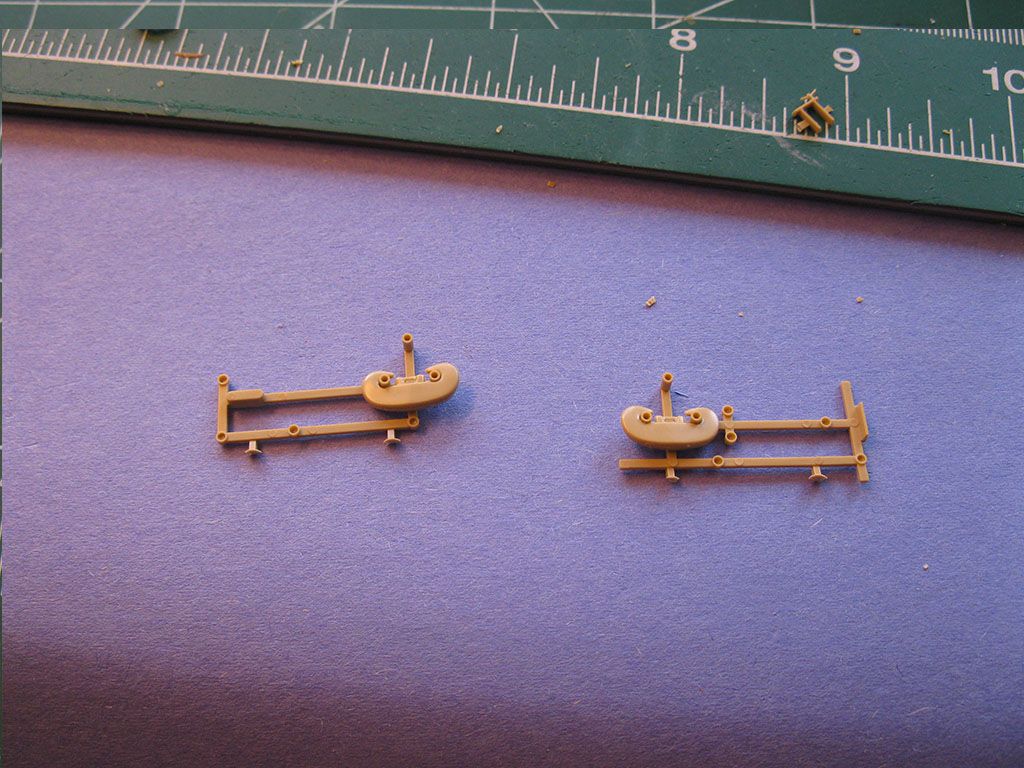
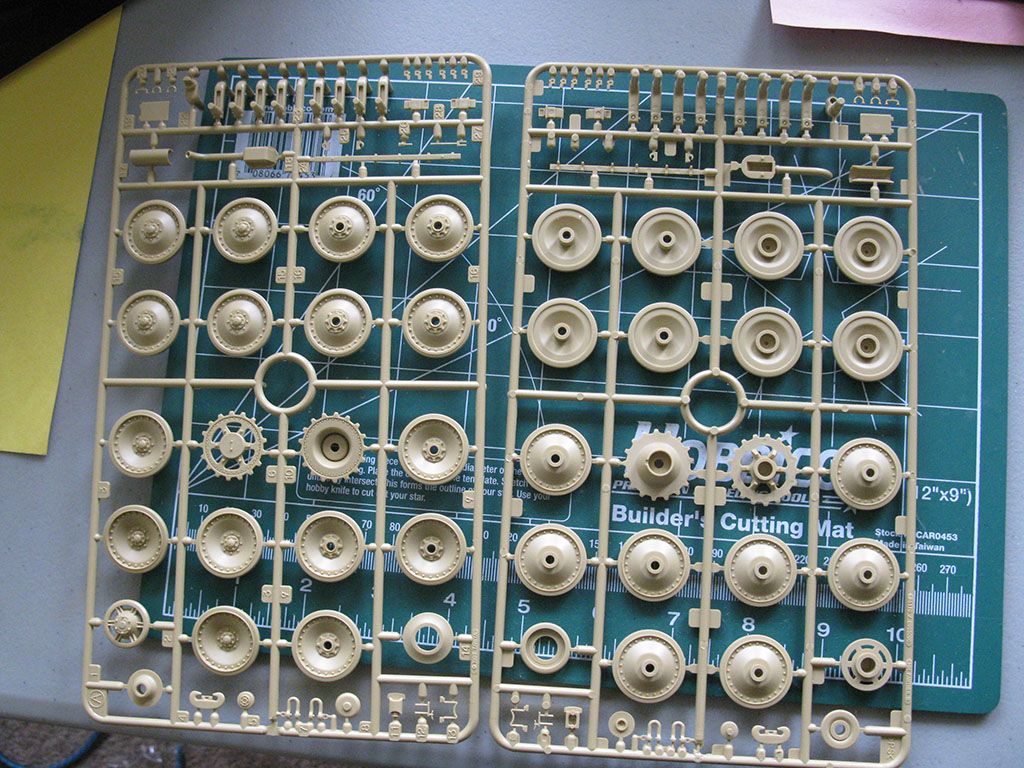
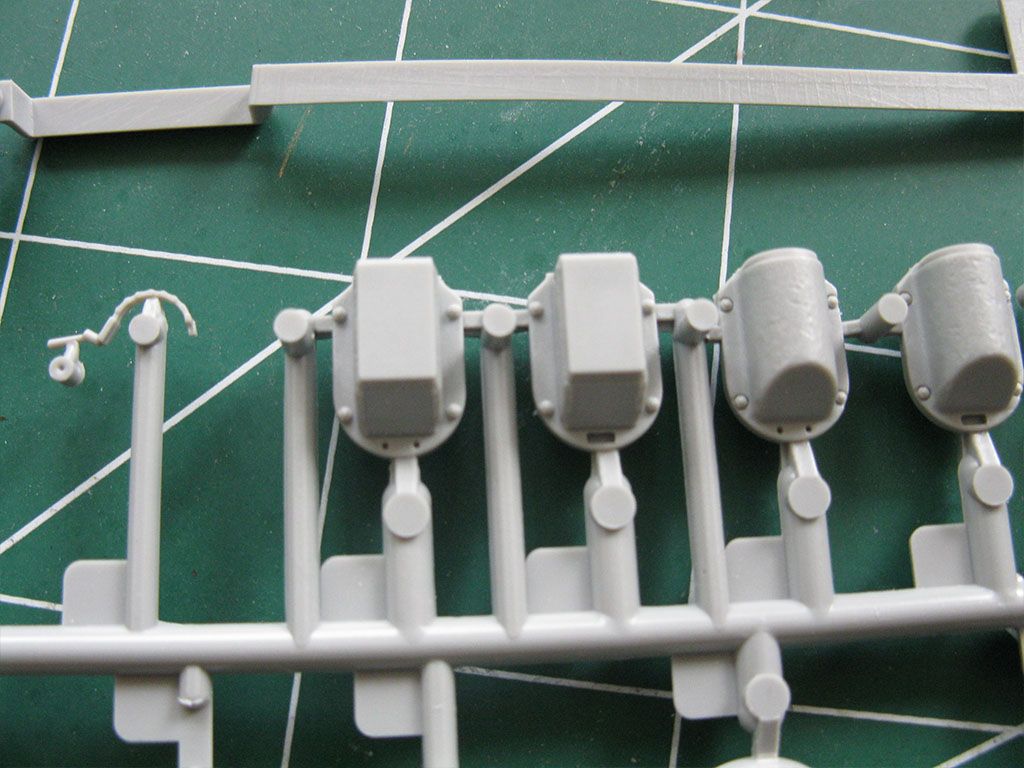
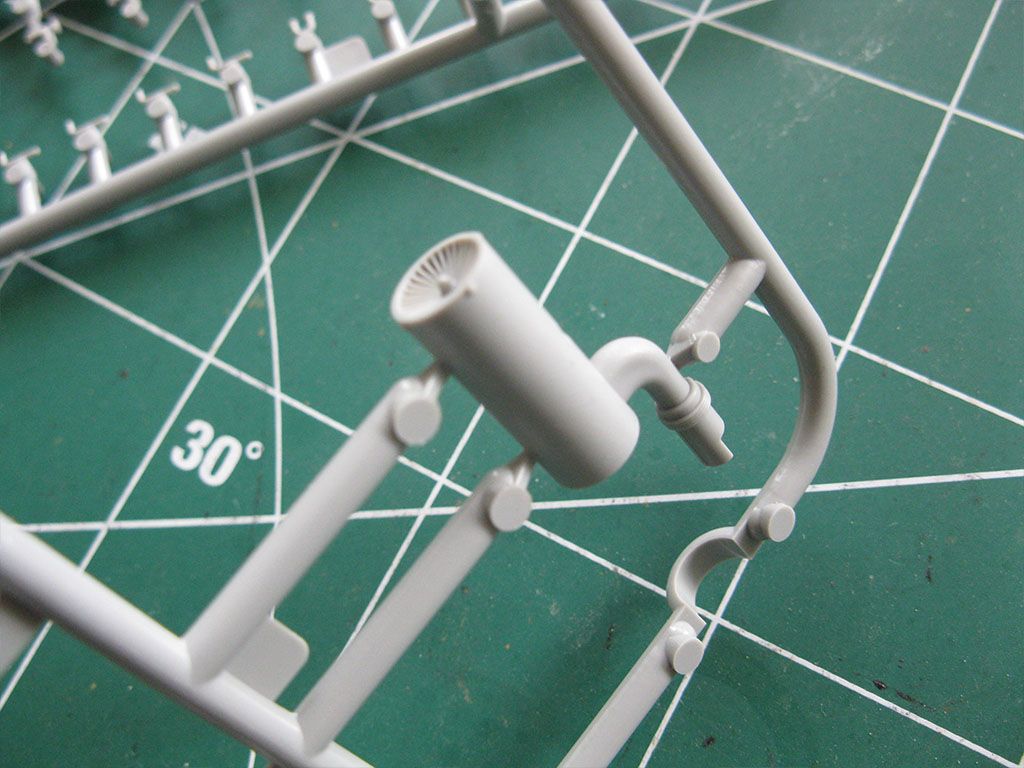
A Sprue, 2 of them actually. Here we have sprockets, idlers and wheels mostly. Again identical to all Tamiya Panther G kits. Wheel detail is pretty good, again not quite Dragon but miles above the old RC Tamyia and any Italeri kit I've seen. These sprues also contain the mid-production exhausts and swing arms. This kit came with all 3 types of Panther exhaust, which is pretty cool.
Image

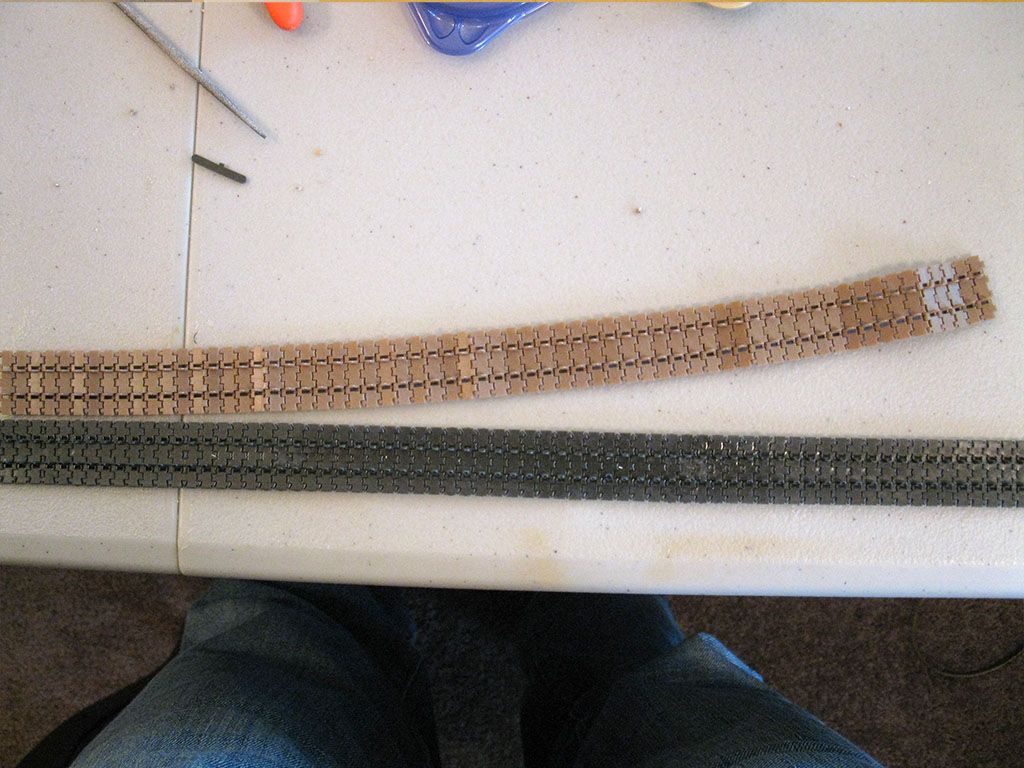
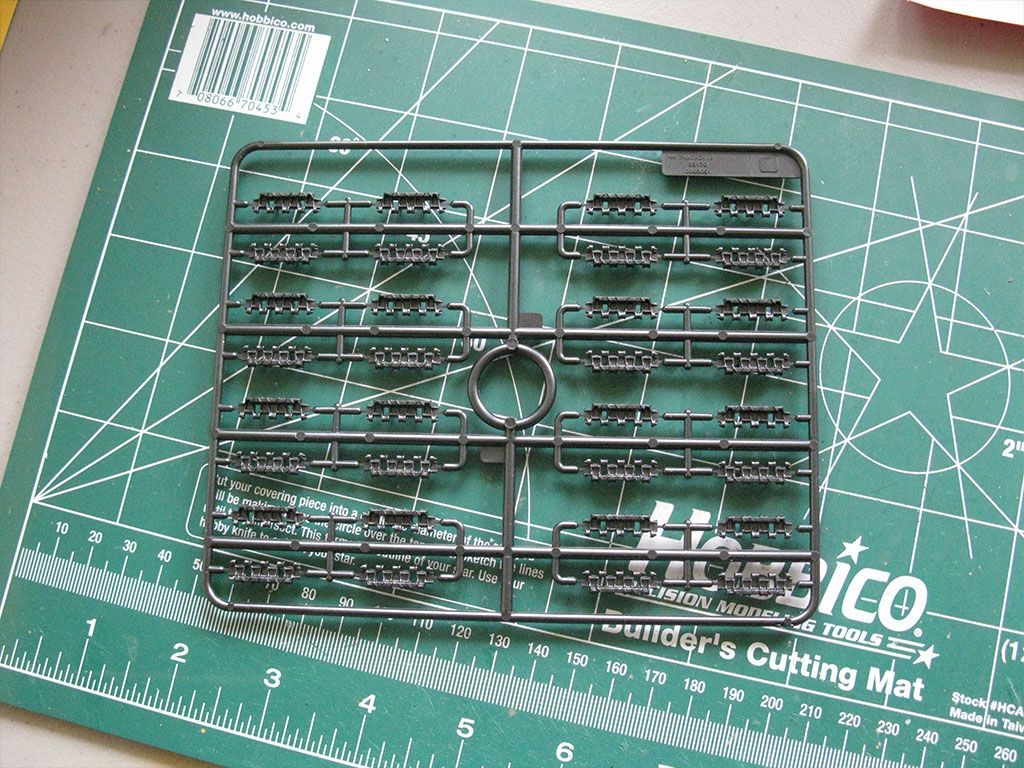
B Sprue. Spare indie link Panther tracks. The guide teeth have no lightening holes, so I more than likely will never use these. Apart from that the detail seems good, it's just an inaccuracy I can't deal with.
Image

C Sprue. You can see here that I have removed parts unused for this kit from the sprue. It's acutally why I bought the kit in the first place. As I have mentioned in a thread before I bought the Tamiya early Panther G with PE Zim from ebay. I then saw the Dragon molded on Zim kit for the same price. Instead of cancelling the Tamiya order I just bought both. I then started to do research on kits that would come with parts I needed to turn the Tamiya early G into a late G so I wouldn't have 2 kits of the same subject. The Jagdpanther kit cam with a late G sprue (this one) with a chin mantlet and everything. So that's how I justified buying it. It was solving a problem and I'd get a Jagdpanther out of it.

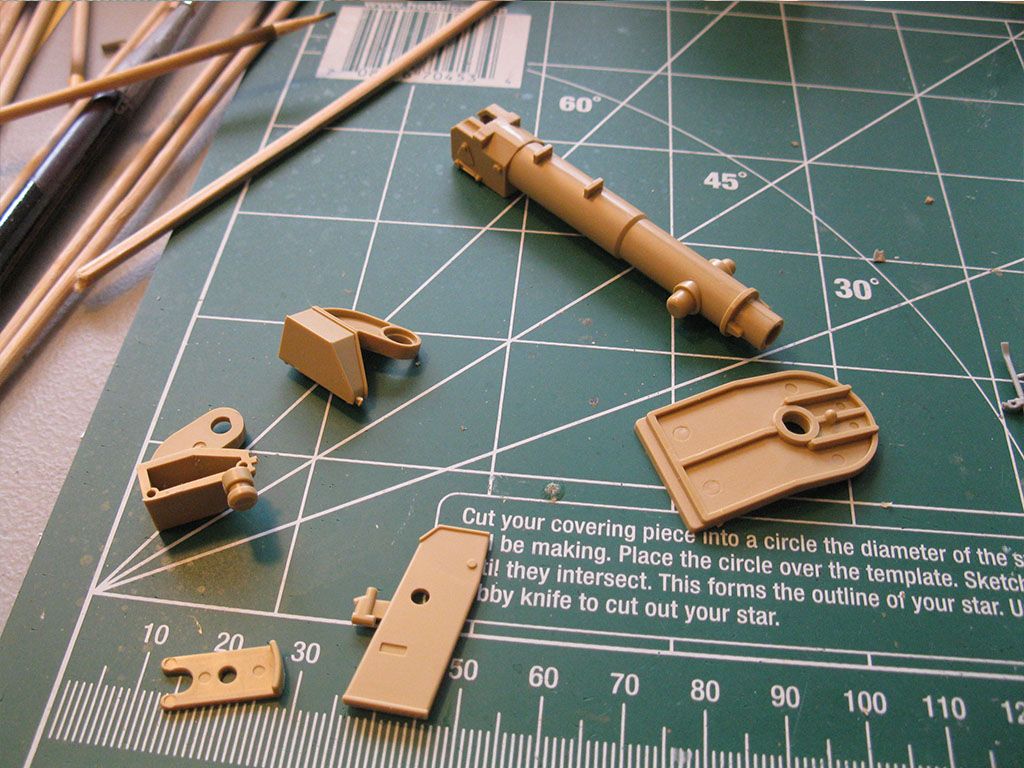
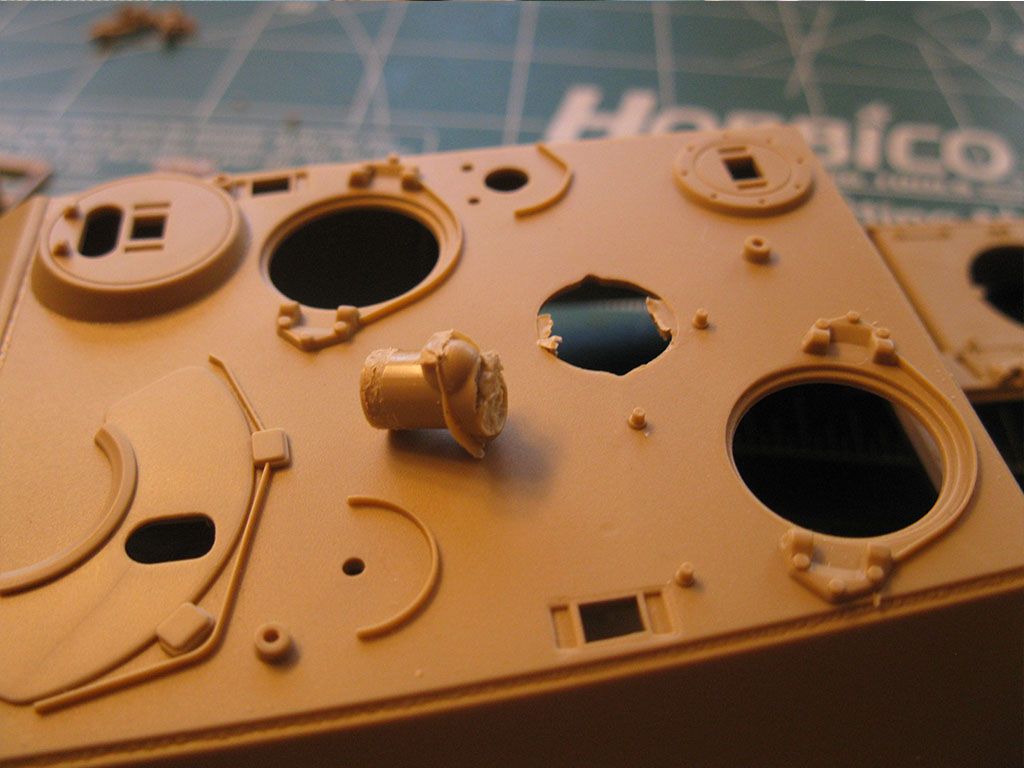
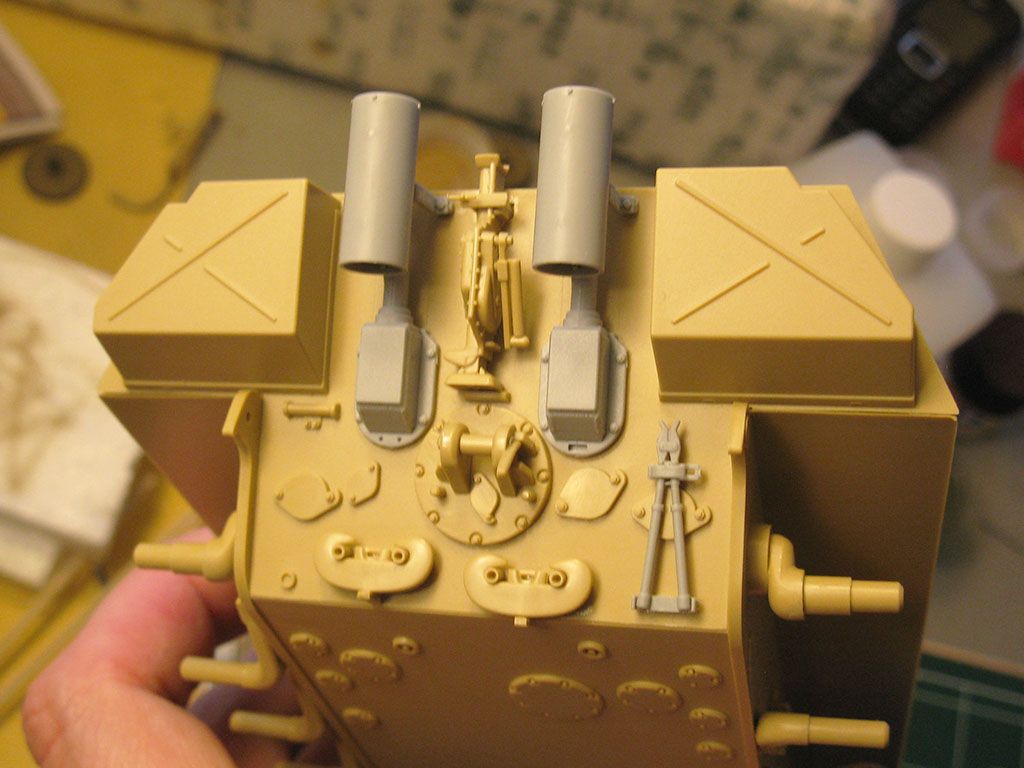
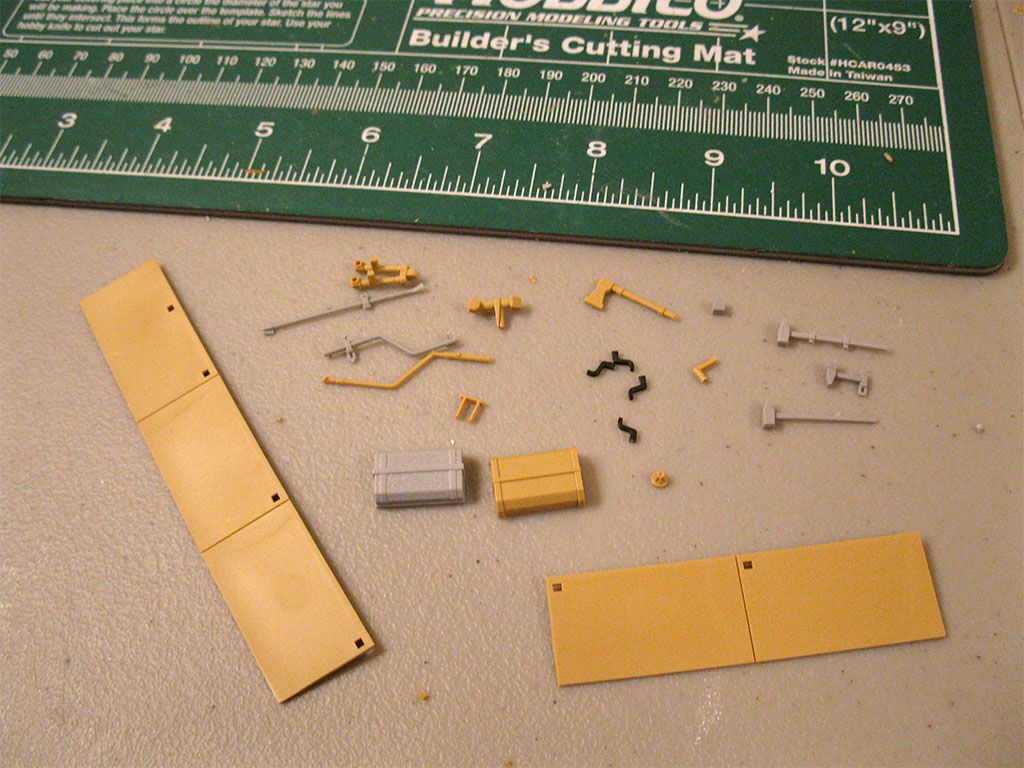
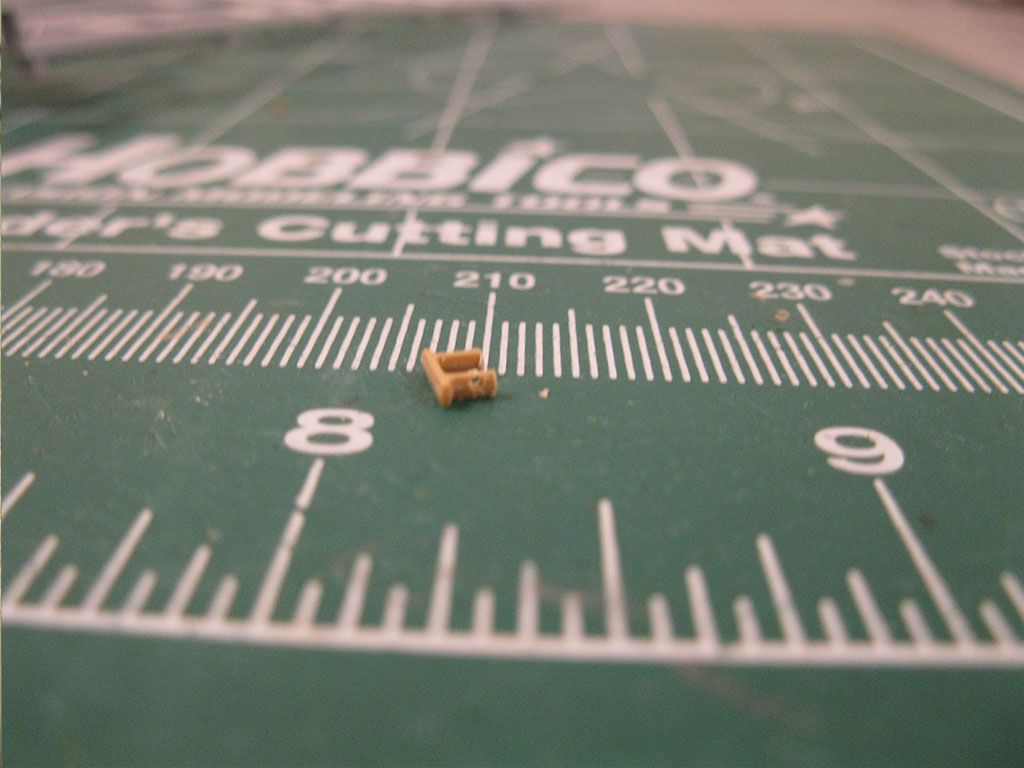
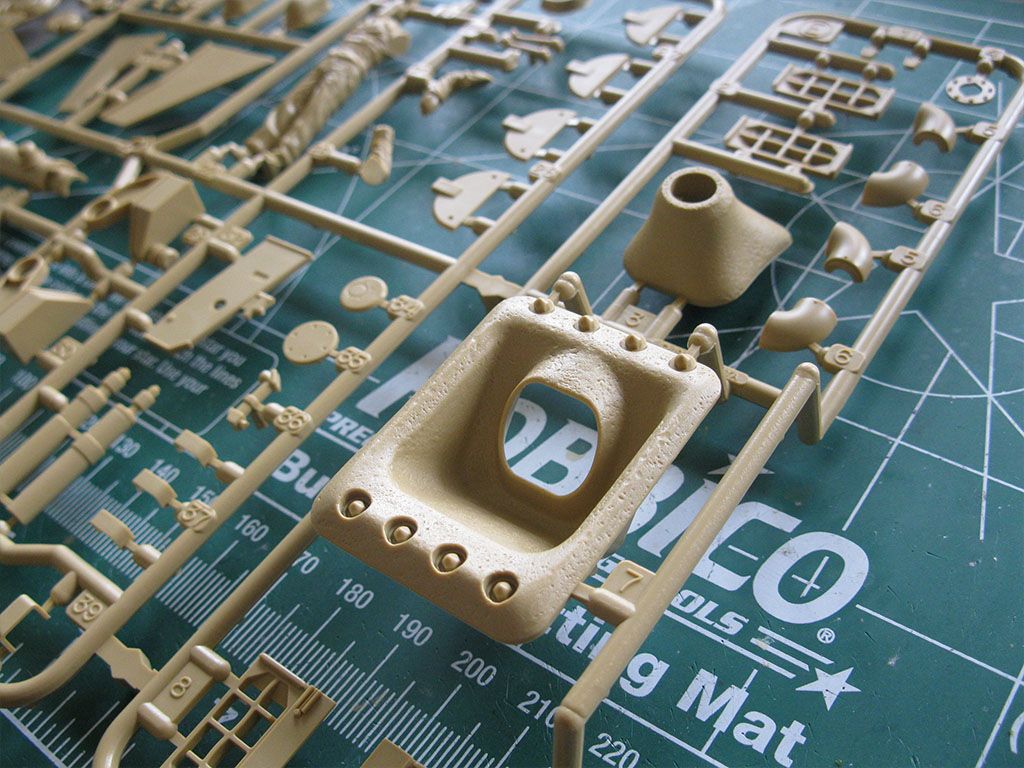
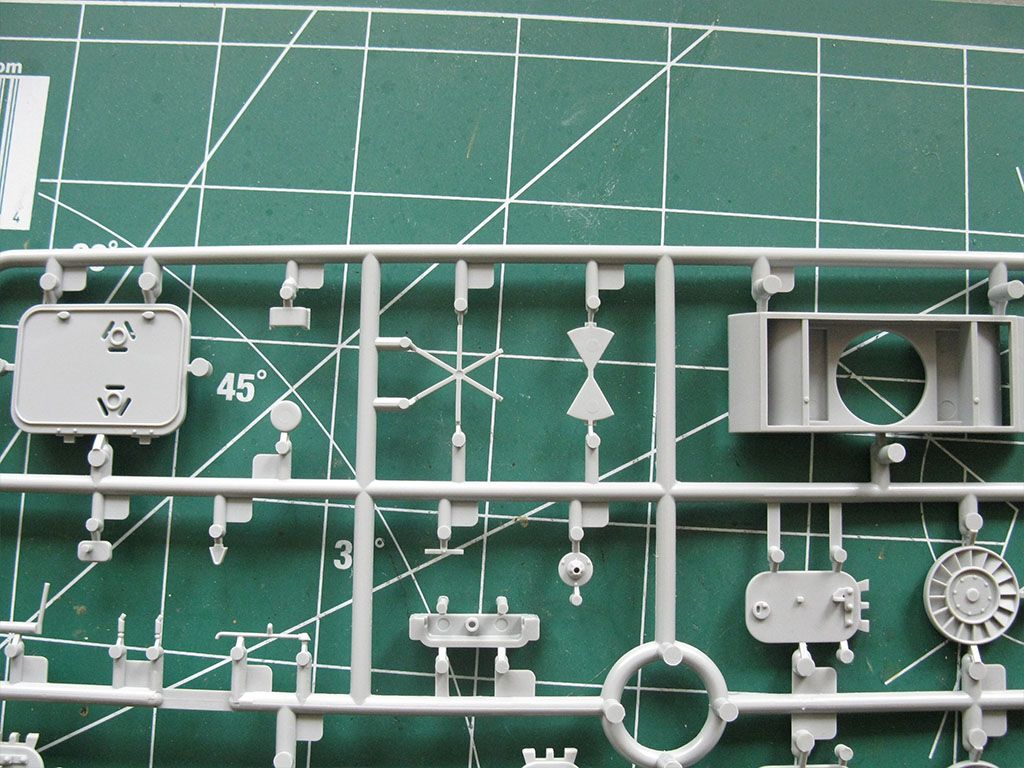
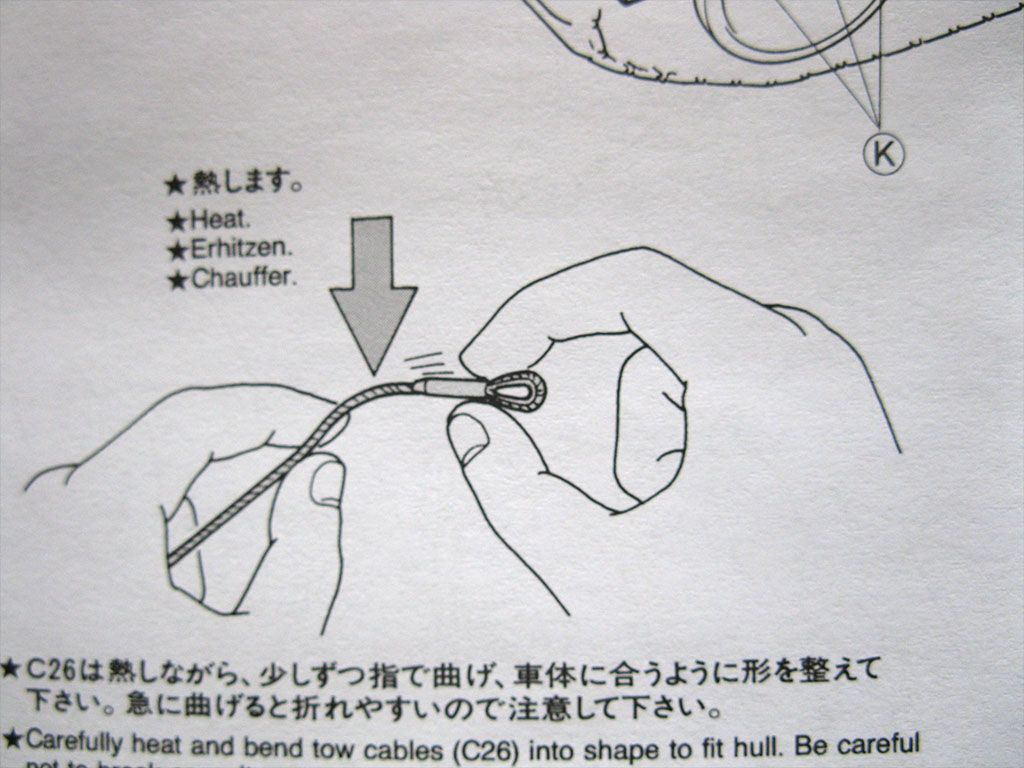
This sprue has the schürzen, final drives, bow MG, storage bins and the rear plate of the tank itself. Detail seems really non-existent on the storage bins. Like seriously it's just flat. Even the hinges on the other piece are just rectangles. Very unimpressed with that. Tow cables, pioneer tools, all look ok for 93/96. Again spongey, and I may replace any of this with Dragon spares if I can. My problem there is that I own a ton of Dragon kits, but I've only built 1. So I don't know what's unused. However I have gone through the Panther kit from Dragon I have and figured out exactly what I can use. So this sprue is not great. Schürzen I would prefer in separate pieces, and I may or may not use it. Tow cables are worse than molded in shape, they are awful. If anyone wants to do a tutorial vid on how to heat them up without ruining them I'd love to see it.
Image

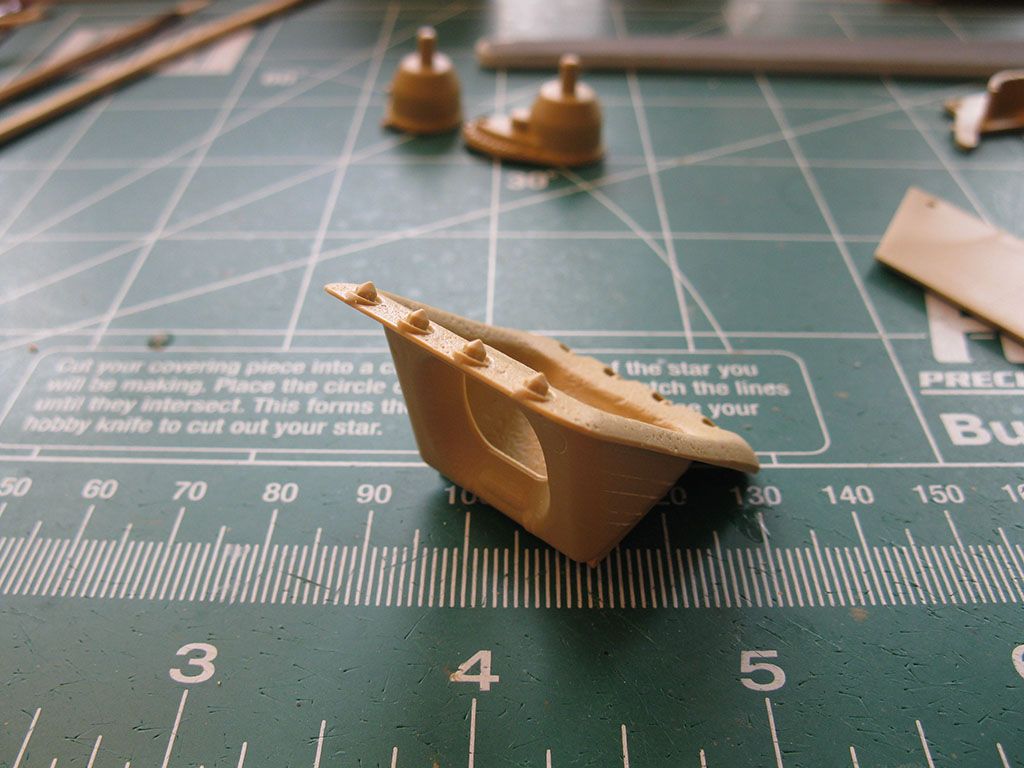
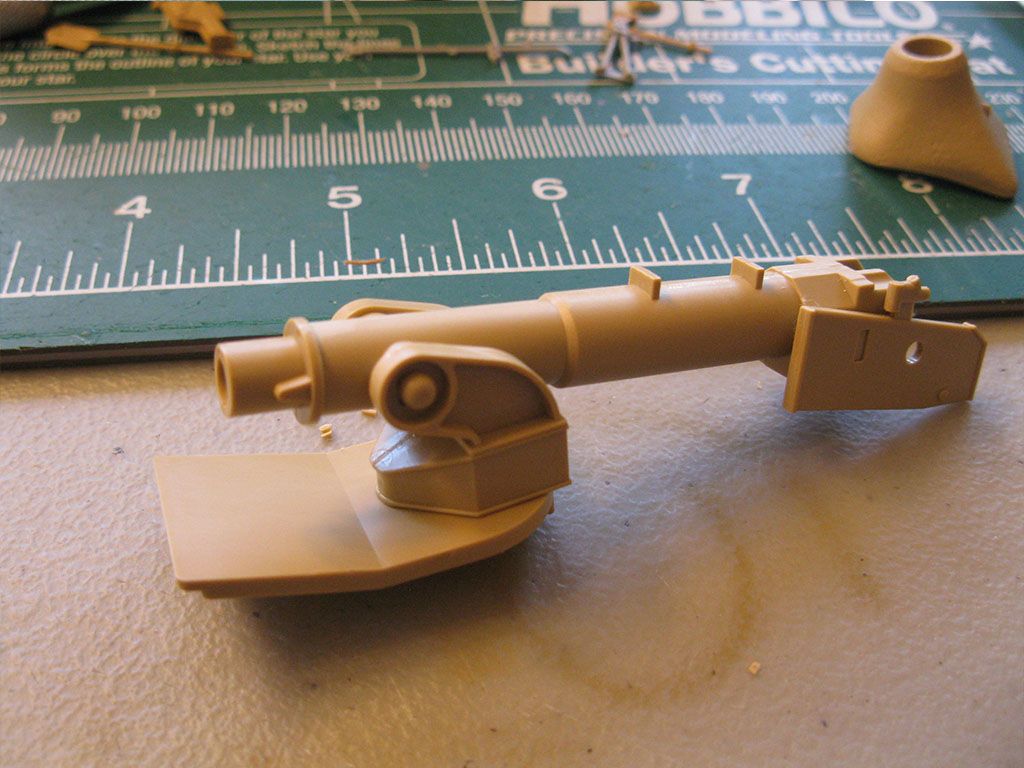
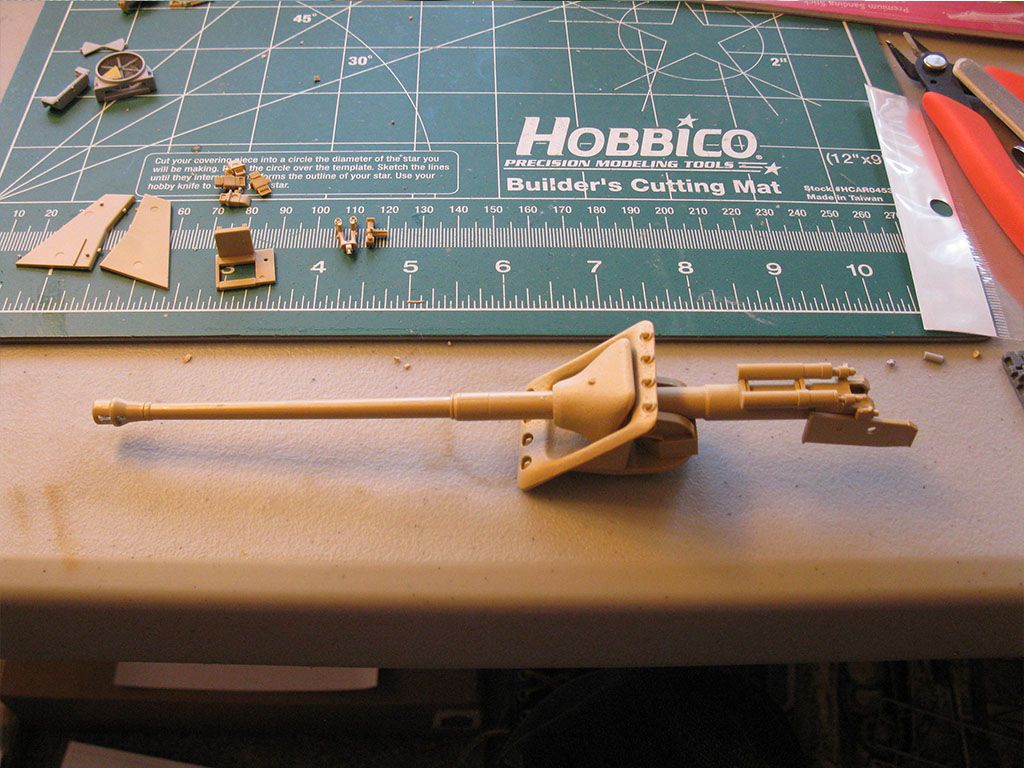
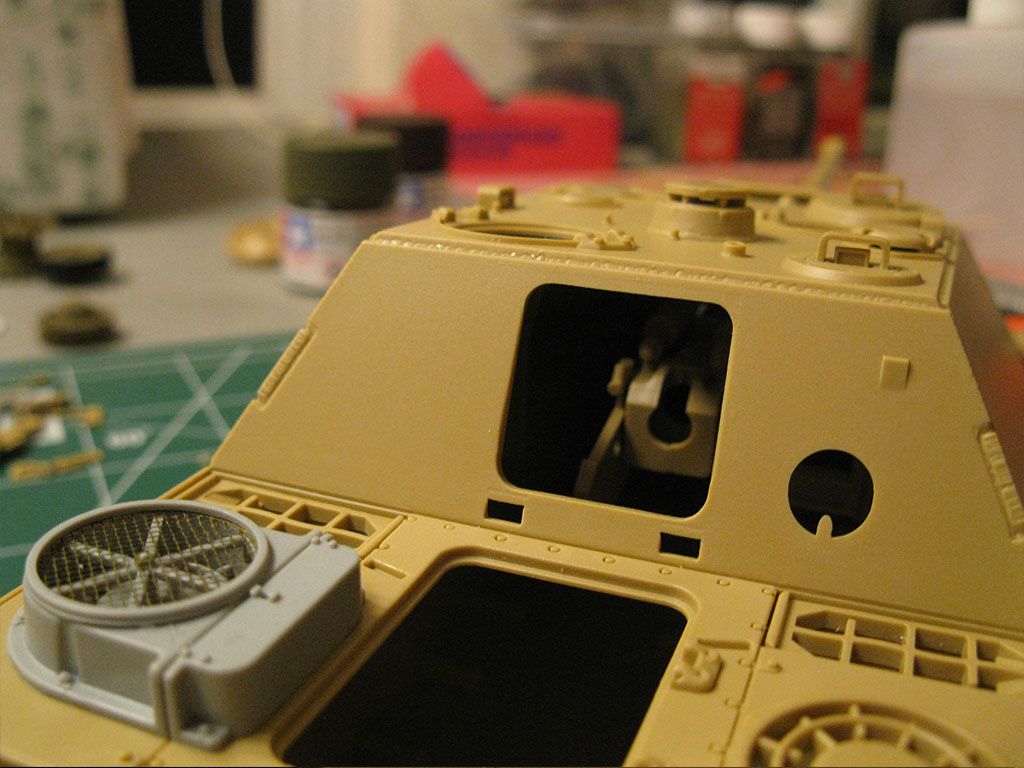
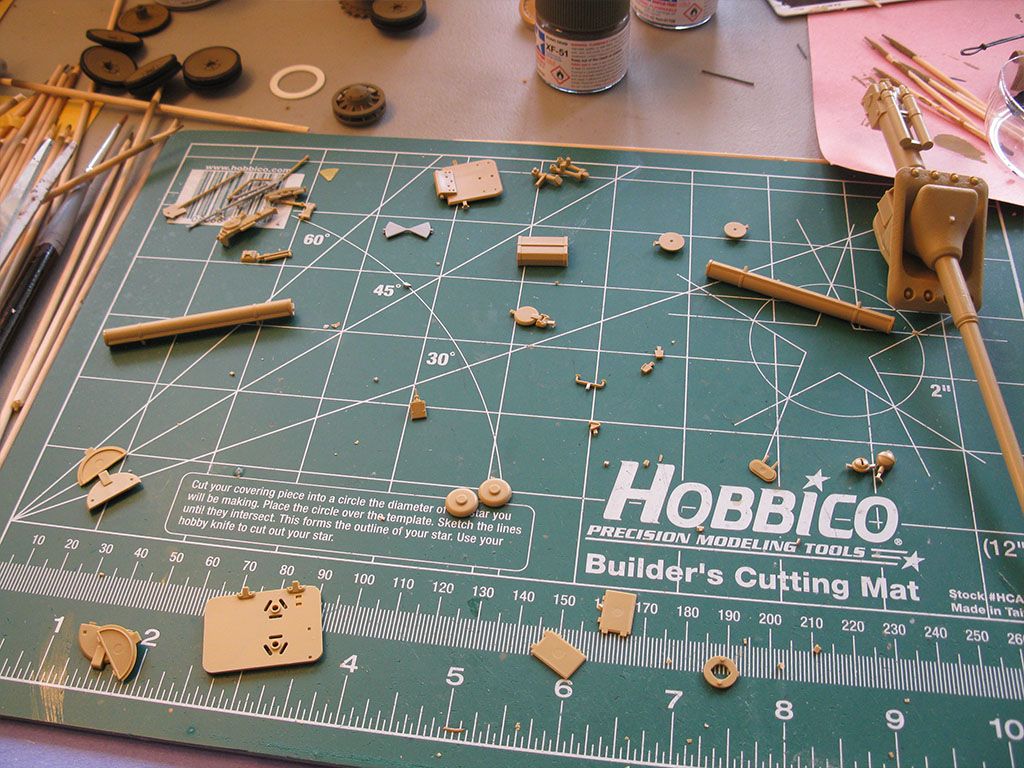
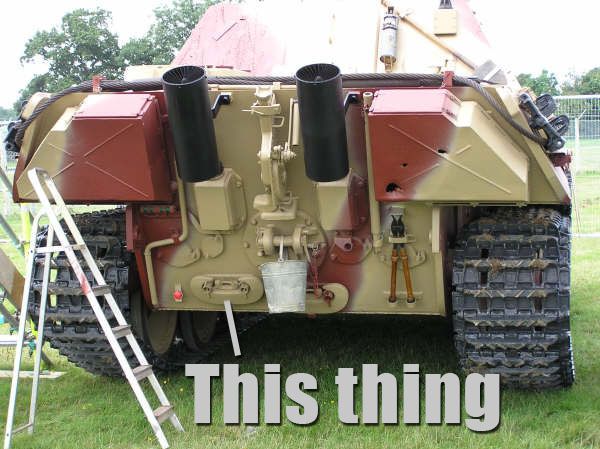
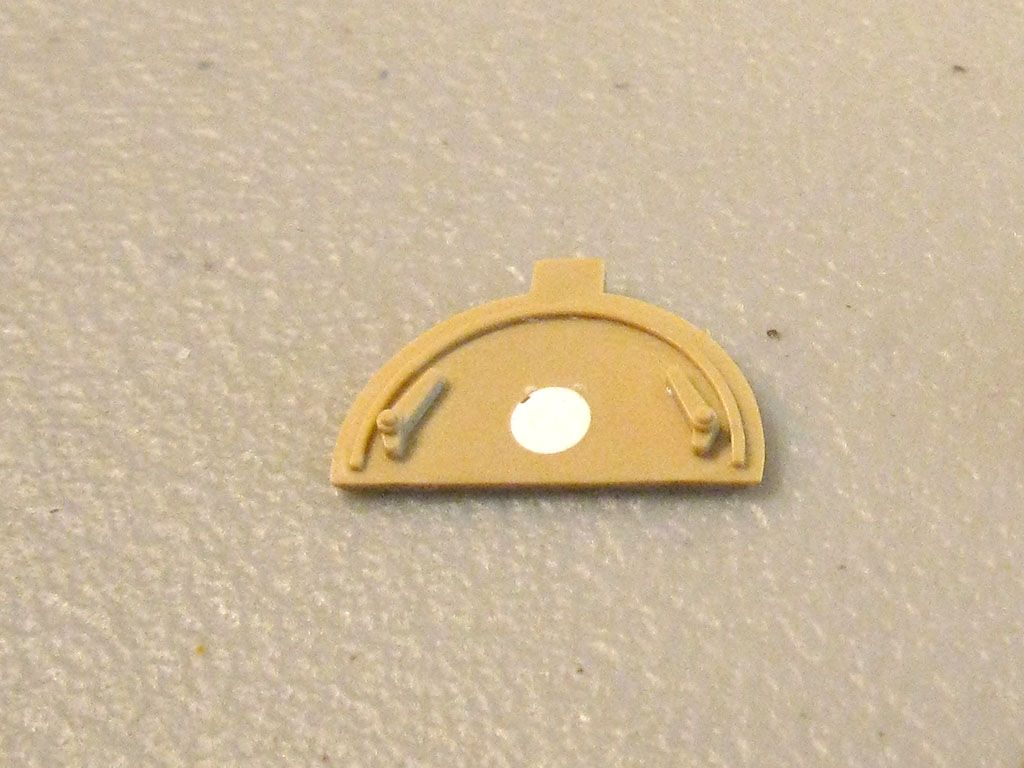
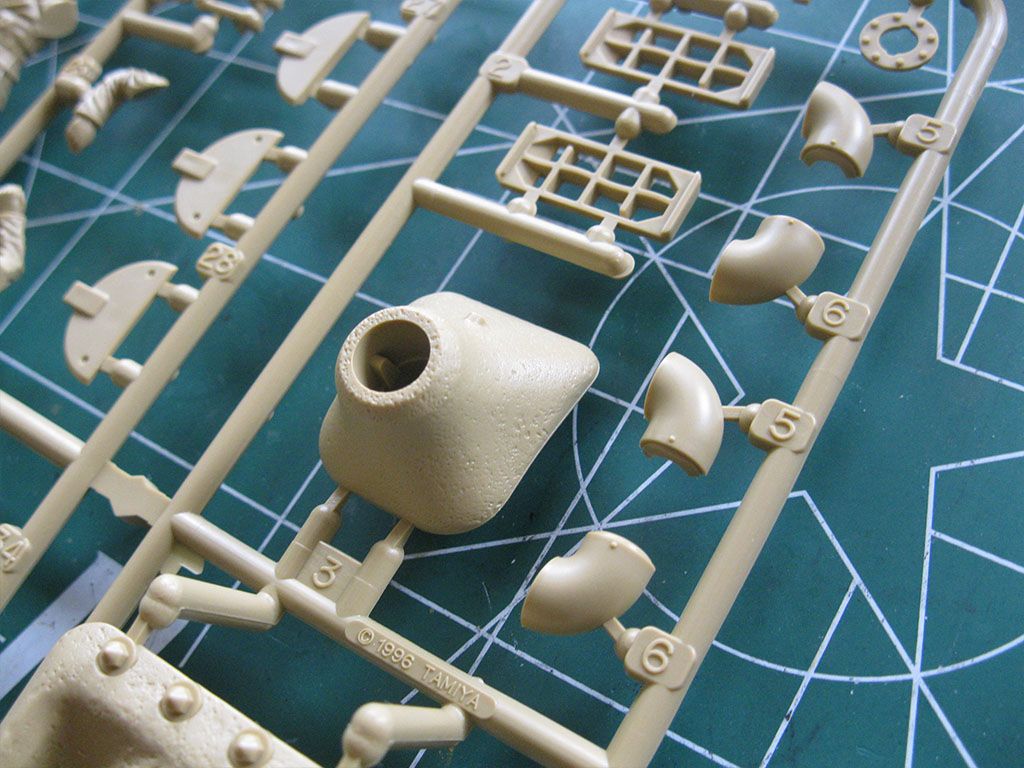
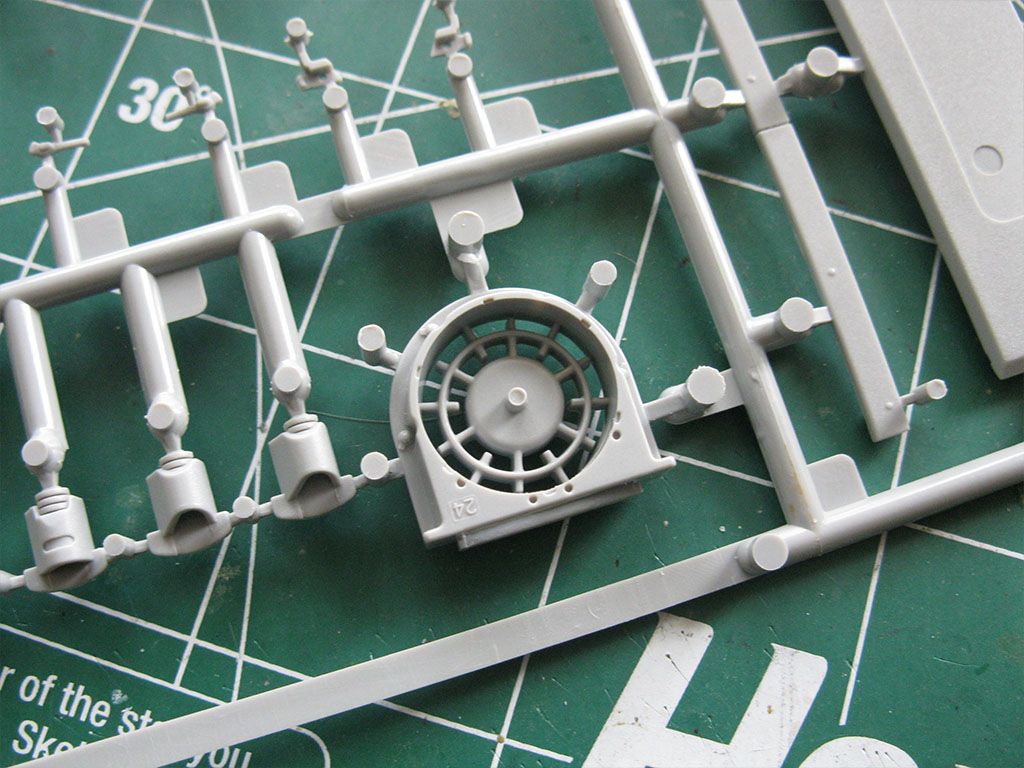
Here we have D Sprue. The figure looks alright for Tamiya. I'm not really a figure guy, but I may add him. We also have the early exhaust here, and the gun bits. I won't be using most of that. The mantlet looks really nice, I must say. The hatches though are super light on interior detail, and I like to pose hatches open, so that's a problem. Overall, sprue is again average for 90's Tamiya. Tolerable. Above that we have some polycaps and a bit of wire.
Image

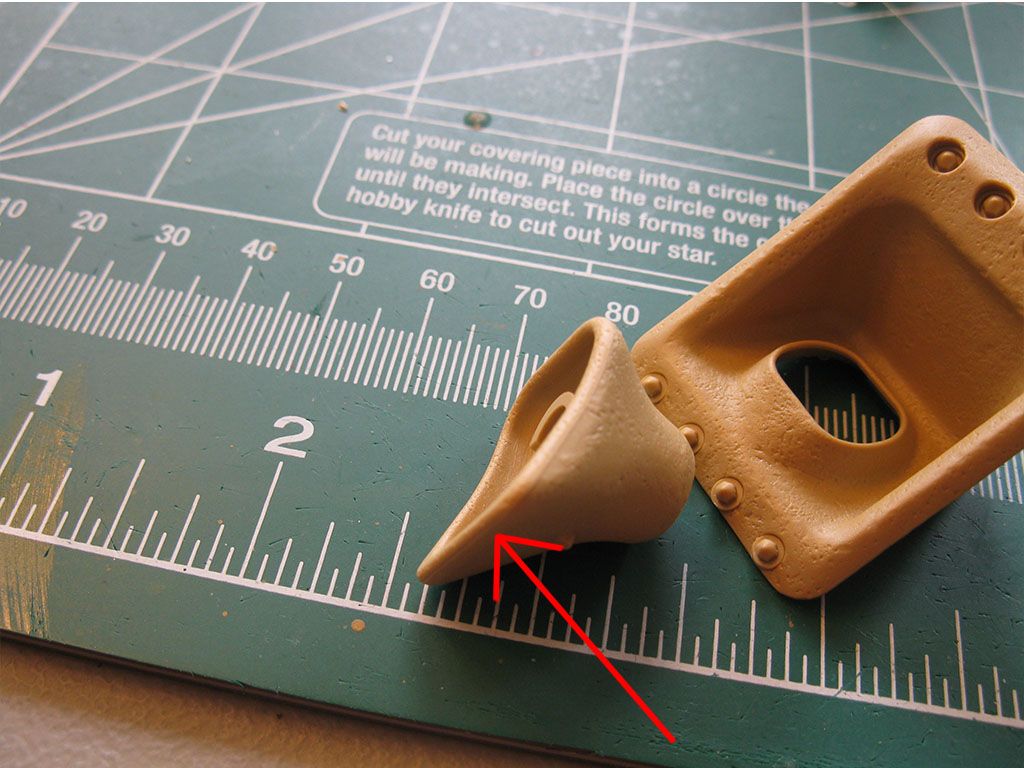
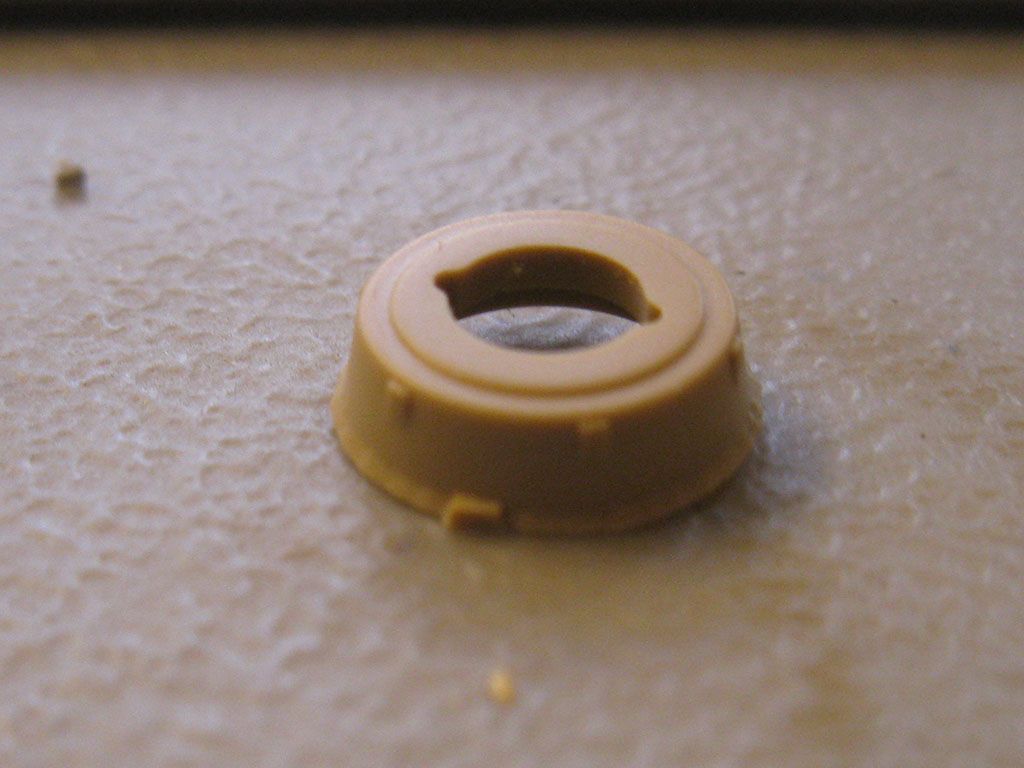
Some close-ups of the mantlet, very nice.
Image

Image

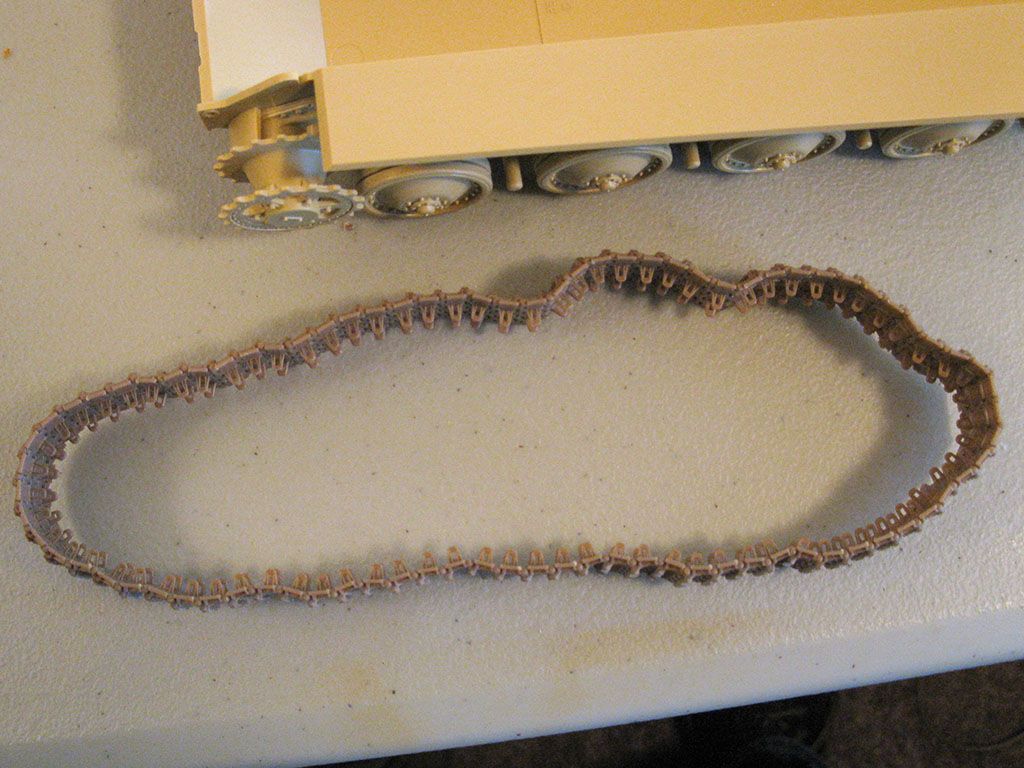
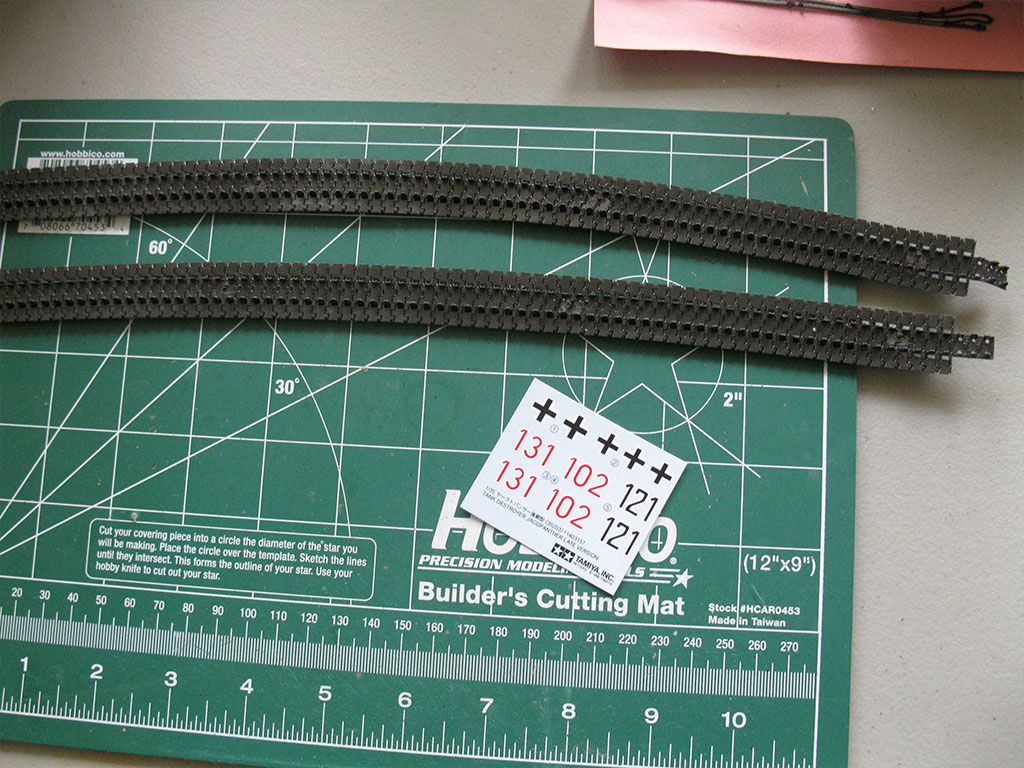
Lastly for the original kit parts we have the decals and vinyl tracks. I'm no decal expert, but they seem ok. Not as thin as cartograf, but for the purposes of this, they'll do. Usually Tamiya decals get silvery on me. The tracks are an atrocity. Better than the old heat up a screw driver rubber bands, but still not ok. I may use them as I have limited funds. But if I do I'll be cursing them the whole time. Ejector pin marks mar the inner surface like gunshot wounds, and again the lack of lightening holes on the guide teeth is an inaccuracy that I cannot ignore. We shall see.
Image

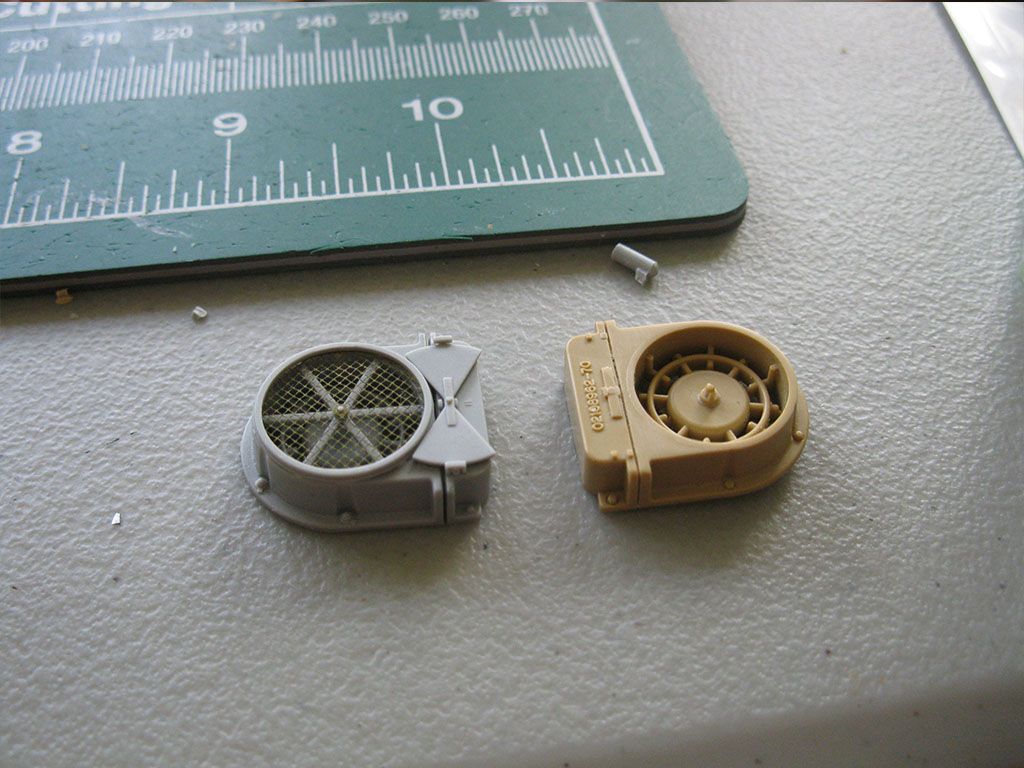
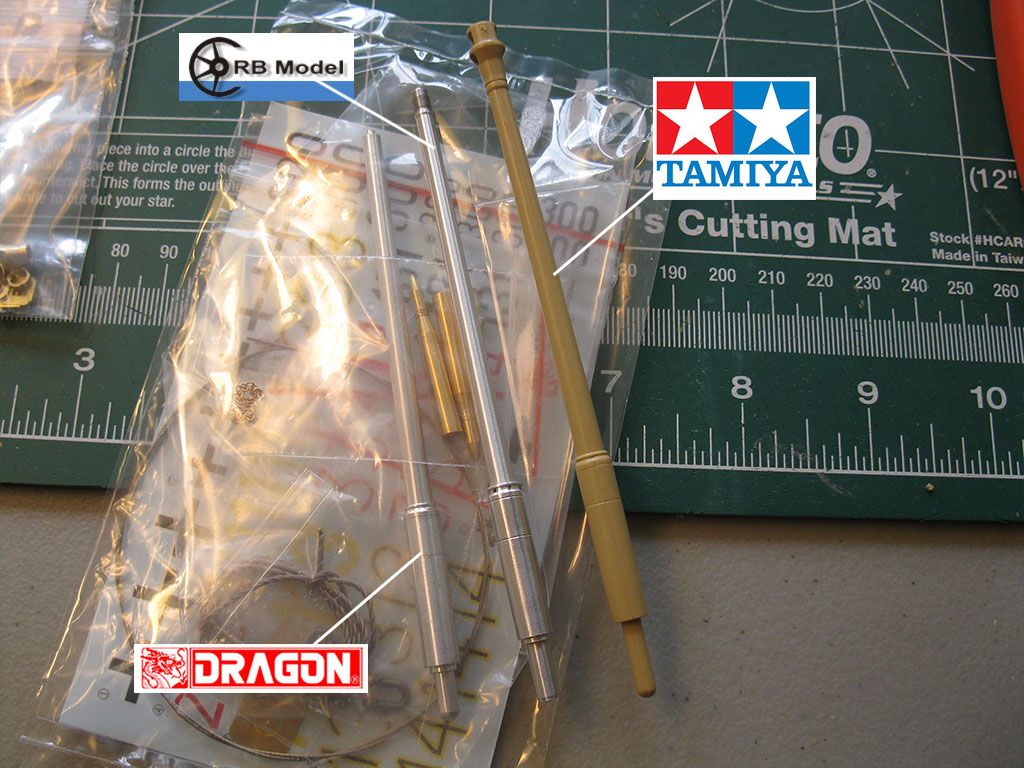
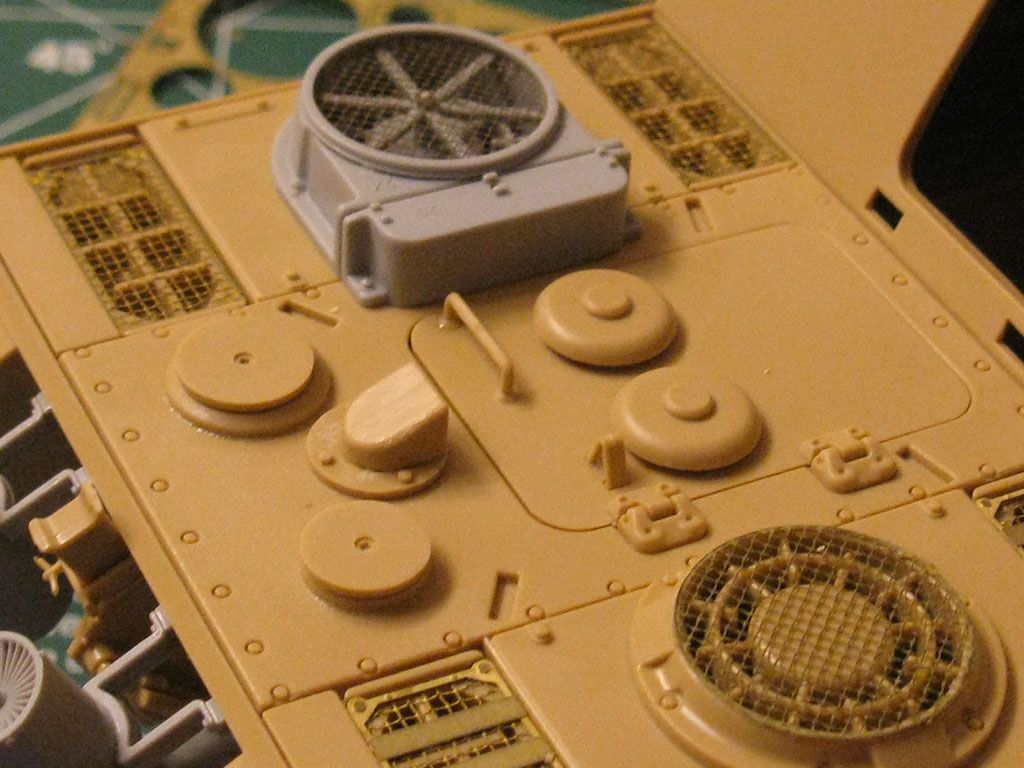
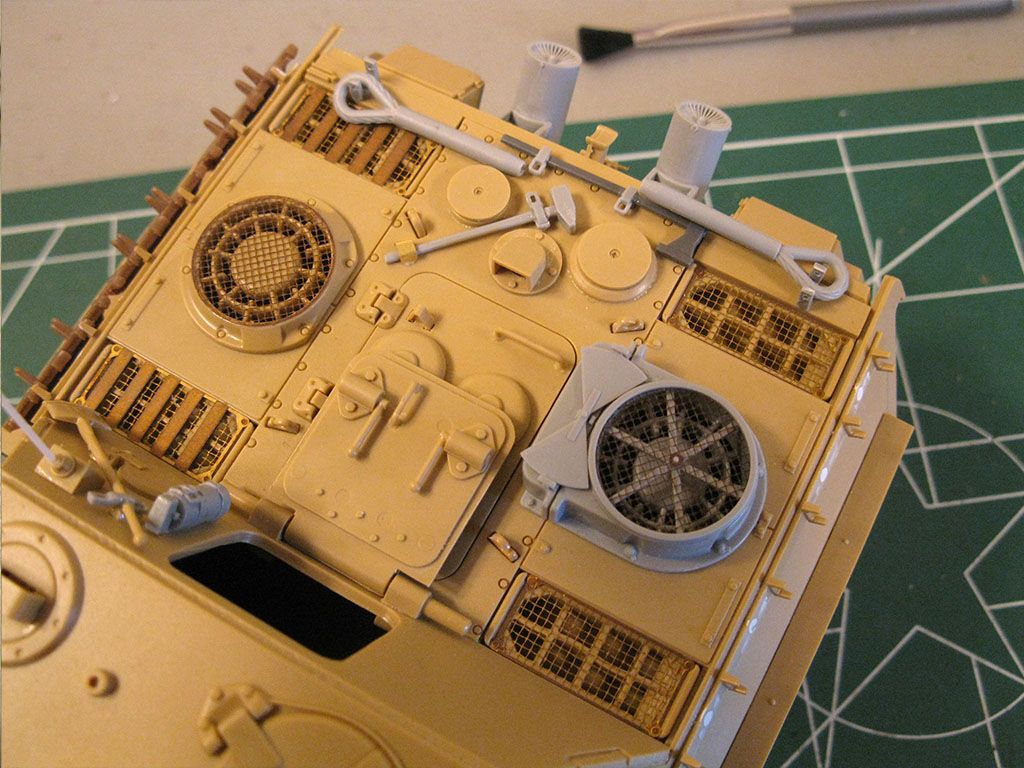
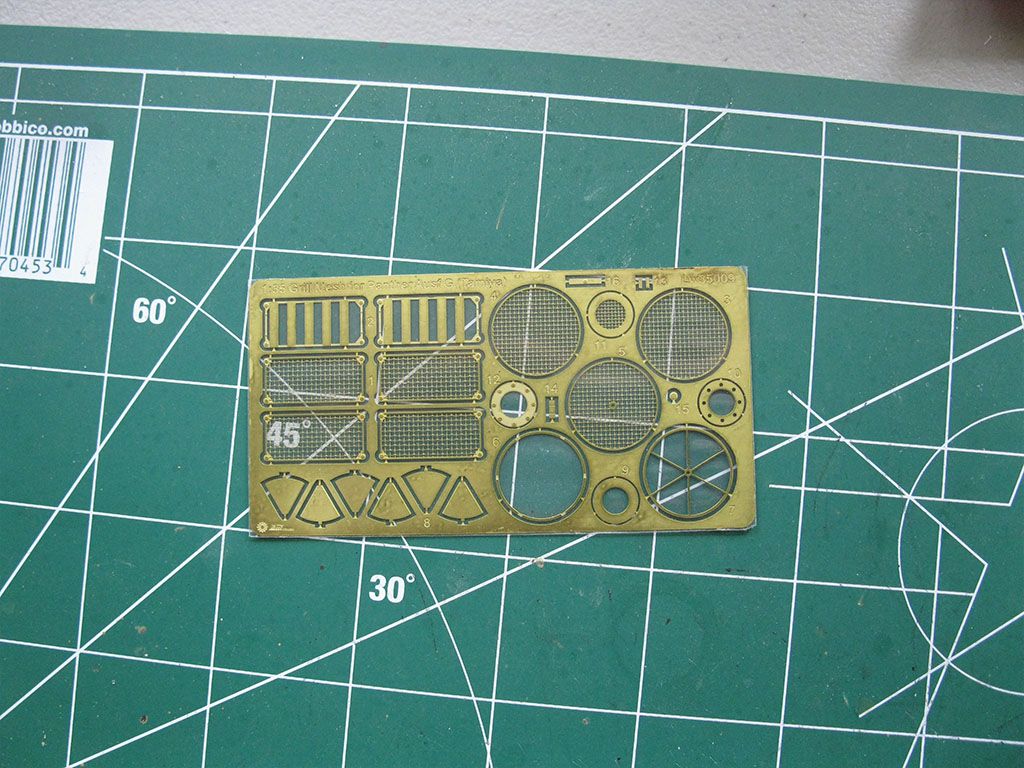
Aftermarket has not all arrived yet. This has, which is the Alliance PE grills. Worked well enough on my late Panther. I will however not be using the full PE heater stuff this time as I will be frankensteining some Dragon parts.
Image

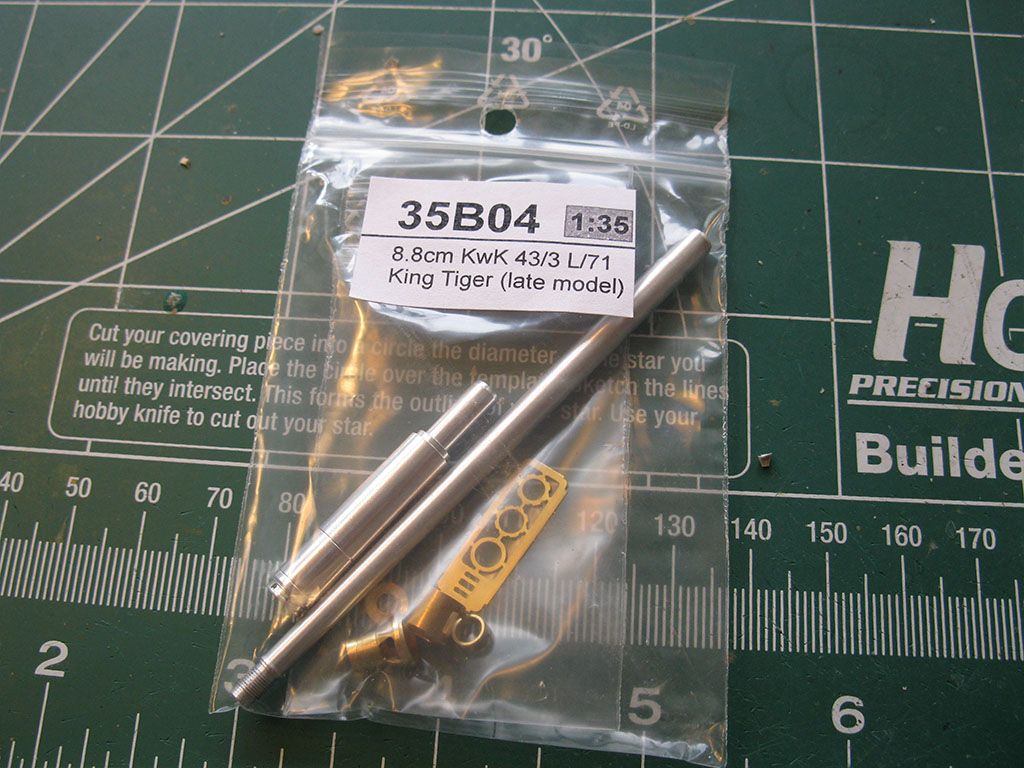
Still yet to arrive is an aluminum barrel from Poland to replace the two piece one in the kit. I have already spent enough money on this kit that I could have bought a Dragon G2, which annoys me. So I may not buy AM tracks, but man I hate the ones in the kit.

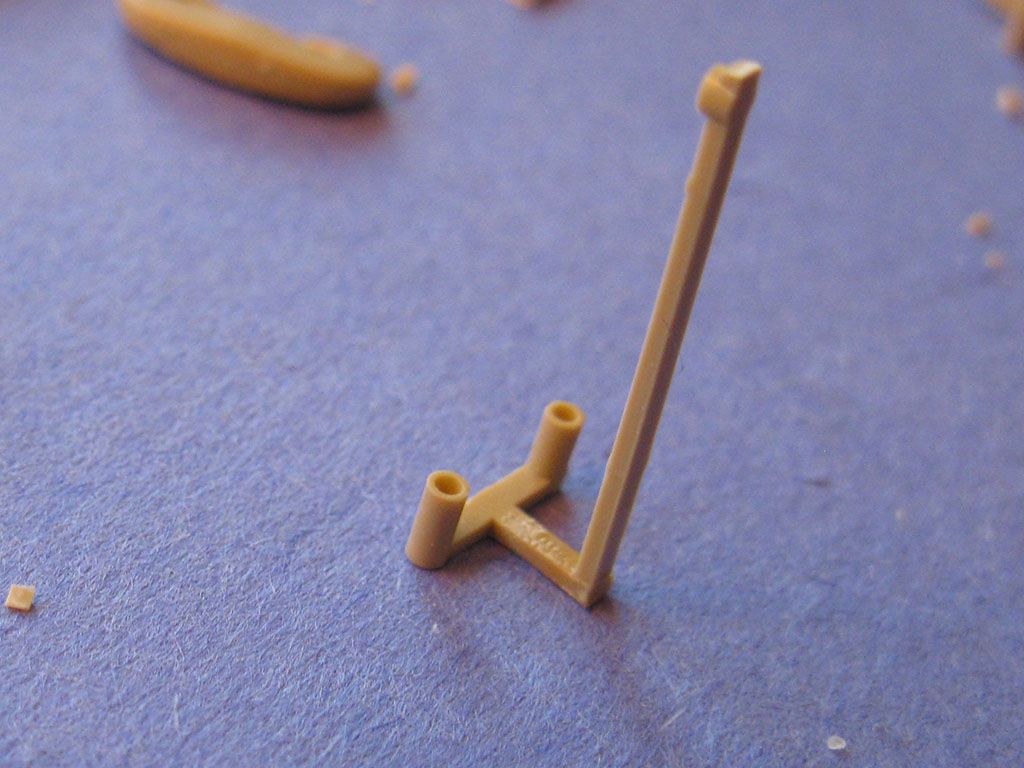
Parts from the Dragon Panther G with Zimmerit kit I will be using.
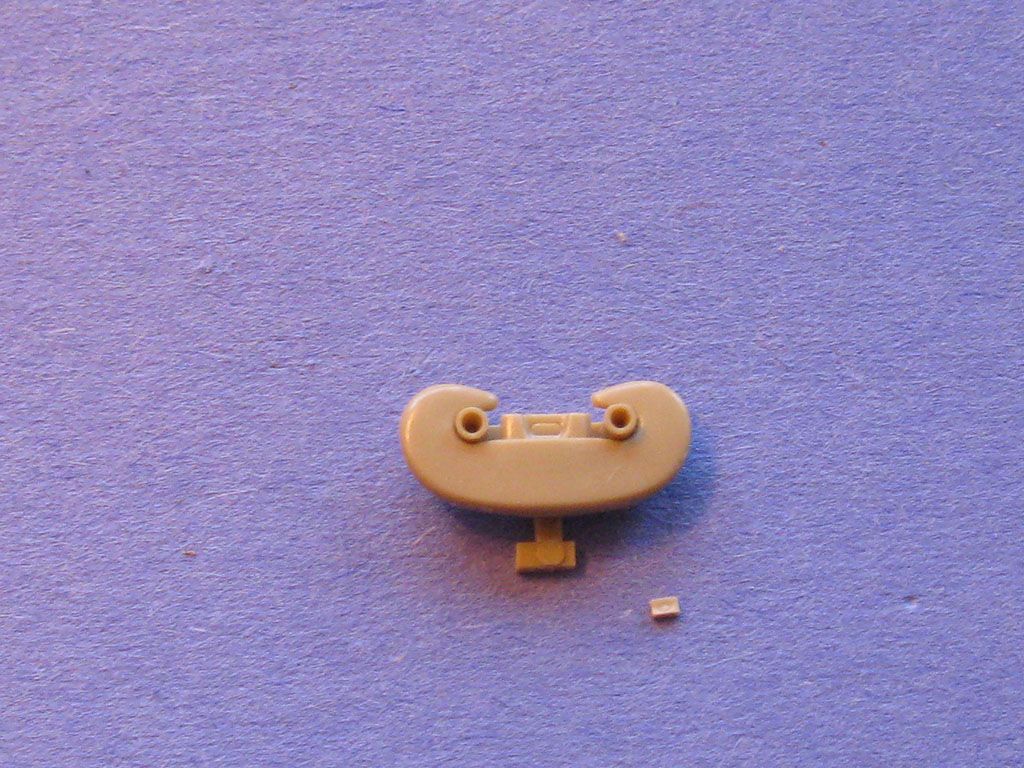
The crew fan tower
Image

Open or closed, not sure yet.
Image

Image

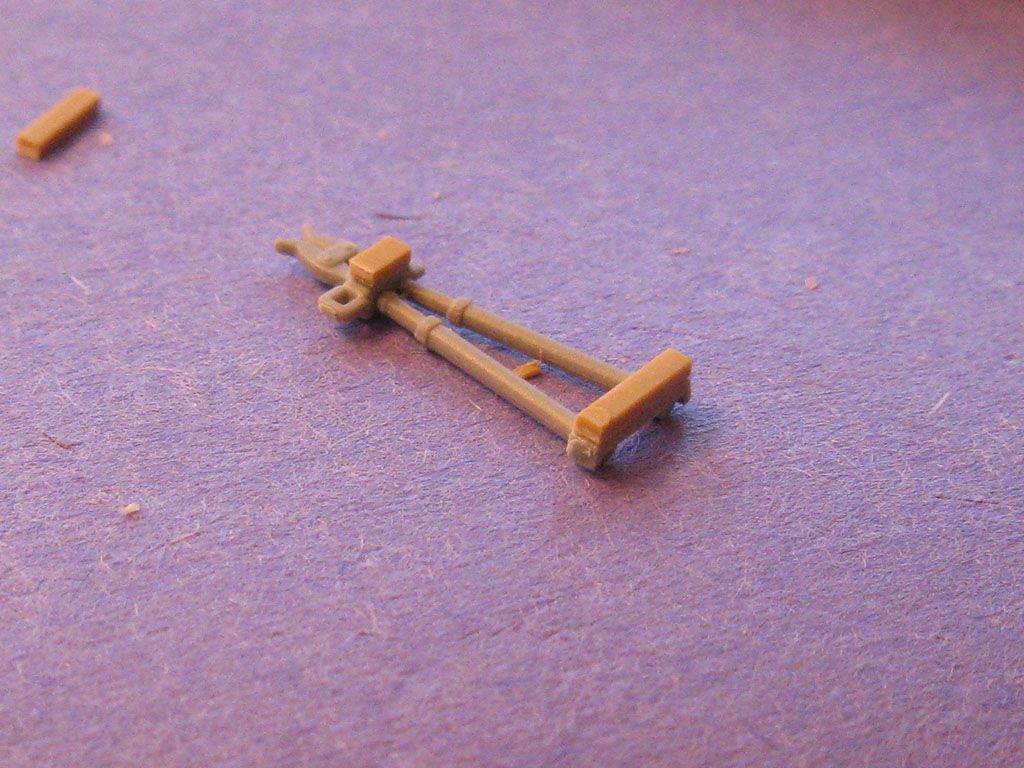
And I'll be using the late exhaust from the Dragon kit as well. These are just more crisply detailed and I won't be using them for the Dragon kit so why not upgrade?
Image

Image

The Instructions (man this is a long post)

Standard armor kit, swing arms, suspension and wheels for a start. Seems familiar enough.
Image

Exhaust choices, Storage bins, interior gun detail, barrel and fighting compartment. interior breach and fighting compartment detail seems almost insultingly simple. One of the main reasons I switched to newer Dragon kits. Even when they are skimpy on detail, what's there looks the part. The bow MG on any Dragon Panzer III or IV kit in recent years for instance.
Image

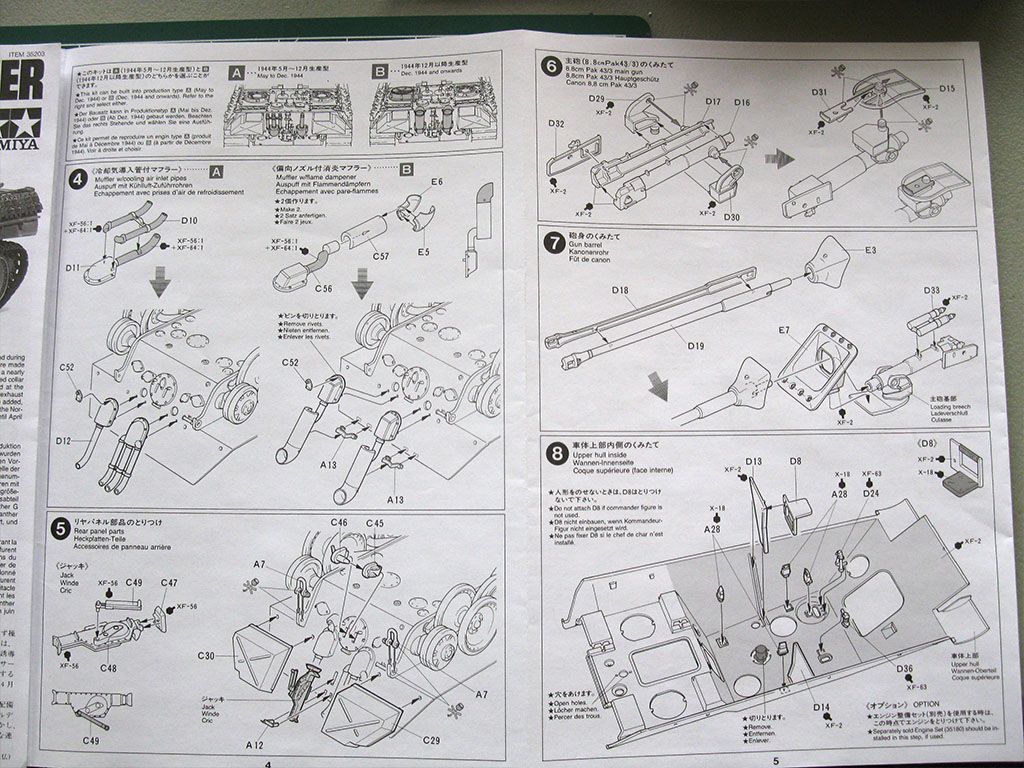
Installing the gun, some rear deck details.
Image

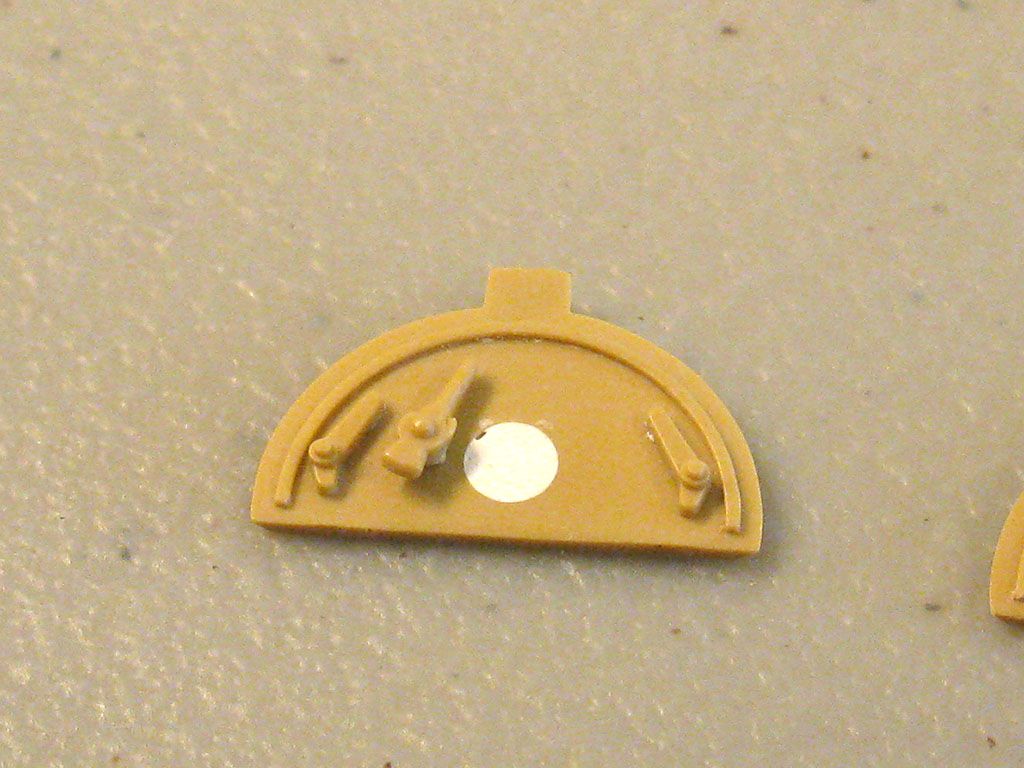
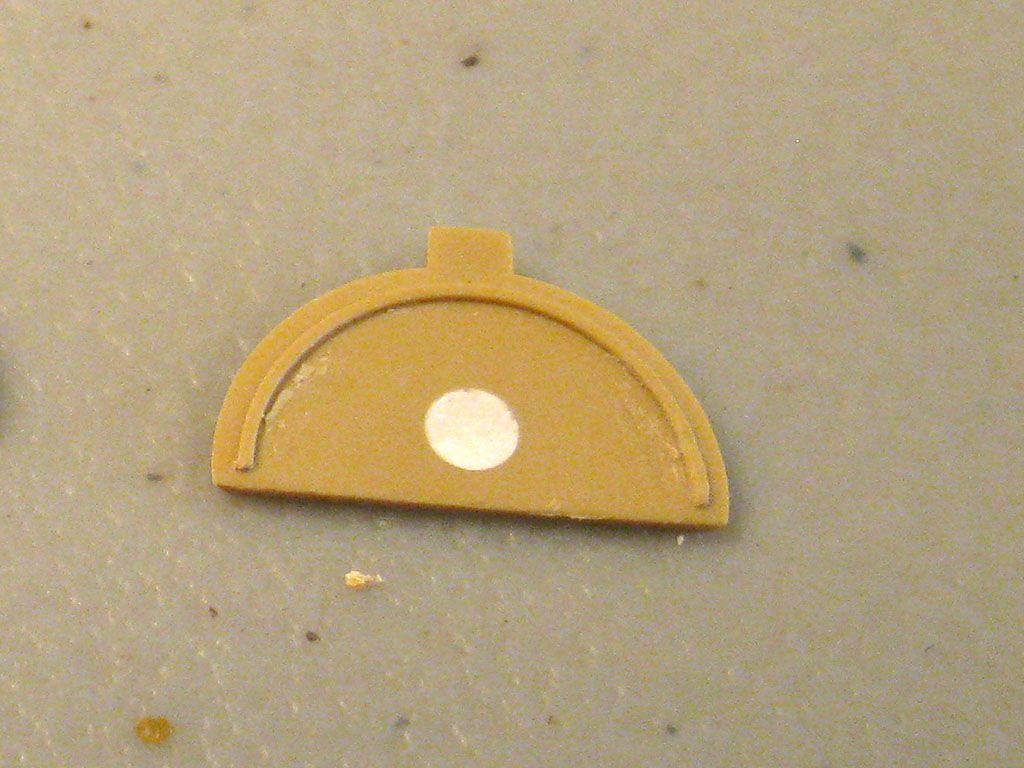
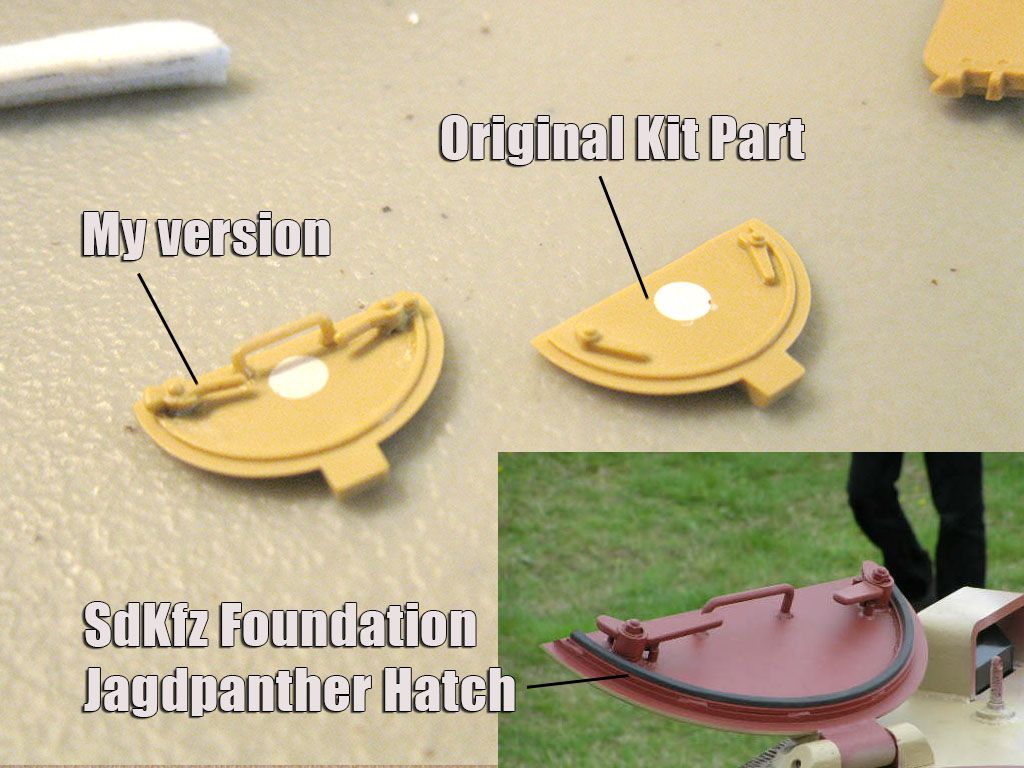
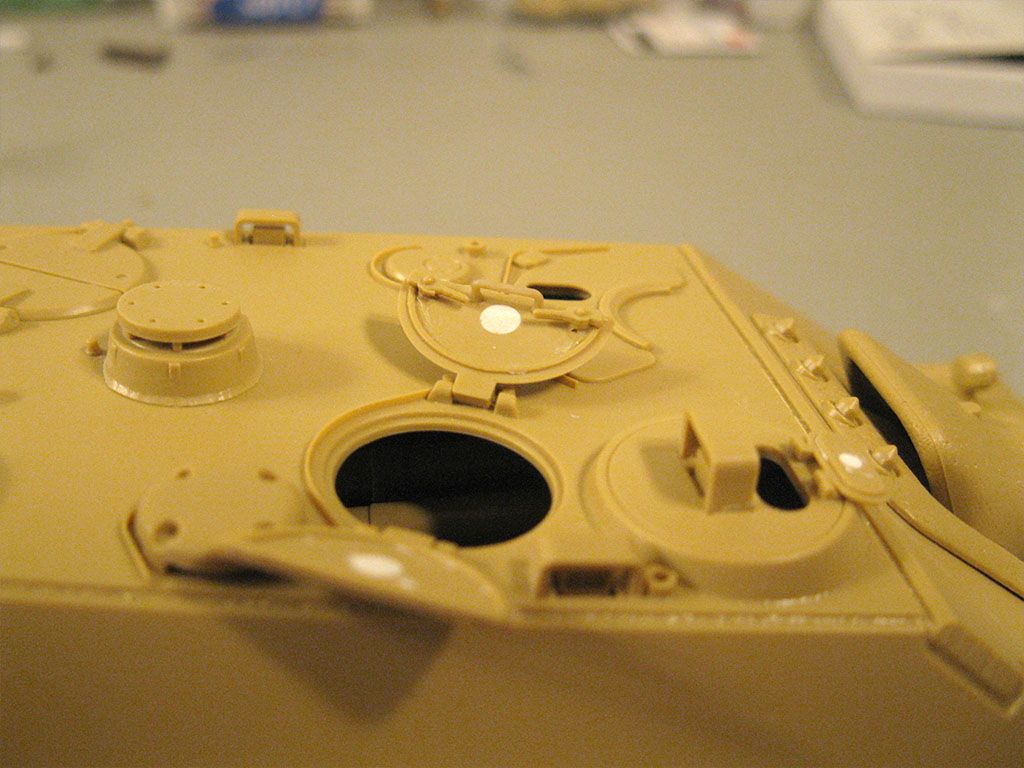
Engine deck, pioneer tools and hatches. Simples. Again though, hatch detail leaves me wishing I'd bought the Dragon G2.
Image

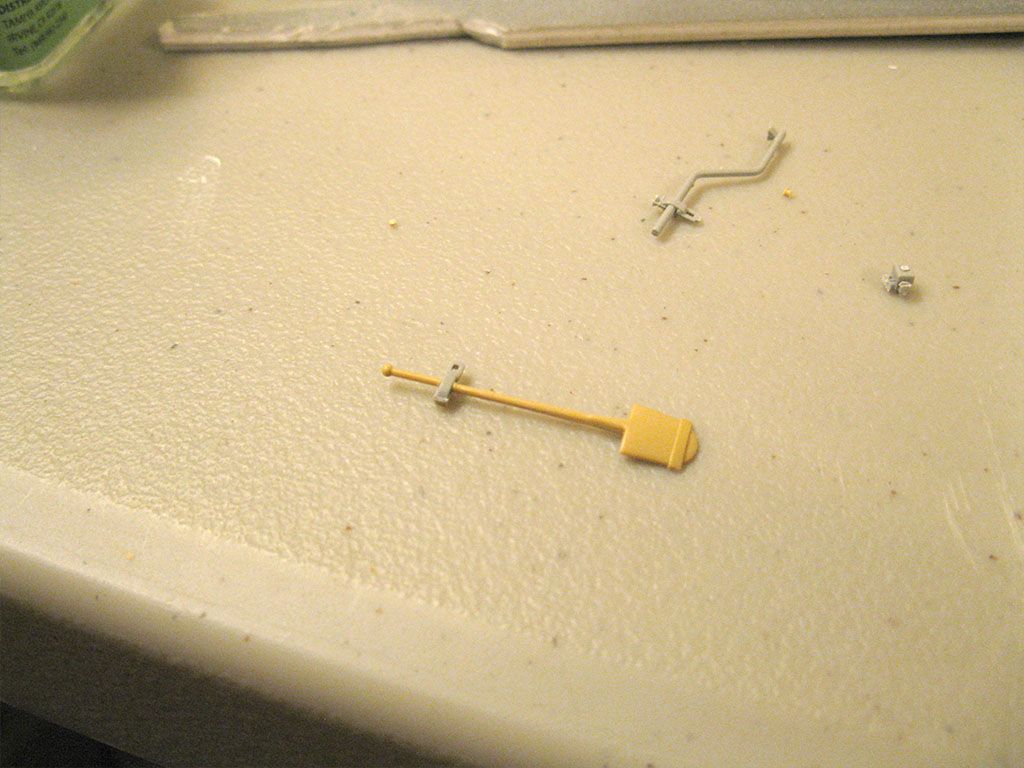
Tow cables, spare track, schürzen installation. installing the figure if I choose to, and of course the ever mysterious heating up and shaping of the plastic cable.
Image

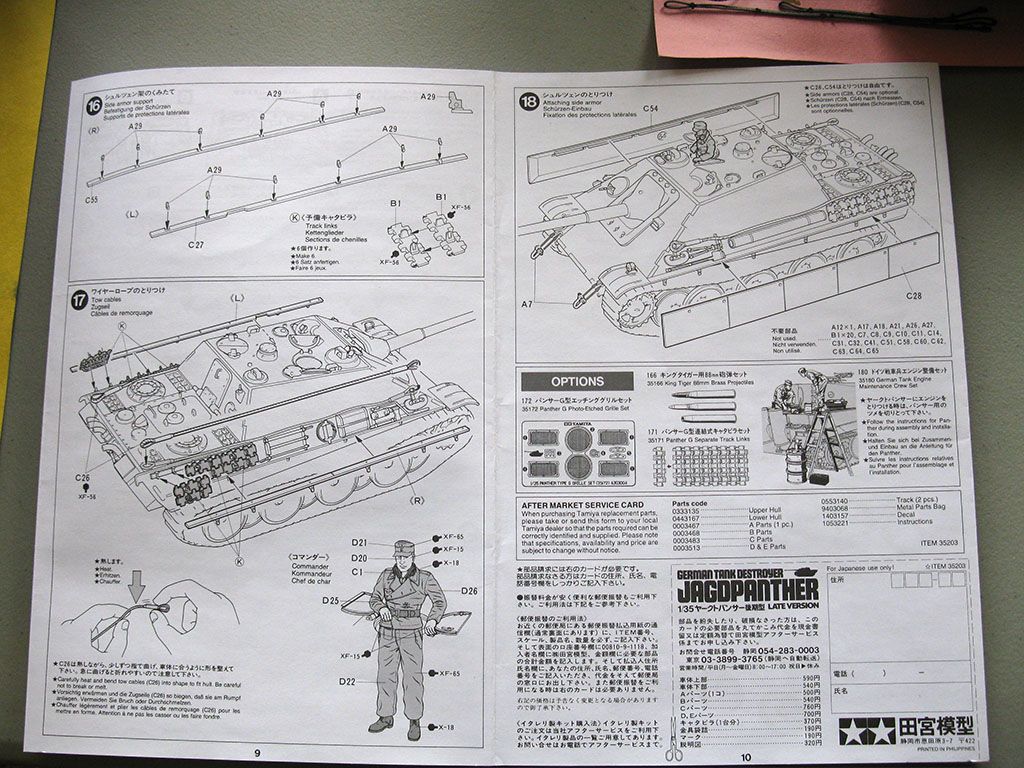
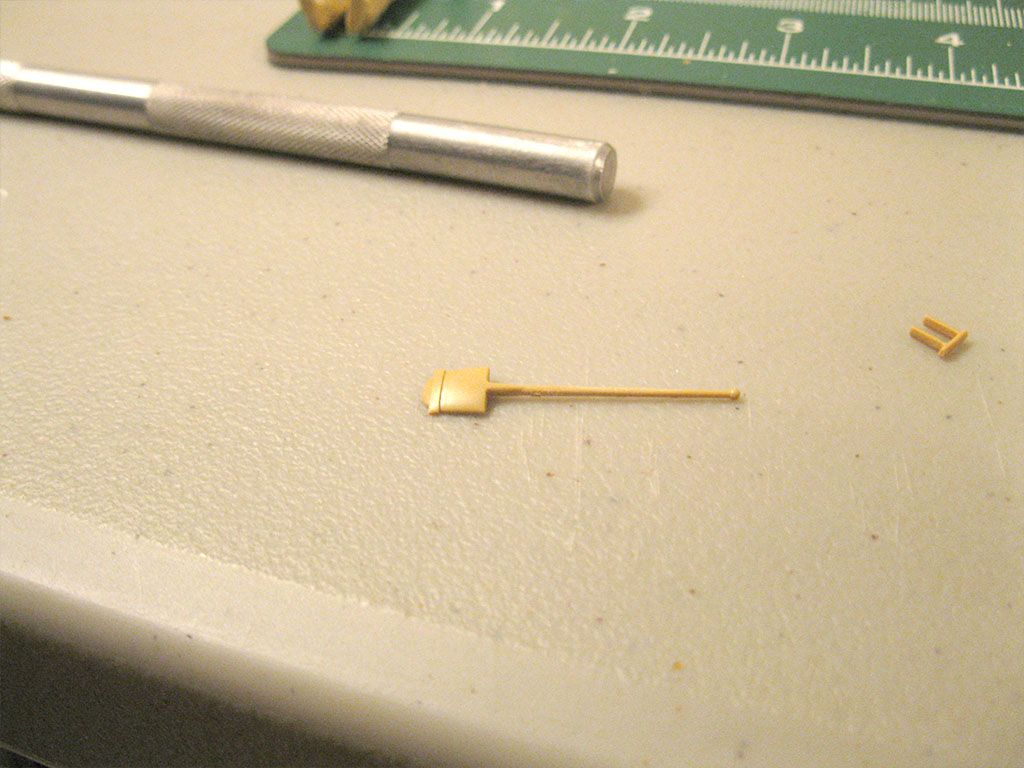
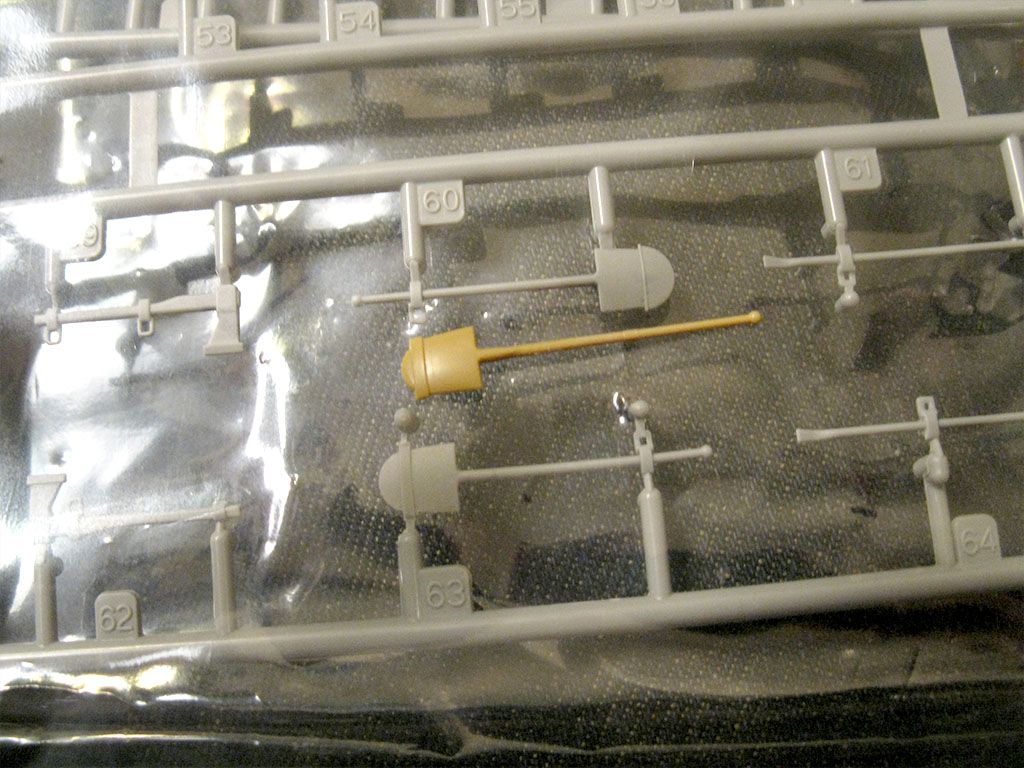
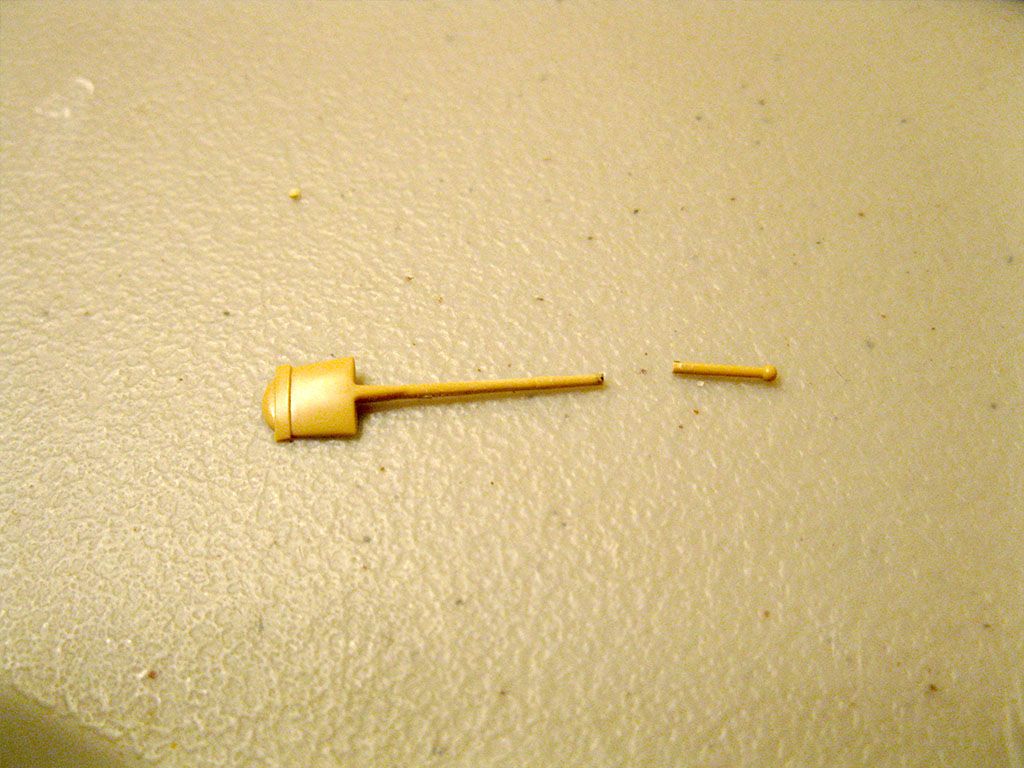
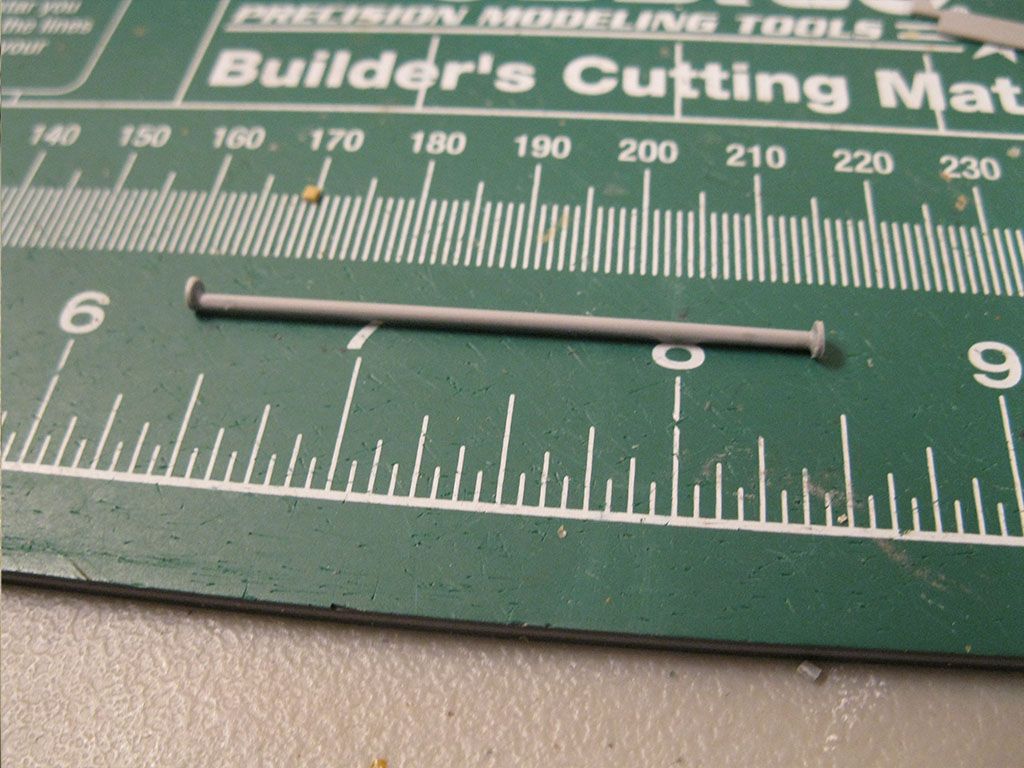
I did this once. Snapped the thing right in 2. Same goes for making an antenna from stretched sprue. I saw HamilkarBarkas do that in a video once and tried it, but I have not the skills for that yet. Any help on those two things is greatly appreciated. Obviously I might just skip the cables if I can't make those work or I can't get some other ones.
Image

That's my initial post guys. really looking forward to starting this SiG and being a part of this with all of you.
Last edited by mannloon on Sat May 31, 2014 8:09 pm, edited 2 times in total.
On the bench:
Cyber-Hobby T-34 Under New Management
Cyber-Hobby Tiger I Kursk
Rye Field Tiger I w/ Interior
Academy T-34 with bed spring armor
User avatar
ForbesHutton
Chief Warrant Officer 3
Posts: 1956
Joined: Mon Sep 02, 2013 9:10 am
Location: To,On,Ca
Scotland

Re: Mannloon's Tamiya Jagdpanther Late build

Post by ForbesHutton »

It should be a nice build.

I can't pull sprue either, I've given up trying and use thin brass rod for antennas now. As for the cable, I pulled one apart too. Perhaps dipping it in hot water will get it flexible without becoming TOO flexible.
Image
User avatar
mannloon
Command Sergeant Major
Posts: 985
Joined: Thu Apr 17, 2014 10:57 pm
Location: Madison, WI USA
Contact:

Re: Mannloon's Tamiya Jagdpanther Late build

Post by mannloon »

ForbesHutton wrote:It should be a nice build.

I can't pull sprue either, I've given up trying and use thin brass rod for antennas now. As for the cable, I pulled one apart too. Perhaps dipping it in hot water will get it flexible without becoming TOO flexible.
I actually tried that. Did not work at all. They don't get hot enough.
On the bench:
Cyber-Hobby T-34 Under New Management
Cyber-Hobby Tiger I Kursk
Rye Field Tiger I w/ Interior
Academy T-34 with bed spring armor
User avatar
Jan01
First Sergeant
First Sergeant
Posts: 561
Joined: Sun Oct 06, 2013 10:28 am
Location: Roermond, Netherlands

Re: Mannloon's Tamiya Jagdpanther Late build

Post by Jan01 »

Welcome to the SIG.

Good luck and have fun.
On the worktop
Too much :bash:
User avatar
NAMBiohazard
Master Sergeant
Master Sergeant
Posts: 474
Joined: Fri Jun 21, 2013 3:21 pm
Location: Windhoek, Namibia

Re: Mannloon's Tamiya Jagdpanther Late build

Post by NAMBiohazard »

Great intro

With all the mods ur gonna do, I'll definitely follow this build. :pop:
Keep the glue on the Sprue

Bjorn
User avatar
chief5437
Major
Major
Posts: 4810
Joined: Fri May 31, 2013 1:25 pm
Location: England
England

Re: Mannloon's Tamiya Jagdpanther Late build

Post by chief5437 »

Wow! :jd: you certainly know your Panzers! I don't, and mine will be oob, so go easy on it! Lol!

Good luck with the build! :th: :th:
Chief
User avatar
PaulAyrey
Sergeant Major of the Army
Posts: 1141
Joined: Tue Feb 04, 2014 5:24 pm
Location: Worthing, West Sussex, UK
Contact:

Re: Mannloon's Tamiya Jagdpanther Late build

Post by PaulAyrey »

Looks like a great thread Adam. And compared to many an antique war film the Spielberg replicas are an improvement!
User avatar
mannloon
Command Sergeant Major
Posts: 985
Joined: Thu Apr 17, 2014 10:57 pm
Location: Madison, WI USA
Contact:

Re: Mannloon's Tamiya Jagdpanther Late build

Post by mannloon »

HollywoodModelling wrote:Will be am interesting build looking forward to it
Image
On the bench:
Cyber-Hobby T-34 Under New Management
Cyber-Hobby Tiger I Kursk
Rye Field Tiger I w/ Interior
Academy T-34 with bed spring armor
User avatar
mannloon
Command Sergeant Major
Posts: 985
Joined: Thu Apr 17, 2014 10:57 pm
Location: Madison, WI USA
Contact:

Re: Mannloon's Tamiya Jagdpanther Late build

Post by mannloon »

So update. I was supposed to be only packing to move today but I got far more modeling in than I probably should have.

So I started by cutting a piece off that felt very distinctive. That giant bolt on mantlet. The sprue gates were on the bolts on the outside of the upper mantlet. This was super annoying to clean up.
Image

Does anyone know off hand if this is a casting seam that should be there or a mold seam I should remove?
Image

Swing arms and storage bins cut loose and cleaned up
Image

I spent some time building the crew heater tower from the Dragon kit and adding the photo etch grill. The grill was made for the Tamiya kit, so I had to get creative with how I fit it together. It's mostly CA. Here it is next to the kit part, which wasn't too bad but I am using for my Late G.
Image

Swing arms installed
Image

Dragon exhaust assembled and added to the rear.
Image

So the lower hull is assembled, and the rear plate is going pretty well. That's all I can manage for day 1. I need to figure out how to adapt the Tamiya tools to clamp on to the rear of the tank. It will require some modding, although I'm not sure just how yet.
Image

Think I may need to get some of those geek goggles. I'm noticing sprue gate marks and other things in pictures I couldn't see with my eyes.
On the bench:
Cyber-Hobby T-34 Under New Management
Cyber-Hobby Tiger I Kursk
Rye Field Tiger I w/ Interior
Academy T-34 with bed spring armor
User avatar
PaulAyrey
Sergeant Major of the Army
Posts: 1141
Joined: Tue Feb 04, 2014 5:24 pm
Location: Worthing, West Sussex, UK
Contact:

Re: Mannloon's Tamiya Jagdpanther Late build

Post by PaulAyrey »

Great start! Really like the way you are merging Dragon parts for added detail.
User avatar
mannloon
Command Sergeant Major
Posts: 985
Joined: Thu Apr 17, 2014 10:57 pm
Location: Madison, WI USA
Contact:

Re: Mannloon's Tamiya Jagdpanther Late build

Post by mannloon »

PaulAyrey wrote:Great start! Really like the way you are merging Dragon parts for added detail.
Thanks. I have to do something to make it better than it is OOB. All the late Tamiya Panthers are very plain in regards to detail. I'm following your build quite closely by the way, using the pics of the rear as reference actually. It looks very good.

Maybe you (or anyone out there) have an opinion on this, I'm trying to decide on AM tracks, I think Friul is too expensive and bit above my skill level, Modelkasten is really expensive and seems pretty fiddly, Bronco seems the only late workable option but I can't find a proper review of how they actually work. Found onw called Kaizen on ebay but it's almost as much as Friul and seems similar to AFV club. That's a lot of options and none stands out as easy to use or get.

I want something around the price range of my AFV club Tiger tracks, which is about half that of Friul.
On the bench:
Cyber-Hobby T-34 Under New Management
Cyber-Hobby Tiger I Kursk
Rye Field Tiger I w/ Interior
Academy T-34 with bed spring armor
User avatar
MarkVerploeg
Major
Major
Posts: 4837
Joined: Wed Oct 16, 2013 12:21 am
Location: Oss, Noord Braband The Netherlands
Netherlands

Re: Mannloon's Tamiya Jagdpanther Late build

Post by MarkVerploeg »

I could say :great start but you are almost done :jd:
Looks good so far
And about the tracks ,nothing beats friul but they come at a price
modelkasten makes your blood boil and still are very fragile
But bronco should have both early and late tracks
If you watch t3h_guppy's video about his entry you will see he has them
And it seems they just click/snap together so that won't be much work
keep up the good work
Cheers Mark
On the bench
GB builds
1/35 Trumpeter M1132 ESV

Personal builds
1/35 Hobby Boss M1070 tractor with M1000 semi trailer and Meng M1A2 TUSK II Abrams
1/35 Takom V2 rocket with the Meillerwagen and SS100 tractor
User avatar
mannloon
Command Sergeant Major
Posts: 985
Joined: Thu Apr 17, 2014 10:57 pm
Location: Madison, WI USA
Contact:

Re: Mannloon's Tamiya Jagdpanther Late build

Post by mannloon »

Thanks guys. I hope i will have time to keep working this week. Not only am I moving but my job starts back up today as we were on semester break.

If the brocno tracks click together and have hollow guide horns i may have to go that route.
On the bench:
Cyber-Hobby T-34 Under New Management
Cyber-Hobby Tiger I Kursk
Rye Field Tiger I w/ Interior
Academy T-34 with bed spring armor
User avatar
mannloon
Command Sergeant Major
Posts: 985
Joined: Thu Apr 17, 2014 10:57 pm
Location: Madison, WI USA
Contact:

Re: Mannloon's Tamiya Jagdpanther Late build

Post by mannloon »

Update 2.

I decided to start the gun and what little interior detail there is today before work. This is the breech assembly parts.
Image

It's pretty lacking in the realism department. But it is what it is.
Image

I ordered an aftermarket barrel that hasn't arrived yet, so I threw together the 2 piece kit barrel and just dry fit it in the assembly. That's quite a long gun once it's together. Keep in mind I didn't try very hard to clean up the barrel as it's only a placeholder.
Image

Then on to the fighting compartment walls? and periscope parts.
Image

Also, around this time in the instructions they instruct me to cut out this big chunk of plastic which is molded inside this air filter hole or what have you. Took a little longer than most areas on this tank to clean up as it was a strange angle to sand.
Image

And this guy is what goes on top of that mangled hole. Look at how the sprue gate is overlapping a bit of detail that I now have to dig out of the plastic to have it blend together. I know this is common, especially with Dragon, but this plastic is soft and not as forgiving as the Dragon stuff. I managed though.
Image

Interior walls installed.
Image

periscopes and some roof detail glued on.
Image

I also glued on the plastic parts for the grills and the crew heater fan. And that's about all I managed, which is more than I should have been able to.
Image

I'm not crazy about the heater fan assembly. I may use some of the photoetch pie piece covers to try and make it more interesting. Just not sure if they'll work since I didn't use all of the pieces from that set. Getting close to having main construction done really. One more long day like that and I'll just be waiting on the barrel and possible aftermarket tracks to arrive in the mail.
On the bench:
Cyber-Hobby T-34 Under New Management
Cyber-Hobby Tiger I Kursk
Rye Field Tiger I w/ Interior
Academy T-34 with bed spring armor
User avatar
MarkVerploeg
Major
Major
Posts: 4837
Joined: Wed Oct 16, 2013 12:21 am
Location: Oss, Noord Braband The Netherlands
Netherlands

Re: Mannloon's Tamiya Jagdpanther Late build

Post by MarkVerploeg »

I haven't seen tamiya jagdpanthtlers looking this good
Nice progress you have made
Do you know where that photo from the intro comes from?
I know it is in the Netherlands as it says Eeneind and Geldrop on it but i never seen it before
Cheers Mark
On the bench
GB builds
1/35 Trumpeter M1132 ESV

Personal builds
1/35 Hobby Boss M1070 tractor with M1000 semi trailer and Meng M1A2 TUSK II Abrams
1/35 Takom V2 rocket with the Meillerwagen and SS100 tractor
User avatar
gustavlekstal
Command Sergeant Major
Posts: 966
Joined: Tue Dec 03, 2013 3:02 pm
Location: Sweden

Re: Mannloon's Tamiya Jagdpanther Late build

Post by gustavlekstal »

Great thread! Good work. :th:
Regards Gustav

Dragon t-34/85 premium mod 44
Done! viewtopic.php?f=46&t=15153&p=189978#p189978

Dragon 15cm sig33 auf pz.kpfw Ib
viewtopic.php?f=29&t=10747

Jsu-152 tamiya with et modelling pe
viewtopic.php?f=29&t=12313
User avatar
warpedcrisis
Sergeant First Class
Posts: 314
Joined: Fri Mar 21, 2014 8:48 am
Location: West Midlands U.K
Great Britain

Re: Mannloon's Tamiya Jagdpanther Late build

Post by warpedcrisis »

looks like a nice sweet build you have there
User avatar
NAMBiohazard
Master Sergeant
Master Sergeant
Posts: 474
Joined: Fri Jun 21, 2013 3:21 pm
Location: Windhoek, Namibia

Re: Mannloon's Tamiya Jagdpanther Late build

Post by NAMBiohazard »

looks sweet :cheers2:

coming along nicely I see
Keep the glue on the Sprue

Bjorn
User avatar
UKguyInUSA
Second Lieutenant
Second Lieutenant
Posts: 3429
Joined: Sun Mar 30, 2014 10:19 pm
Location: New Hampshire, USA formerly Palm Beach, Florida, USA and Leicestershire, UK (until 1999)
Contact:

Re: Mannloon's Tamiya Jagdpanther Late build

Post by UKguyInUSA »

Nice looking kit, manloon....she's coming together nicely! :thumb1:
WIP:: Tamiya 1/48 F4U-1A Corsair

Non-WIP::Eduard 1/48 Fokker DVII, Revell 1/32 Arado AR196 and 1/32 BF109G10 Erla,
User avatar
mannloon
Command Sergeant Major
Posts: 985
Joined: Thu Apr 17, 2014 10:57 pm
Location: Madison, WI USA
Contact:

Re: Mannloon's Tamiya Jagdpanther Late build

Post by mannloon »

MarkVerploeg wrote:I haven't seen tamiya jagdpanthtlers looking this good
Nice progress you have made
Do you know where that photo from the intro comes from?
I know it is in the Netherlands as it says Eeneind and Geldrop on it but i never seen it before
Cheers Mark
Thats a set in England representing Nuenen during Market Garden.

Thanks for the kind words guys, doin my best.
On the bench:
Cyber-Hobby T-34 Under New Management
Cyber-Hobby Tiger I Kursk
Rye Field Tiger I w/ Interior
Academy T-34 with bed spring armor
User avatar
martin57
Command Sergeant Major
Posts: 897
Joined: Tue Apr 01, 2014 8:44 pm
Location: oundle, east northants.

Re: Mannloon's Tamiya Jagdpanther Late build

Post by martin57 »

like the history . the build is coming along great good luck with the rest of the build :thumb1:
User avatar
mannloon
Command Sergeant Major
Posts: 985
Joined: Thu Apr 17, 2014 10:57 pm
Location: Madison, WI USA
Contact:

Re: Mannloon's Tamiya Jagdpanther Late build

Post by mannloon »

Alright so a small update.

Firstly, I ordered a set of these yesterday from China, so who knows when they will actually arrive. From what I've been able to find online they seem to go together easily by just clicking together. And apparently they're very accurate, just read about some issues on DML sprockets. I really had a good experience with the AFV Club workable tracks for my Tiger 1, so I hope I have a similar experience with these.
Image

My RB aluminum barrel finally came yesterday. I have no idea how to assemble the muzzle break, so if any of you know, or know of a video please point me in that direction. The barrel is hollow and threaded for the muzzle break, it's really beautiful, I just don't know exactly how to put it together. I will also have to modify the mantlet to receive the thing, but that shouldn't be too hard.
Image

My apologies for not opening up the plastic for this shot. I wanted to compare the barrel from RB that I bought for this build, with the metal barrel that came with my King Tiger from Dragon. I threw the Tamiya plastic one in there for good measure. The RB one is actually separate parts, and I think was well worth the money.
Image

So that's not really progress so much as goodies. I did install the PE grills on the engine deck after work today.
Image

And now I'm just cutting off and cleaning up lots of little bits.
Image

The next time I post anything it should be nearly complete I would think.

I am very disappointed in the lack of detail on the inside of the hatches. I may have to scratch build something since I want them open. Nothing but an ejector pin mark sink hole....classy.

I am admittedly putting off the modifications to the tools for mounting on the rear. That involves some creative solutions, like kit bashing little clamps and spare PE but I think I should be able to pull it off. I also plan to fill all of the mounting holes on the hull, which I'm avoiding as well because my putty work is a bit crap. I have a few different kinds, none have looked very good when I use them. Why didn't I just buy the kit with the tools already where they should be?

So be it.
On the bench:
Cyber-Hobby T-34 Under New Management
Cyber-Hobby Tiger I Kursk
Rye Field Tiger I w/ Interior
Academy T-34 with bed spring armor
User avatar
PaulAyrey
Sergeant Major of the Army
Posts: 1141
Joined: Tue Feb 04, 2014 5:24 pm
Location: Worthing, West Sussex, UK
Contact:

Re: Mannloon's Tamiya Jagdpanther Late build

Post by PaulAyrey »

Tha differences between the barrels is quite surprising. I have had an RB barrel in the past and they are exquisite.
User avatar
T3hGuppy
Second Lieutenant
Second Lieutenant
Posts: 3467
Joined: Wed Jun 12, 2013 11:20 pm
Location: Bournemouth, UK
Contact:
Great Britain

Re: Mannloon's Tamiya Jagdpanther Late build

Post by T3hGuppy »

Look great dude.

The detailing on the rear plate is fantastic.
On the bench

Too much to list. !!


Youtube channel:https://www.youtube.com/user/bnealuk
User avatar
Rob
Chief Warrant Officer 2
Posts: 1892
Joined: Thu Aug 29, 2013 5:02 pm
Location: Kent, UK

Re: Mannloon's Tamiya Jagdpanther Late build

Post by Rob »

This thread has been a brilliant read and that's a first-class model. I am very much looking forward to more of the same! :pop:
User avatar
mannloon
Command Sergeant Major
Posts: 985
Joined: Thu Apr 17, 2014 10:57 pm
Location: Madison, WI USA
Contact:

Re: Mannloon's Tamiya Jagdpanther Late build

Post by mannloon »

Update. I think I went a bit out of my comfort zone yesterday. I will say that I know I could've done some of this with scratch built spare photo etch, but I decided to try this, and it worked ok. I know most would probably cringe at the sloppy methods of this, but it is what it is.

So these things. I know they are for towing, I don't know what they're called.
Image

The way they're mounted on the G2 Jagdpanther is very different than the way they are on the Tamiya kit. I looked at reference, and images of the kit part from Dragon's G2 for how I was going to do this. I actually ended up more replicating the Dragon styrene part than making a scale real one.

At first I was debating using a spare Sturmtiger part, as I had only used one for the kit, and it was similar.
Image

But it wasn't the same, and I only had one. What I did have was the Tamiya kit parts for the tool mounting brackets and the pieces themselves.
Image

So I set out to make two of the right kind, not sure if it would work at all. First I chopped the kit mounting brackets down to something more resembling what I needed.
Image

later I noticed on an image of the Dragon G2 that the bracket goes beyond the two cylinders that the piece mounts on, but at the time I didn't know that and I over trimmed it. Either way when it's on the tank you can't see, so no problem there.
Image

kept sanding and chopping away at it until it was close.
Image

Then I just glued another part of the original bracket to it, making the bottom part. On the real tank this is a thinner piece that actually lips up to keep the piece from falling off of the tank, but just a simple piece coming out matched what I saw of the Dragon part pretty well.
Image

I trimmed the glued on piece after it had time to dry and sanded things a bit. Hopefully more than in this picture but I'm not sure. And here it is next to the Sturmtiger bit I almost used. It was a ballsy decision to try that, and I think they look pretty ok for my skill level.
Image

Also for the rear tools I took a spare Dragon cutters and just glued some more spare tool bracket pieces to the back of it to lift it off of the surface appropriately. I again had been debating using old PE to make the welded on metal piece from my reference, but you can't see it. So I went super low tech.
Image

There are I think 2 more tools to figure out how to get on the rear, but here is how she stands now. I think for having never really done anything like this before it looks ok.
Image

I think I should've stopped there last night. In my profession we are very cautious of working when we're tired. And around the time I started this next part I should've stopped for the night. People just get sloppy when they're tired and I'm a little annoyed with myself. In the light of day it's not as bad as I feared, but still. I like to stop while things are going well.

So In this picture from earlier in the build you can see where the arrow is there is no hole. There is a duct or vent that goes there, and on the Panther G I have from Tamiya it was there. And there is no mention in the kit instructions that I should put it there. It was hollow-ish on the backside, but still.
Image

I have dropped a TON of money on this hobby since I started 6 months ago. But one of the few things I don't have is a pin vice or drill to make holes. So I throw on a new #11 and start spinning. I of course broke the tip off of both blades within seconds that I tried this with. One tip even got caught in the styrene. Eventually I started to carve it out. here's a view from the underside.
Image

So on the kit part, and the PE option from Alliance actually there were 8 bolts. But on my reference of the Sd.Kfz foundations G2 there were only 4, so I chopped half of them off. This is where I feel like I got sloppy. This also requied me to remove the locator pins on the vent piece that attaches to it, as the bolts were aligned in a way that wouldn't be right if I used the mounting pins. So I chopped it up, and had to glue everything in by sight, and as I said I was getting tired. So I mucked it up the first time, and ripped it back apart, and tried it again. It looks ok now. But there is some surface marring I'd love to clean up. But the area is so small I can't really polish it properly.

So here is the parts after having locator pins and bolts I didn't want removed. Obviously where the arrows are pointing is where the bolts were. The cleanup is not so good.
Image

And here it is installed on the engine deck. It's not bad, but it's a small area of less than smooth plastic so for now it stands out. I will try to go in and clean it up a bit more, but I'm hoping paint and weathering will make it a non issue.
Image

So that's where I got yesterday. I feel some things were very successful, and others not as much. But it's on it's way to looking like a proper G2.
On the bench:
Cyber-Hobby T-34 Under New Management
Cyber-Hobby Tiger I Kursk
Rye Field Tiger I w/ Interior
Academy T-34 with bed spring armor
User avatar
PaulAyrey
Sergeant Major of the Army
Posts: 1141
Joined: Tue Feb 04, 2014 5:24 pm
Location: Worthing, West Sussex, UK
Contact:

Re: Mannloon's Tamiya Jagdpanther Late build

Post by PaulAyrey »

Wow, you are doing a really good job, very impressive!
User avatar
mannloon
Command Sergeant Major
Posts: 985
Joined: Thu Apr 17, 2014 10:57 pm
Location: Madison, WI USA
Contact:

Re: Mannloon's Tamiya Jagdpanther Late build

Post by mannloon »

PaulAyrey wrote:Wow, you are doing a really good job, very impressive!
Thanks very much man.
On the bench:
Cyber-Hobby T-34 Under New Management
Cyber-Hobby Tiger I Kursk
Rye Field Tiger I w/ Interior
Academy T-34 with bed spring armor
User avatar
gustavlekstal
Command Sergeant Major
Posts: 966
Joined: Tue Dec 03, 2013 3:02 pm
Location: Sweden

Re: Mannloon's Tamiya Jagdpanther Late build

Post by gustavlekstal »

Impressive!!! :cheers2: :th:
Regards Gustav

Dragon t-34/85 premium mod 44
Done! viewtopic.php?f=46&t=15153&p=189978#p189978

Dragon 15cm sig33 auf pz.kpfw Ib
viewtopic.php?f=29&t=10747

Jsu-152 tamiya with et modelling pe
viewtopic.php?f=29&t=12313
User avatar
mannloon
Command Sergeant Major
Posts: 985
Joined: Thu Apr 17, 2014 10:57 pm
Location: Madison, WI USA
Contact:

Re: Mannloon's Tamiya Jagdpanther Late build

Post by mannloon »

Small Update. I moved this week and I've had almost no time to model. Life has gotten pretty unrelenting lately.

So the Jagdpanther. I'm a little stuck on the hatch handles. The molded on ones are terrible and I've used all of the Panther G spares that I had, so I'm looking for an alternative. Other than that I started to fill the original locator holes with Perfect Plastic Putty. I've heard conflicting opinions on the stuff, but it's easier for me to clean up so I'm going to try it.
Image

A lot more on this side. Only gone over it once, I'll probably do one more before I do a test primer coat over one hole to see how it's working. I'm also going to need to find something to use as the hanging post for the tow cables. I think I'll be using Dragon metal tow cables from my Panther G kit. Maybe...
Image

So these did come very fast from China. What Coen and others have said about their fragility is very true. I don't think I'd buy these again, I'd probably just spring for the Friul tracks. but alas I put one run together to see how it goes. I think I will end up treating them similar to Magic Track, just ones that allow me to position them without glue. I will have to fight the weird kinking with glue.
Image

A few links together look amazing.
Image

but the more you get together it starts to bunch up in chunks, in a very unnatural way.
Image

Also, as the run gets longer it is not even close to straight.
Image

A run with 84 or 86 links, obviously showing the weird behavior of the links. Not to mention 6 or 7 broke while building it, and they still pop apart. So as I said I'll be gluing them after they're on.
Image

I also dry fit the RB barrel, so here she is as she sits. There is one PE piece I still don't know what to do with on the barrel, so that's why I haven't glued it yet.
Image
On the bench:
Cyber-Hobby T-34 Under New Management
Cyber-Hobby Tiger I Kursk
Rye Field Tiger I w/ Interior
Academy T-34 with bed spring armor
User avatar
gustavlekstal
Command Sergeant Major
Posts: 966
Joined: Tue Dec 03, 2013 3:02 pm
Location: Sweden

Re: Mannloon's Tamiya Jagdpanther Late build

Post by gustavlekstal »

The rb barrel look bloody awesome!
Regards Gustav

Dragon t-34/85 premium mod 44
Done! viewtopic.php?f=46&t=15153&p=189978#p189978

Dragon 15cm sig33 auf pz.kpfw Ib
viewtopic.php?f=29&t=10747

Jsu-152 tamiya with et modelling pe
viewtopic.php?f=29&t=12313
User avatar
mannloon
Command Sergeant Major
Posts: 985
Joined: Thu Apr 17, 2014 10:57 pm
Location: Madison, WI USA
Contact:

Re: Mannloon's Tamiya Jagdpanther Late build

Post by mannloon »

Alrighty. A small build update. I feel like I'm dragging behind as I'm still building, but I'm hack and slashing a lot to try and get things how I want them. If I had done an out of the box build I'd have been a lot further by now. But as I was silly and decided to spend the time altering the Tamiya kit into a G2 I'm going pretty slowly.

So here's the little I've done lately.

So the kit has hatches with molded on detail handles which I thought looked terrible.
Image

The Kit comes with two unused Panther hatch handle/things. Although they're not exactly the right kind, at least they are not molded on, so I tossed this idea around for a good two weeks. Finally I decided to do it.
Image

I did my best to remove the molded on hatch handles.
Image

After that I added the Panther G handles and a spare grab handle from my Tamiya Sturmtiger. Here's the result.
Image

I think it's pretty good. I only had enough of those handles for one hatch, so I modeled the other one closed. Here it is on the tank. I'm noticing now a tiny gap at the bottom of one of the handles I'll have to see to, and I also think I put the hatch on a little less than centered in that hinge....not sure that there's much I can do to mend that now.
Image

I noticed in doing research that all of the Dragon kits have that grab handle on the opposite hatch half, but this is the only G2 I could find images of the hatch interior and all of it is on one door while the other is devoid of anything. Maybe these guys modified theirs, but it's the tank I'm using as reference so that's how I made it.

The shovel was a pain too. This is after I sanded off the very spongey Tamiya clamp. But this shovel was too long and the clamp was in the wrong spot to mount it on the rear of the fighting compartment.
Image

I had a correct Dragon part but it is to be used on my Sturmhaubitze 42, but it did make a handy reference for size and such.
Image

So my apologies for the method here, but as I've stated I'm new and uncomfortable with PE clamps. I do have a lot of those, but I'm unsure which are going to be used and not used, so for now I'm kit bash/hack and slashing unused dragon clamps for the limited kits I have built. I plan to do all PE clamps on one of my Panzer IV super kits later this year.

So I chopped the thing.
Image

And glued it to a Dragon clamp from some unused Panzer III crowbar or some such thing. Looks right to me. Might not seem like a big deal, but I was really not sure how to go about that. I really have to get good with PE clamps.
Image

And here is the engine deck with tools as it stands tonight.
Image

Image

So, I'm finishing the left side of the tracks when I get time. Man do I hate those Bronco tracks. They will look good I think but they break WAY too easily. Stupid things. And here is the majority of parts left in my pile to add as tools to the deck or rear. I have to customize each part, and as I don't have much time to model it's taking me forever. I get time to do like one per week...being busy at work makes this very hard. I also have to fabricate the deck clamps for the tow cables yet, and the post they hang from on the side of the tank.
Image

I think it'll turn out well. And it's still fun so I'm glad I did this SiG. But man you guys are so much faster than I am.
On the bench:
Cyber-Hobby T-34 Under New Management
Cyber-Hobby Tiger I Kursk
Rye Field Tiger I w/ Interior
Academy T-34 with bed spring armor
User avatar
PaulAyrey
Sergeant Major of the Army
Posts: 1141
Joined: Tue Feb 04, 2014 5:24 pm
Location: Worthing, West Sussex, UK
Contact:

Re: Mannloon's Tamiya Jagdpanther Late build

Post by PaulAyrey »

You are doing so well, looking really fantastic.
User avatar
mannloon
Command Sergeant Major
Posts: 985
Joined: Thu Apr 17, 2014 10:57 pm
Location: Madison, WI USA
Contact:

Re: Mannloon's Tamiya Jagdpanther Late build

Post by mannloon »

PaulAyrey wrote:You are doing so well, looking really fantastic.
Thanks very much man. Yours is a bench mark.
On the bench:
Cyber-Hobby T-34 Under New Management
Cyber-Hobby Tiger I Kursk
Rye Field Tiger I w/ Interior
Academy T-34 with bed spring armor
trekfanj
Sergeant Major
Sergeant Major
Posts: 721
Joined: Mon Jun 17, 2013 8:01 pm
Location: Mesa, AZ USA
United States of America

Re: Mannloon's Tamiya Jagdpanther Late build

Post by trekfanj »

This Jagdpanther is going to look freaking AWESOME!!! :th: :th:
You've got me thinking about buying one now!
Jarod

"That which we persist in doing becomes easier, not that the task itself has become easier, but that our ability to perform it has improved."
-Ralph Waldo Emerson


On the bench
Bandai 1/144 Millennium Falcon Lando Calrissian version
User avatar
mannloon
Command Sergeant Major
Posts: 985
Joined: Thu Apr 17, 2014 10:57 pm
Location: Madison, WI USA
Contact:

Re: Mannloon's Tamiya Jagdpanther Late build

Post by mannloon »

trekfanj wrote:This Jagdpanther is going to look freaking AWESOME!!! :th: :th:
You've got me thinking about buying one now!
Thanks man, i hope it turns out.
On the bench:
Cyber-Hobby T-34 Under New Management
Cyber-Hobby Tiger I Kursk
Rye Field Tiger I w/ Interior
Academy T-34 with bed spring armor
User avatar
mannloon
Command Sergeant Major
Posts: 985
Joined: Thu Apr 17, 2014 10:57 pm
Location: Madison, WI USA
Contact:

Re: Mannloon's Tamiya Jagdpanther Late build

Post by mannloon »

HollywoodModelling wrote:Nice job and some nice tweaks to the old tamiya kit...:D Realy like it so far.
Thanks Hendrik. It's actually pretty fun to dress up an old Tamiya kit.
On the bench:
Cyber-Hobby T-34 Under New Management
Cyber-Hobby Tiger I Kursk
Rye Field Tiger I w/ Interior
Academy T-34 with bed spring armor
User avatar
Rob
Chief Warrant Officer 2
Posts: 1892
Joined: Thu Aug 29, 2013 5:02 pm
Location: Kent, UK

Re: Mannloon's Tamiya Jagdpanther Late build

Post by Rob »

Fantastic model making - a masterclass in creativity and precision :th: :pop:
User avatar
mannloon
Command Sergeant Major
Posts: 985
Joined: Thu Apr 17, 2014 10:57 pm
Location: Madison, WI USA
Contact:

Re: Mannloon's Tamiya Jagdpanther Late build

Post by mannloon »

Rob wrote:Fantastic model making - a masterclass in creativity and precision :th: :pop:
Wow, that's very kind of you. thanks very much.
On the bench:
Cyber-Hobby T-34 Under New Management
Cyber-Hobby Tiger I Kursk
Rye Field Tiger I w/ Interior
Academy T-34 with bed spring armor
User avatar
felisbarcinonensis
Command Sergeant Major
Posts: 860
Joined: Tue Jun 10, 2014 9:42 pm
Location: BCN

Re: Mannloon's Tamiya Jagdpanther Late build

Post by felisbarcinonensis »

Wow man! This is too much! I'm building my cat out of the box :oops:
The whole building process is a master-class; Congratulations! :bow::
User avatar
mannloon
Command Sergeant Major
Posts: 985
Joined: Thu Apr 17, 2014 10:57 pm
Location: Madison, WI USA
Contact:

Re: Mannloon's Tamiya Jagdpanther Late build

Post by mannloon »

felisbarcinonensis wrote:Wow man! This is too much! I'm building my cat out of the box :oops:
The whole building process is a master-class; Congratulations! :bow::
Thank you very much. I hope it lives up to all of these wonderful compliments.
On the bench:
Cyber-Hobby T-34 Under New Management
Cyber-Hobby Tiger I Kursk
Rye Field Tiger I w/ Interior
Academy T-34 with bed spring armor
User avatar
cib2265
First Sergeant
First Sergeant
Posts: 581
Joined: Tue Feb 18, 2014 11:12 pm
Location: QLD, Australia
Contact:

Re: Mannloon's Tamiya Jagdpanther Late build

Post by cib2265 »

Loving this build - this is my next armor kit, so cant wait!
Chris Becker in Sunshine Coast, Australia
User avatar
mannloon
Command Sergeant Major
Posts: 985
Joined: Thu Apr 17, 2014 10:57 pm
Location: Madison, WI USA
Contact:

Re: Mannloon's Tamiya Jagdpanther Late build

Post by mannloon »

cib2265 wrote:Loving this build - this is my next armor kit, so cant wait!
Thanks. If this is your next kit, it is a very easy build. It doesn't require too much to make it sing either.
On the bench:
Cyber-Hobby T-34 Under New Management
Cyber-Hobby Tiger I Kursk
Rye Field Tiger I w/ Interior
Academy T-34 with bed spring armor
User avatar
UKguyInUSA
Second Lieutenant
Second Lieutenant
Posts: 3429
Joined: Sun Mar 30, 2014 10:19 pm
Location: New Hampshire, USA formerly Palm Beach, Florida, USA and Leicestershire, UK (until 1999)
Contact:

Re: Mannloon's Tamiya Jagdpanther Late build

Post by UKguyInUSA »

Looks great so far and nice attention to detail with your personal scratch building touches! :thumb1: :thumb1:
WIP:: Tamiya 1/48 F4U-1A Corsair

Non-WIP::Eduard 1/48 Fokker DVII, Revell 1/32 Arado AR196 and 1/32 BF109G10 Erla,
User avatar
mannloon
Command Sergeant Major
Posts: 985
Joined: Thu Apr 17, 2014 10:57 pm
Location: Madison, WI USA
Contact:

Re: Mannloon's Tamiya Jagdpanther Late build

Post by mannloon »

UKguyInUSA wrote:Looks great so far and nice attention to detail with your personal scratch building touches! :thumb1: :thumb1:
Thank you. I'm glad it's appreciated how much work I put in to each little piece. It sure is fun.

I hope to get some real work done this weekend. Nothing going on and a 3 day weekend thanks to the 4th.
On the bench:
Cyber-Hobby T-34 Under New Management
Cyber-Hobby Tiger I Kursk
Rye Field Tiger I w/ Interior
Academy T-34 with bed spring armor
User avatar
mannloon
Command Sergeant Major
Posts: 985
Joined: Thu Apr 17, 2014 10:57 pm
Location: Madison, WI USA
Contact:

Re: Mannloon's Tamiya Jagdpanther Late build

Post by mannloon »

One more build update before it's officially done being put together.... I hope.

So trying to update this Tamiya kit close to the Dragon G2 kit has been kind of a huge pain for someone with as little experience as me. It's the last Tamiya kit in the stash, so hopefully I'll get to spend more time just cruising on builds and painting on my days off in the future. I love scratch building, but it's time consuming.

So the build.

These are 2 spare jack clamps from the two Tamiya Panthers I have. My idea was to scratch build them into the clamps on the engine deck that hold the tow cable ends.
Image

I got a pin vise to drill the holes through. I also bought some styrene, brass and steel rod. I'm not sure which material I'll use for what, but some of the finishing touches like the bit through these holes, and the antenna will be made out of some of these. I have no idea what to cut the metal with. In this pic I highlighted what I was trying to do with the part.
Image

First attempt was to cut the part down and drill through it. The hole wasn't straight and it looked horrible.
Image

My whole looking through spares to find parts that I could alter was out the window. SO I then started to just build the brackets out of pieces of the earlier type tool racks which I had been using for various things. I drilled the holes first, then lined them up using steel rod, and tried to just glue the shape together.
Image

That almost worked. They were just a tad on the short side and I couldn't fit the tow cable eyelets in them with the pins through. So I came back at it another day with some Dragon styrene from a random spare from my Panzer III smart kit. I made them a little bigger than before and boom. You can see my original piece on the far right, the Dragon Panther G part I was trying to replicate next to that, and my two monstrosities. They aren't perfect, but with some sanding and tweaking they turned out alright.
Image

Here they are on the tank.
Image

Next was the thing the tow cables hook to on the front of the tank. This was a little challenging. If you know the part it's a rod, with a larger circle piece on the end to hold the eyelet. It's asymmetrical, and I had no idea how to scratch build it.
I needed a thin and thick rod of styrene. I used an unused tool from my Cyber Hobby 9142 Tiger I for the thinner piece. That kit had arrived in the mail only a day earlier. I often go through future kits looking for bits to steal. And for the bigger piece I used just a nub of the sprue from an old kit. Essentially the sprue structure itself, as it's thicker than parts usually are. I highlighted the piece I trimmed off in the pic below. I had to sand it for a VERY long time to get it anywhere near flat so I could glue it to the other piece.
Image

I glued two flat pieces made from sprue to either side of the thinner rod, which by the way I think was a spare antenna case from the Tiger I. This way I figured I could get both ready at the same time, and if I messed up there was material in the middle of the rod I could use to try again.
Image

So I trimmed it down, and put them on the tank. They stuck out too far, so today I ripped them off and shorted the stem....thing, and boom. I am really happy with the result. So here is where she stands now.
Image

I'm starting to like the Bronco tracks as odd as that seems. It's almost like the longer they're on the tank they are getting broken in or something. They don't sit perfectly but they do stay on and look ok. I will still glue them magic Track style before I paint. I chose to use the kit schurzen without separating it. This is actually the second set of schurzen I have used on this tank. The first I tried to thin down and separate and it looked awful and wouldn't stay on the way I attached it. So despite the fact that sometimes I feel like it ruins all my work, I chose to go with the kit schurzen just trimmed down.

I will be adding some type of scratch built PE where they are connected so it doesn't just look like holes in the schurzen. I glued the tools on the engine deck, including a scratch built PE clamp, which I hope to be the first of many. I have an antenna dry fitted into a pin vised hole made from styrene rod, not sure if I'll use that or brass, but the styrene is thinner than my Dragon antennas. Not sure on how high it should be though.

So actual things left to do? Conduit for the headlight, tow cable construction, a scratch built hook(s) to hold up the tow cables on the side of the vehicle, and the intertial starter which I have partially ready to install. Not too bad. Sure is taking forever though. Trying to keep my mojo going.

Some more pictures.
Image

Image

Image

Image

Cheers guys.
Adam
On the bench:
Cyber-Hobby T-34 Under New Management
Cyber-Hobby Tiger I Kursk
Rye Field Tiger I w/ Interior
Academy T-34 with bed spring armor
User avatar
UKguyInUSA
Second Lieutenant
Second Lieutenant
Posts: 3429
Joined: Sun Mar 30, 2014 10:19 pm
Location: New Hampshire, USA formerly Palm Beach, Florida, USA and Leicestershire, UK (until 1999)
Contact:

Re: Mannloon's Tamiya Jagdpanther Late build

Post by UKguyInUSA »

Looking great can't wait to see this painted and weathered! :thumb1:
WIP:: Tamiya 1/48 F4U-1A Corsair

Non-WIP::Eduard 1/48 Fokker DVII, Revell 1/32 Arado AR196 and 1/32 BF109G10 Erla,
User avatar
PaulAyrey
Sergeant Major of the Army
Posts: 1141
Joined: Tue Feb 04, 2014 5:24 pm
Location: Worthing, West Sussex, UK
Contact:

Re: Mannloon's Tamiya Jagdpanther Late build

Post by PaulAyrey »

Well, I hope you manage to keep your mojo going. Rest assured its a stunning build, and your efforts have really paid off as it is looking first class.
User avatar
mannloon
Command Sergeant Major
Posts: 985
Joined: Thu Apr 17, 2014 10:57 pm
Location: Madison, WI USA
Contact:

Re: Mannloon's Tamiya Jagdpanther Late build

Post by mannloon »

PaulAyrey wrote:Well, I hope you manage to keep your mojo going. Rest assured its a stunning build, and your efforts have really paid off as it is looking first class.
Thanks man, trying to keep things at a certain level. I even went back tonight and ripped off the schurzen and cut it up and reinstalled it.
On the bench:
Cyber-Hobby T-34 Under New Management
Cyber-Hobby Tiger I Kursk
Rye Field Tiger I w/ Interior
Academy T-34 with bed spring armor
Post Reply

Return to “Builds”